Archived content
NOTE: this is an archived page and the content is likely to be out of date.
Cleaning method
Cleaning the Pad- Press the ADF Cover Open Button.
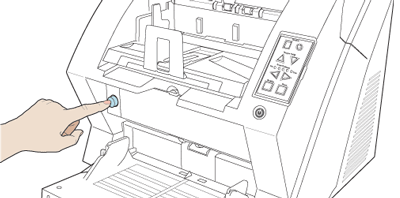
The ADF Cover will open by itself.
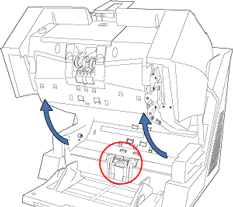
 CAUTION:
The glass surface inside the ADF can become extremely hot while operating the scanner. Be carefull not to touch the glass until it has cooled. - Wipe the rubber part of the Pad with a lint-free cloth, moistened with Cleaner F1, in the direction indicated by the arrows.
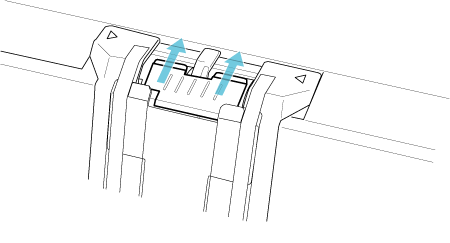
- Hold the ADF Cover with both hands and press it down slowly. Press the ADF Cover until it is fixed.
- Press the ADF Cover Open Button. The cover will open by itself.
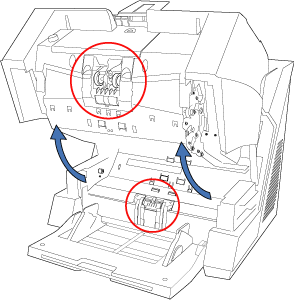
- Open the Upper Roller Cover of the feeder.
Pinch the lower edges of the holes on the left and right sidesof the cover with your fingersand pull towards you to release the lock.
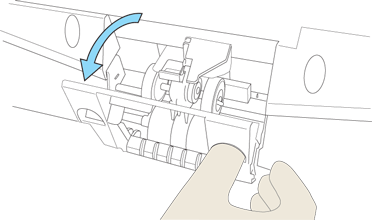
- Clean the Pick Rollers and the rubber surface of the Separation Rollers using Cleaner F1.
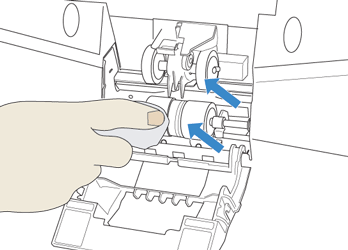
- Close the Roller Cover after the cleaning is finished.
- Open the lower Pad Cover of the feeder.
Push the left and right sides of the cover inwards with your fingers and pull the cover towards you to open.
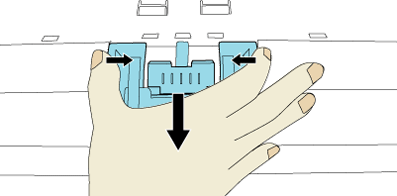
- Remove the Brake Roller.
Lift the right side of the Brake Roller, then pull it upwards to remove it, as shown below.
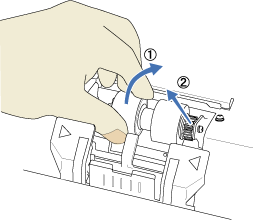
- Clean the rubber surface of the Brake Roller using a lint-free cloth, moistened with Cleaner F1.
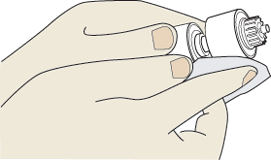
- Install the Brake Roller again after cleaning.
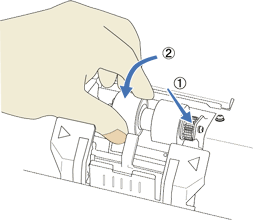
- Close the Pad Cover.
- Clean the Metal Feed Rollers (shown below) on the lower side of the ADF using a lint-free cloth moistened with Cleaner F1.
Take care to remove black stains on the rollers, since such stains canuse deteriorated the feeding performance.
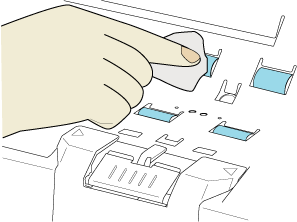
- Clean the Rubber Pinch Rollers on the upper side of the ADF using a lint-free cloth moistened with Cleaner F1.
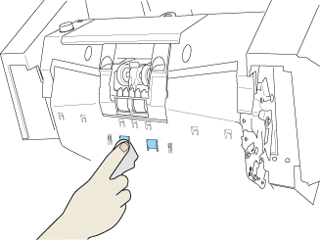
- Press the ADF Cover Open Button to open the ADF.
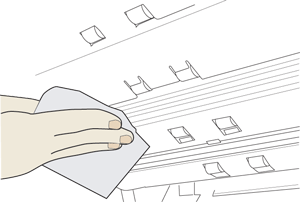
- Clean the whole transport path (stainless and glass parts) using a lint-free cloth moistened with Cleaner F1.
HINT: If the transport path is contaminated with paper dust or other debris, vacuum-clean it carefully.
 CAUTION:
- Do not use compressed air to clean debris as it can contaminate the scanner optics.
- Take care not to get your hands caught when cleaning difficult to reach places inside the scanner.
Upper transport path
Lower transport path
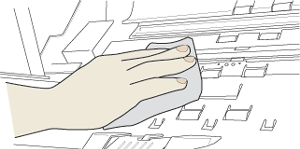
- Clean the Skew-Detection Sensors on the lower transport path using a lint-free cloth moistened with Cleaner F1.
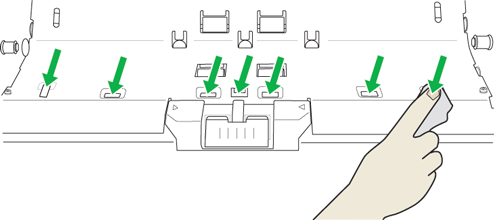
- Clean the supersonic sensors (three pieces), pick sensor (one piece), and skew sensors (six pieces) installed in the lower transport path using a cloth moistened with the cleaner F1.
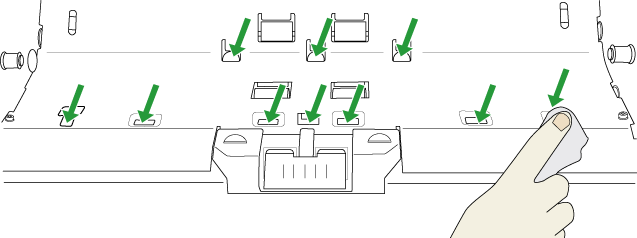
- Clean the supersonic sensors (three pieces) and the reflectors for the pick sensor (one piece) and skew sensors (six pieces) installed in the upper transport path using a cloth moistened with the cleaner F1.
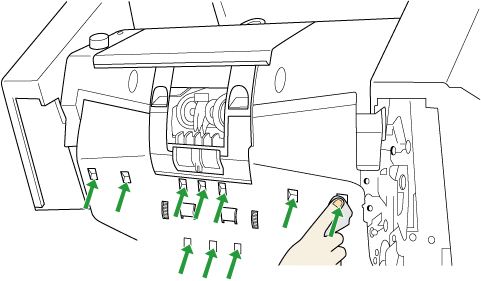
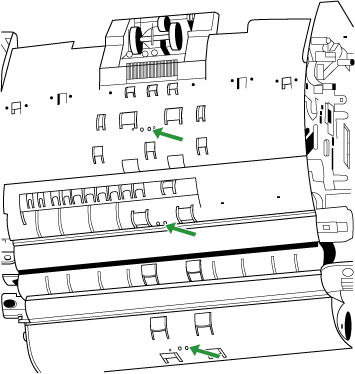
- Clean the IMP top-sensor (one piece), RED top-sensor (one piece), and REJ sensor (one piece) installed in the lower transport path using a cloth moistened with the cleaner F1.
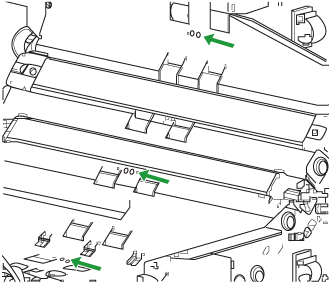
- Clean the IMP top-sensor (one piece), RED top-sensor (one piece), and REJ sensor (one piece) installed in the upper transport path using a cloth moistened with the cleaner F1.
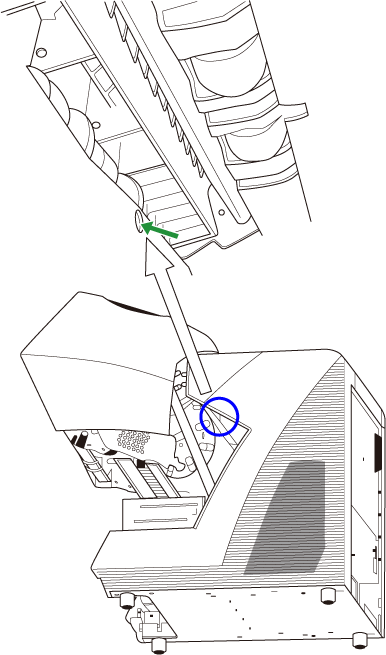
- Clean the EXT sensor (one piece) located near the outlet in the upper transport path using a cotton swab moistened with the cleaner F1.
- Clean the surface of two pads on the Hopper with a lint-free cloth, moistened with cleaner F1.
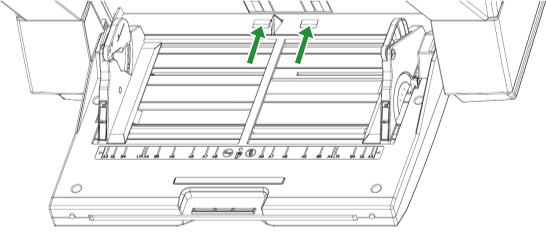
- Close the ADF Cover.
Hold the ADF Cover with both hands and press it down slowly. Press the ADF Cover until it is latches.
- Confirm the scanner is connected to the PC before turning on the scanner.
- On the [Start] menu in Windows, select [Programs]-[Scanner Utility for Microsoft Windows]-[Software Operation Panel].
→ The FUJITSU Software Operation Panel appears.
 CAUTION:
If the [Software Operation Panel] is password protected, enter the password to cancel the View Only mode. For details on how to enter the password to cancel the View Only mode, refer to the fi-5950 Operator's Guide "8.1 Scanner Settings". - Select the [Device Setting] tab.
→ The following dialog box appears.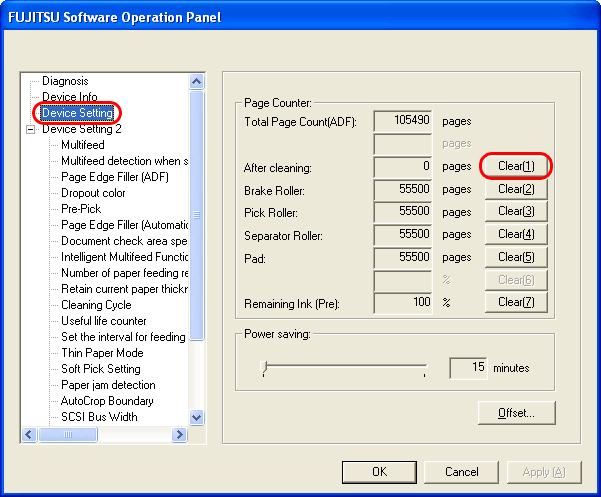
- Click the [Clear] button beside [After cleaning], and then click the [OK] button. Click the [OK] button again on the message that appears.
→ The value of the counter will be reset to "0."


