Archived content
NOTE: this is an archived page and the content is likely to be out of date.
Cleaning
Clean the scanner in the following procedure:
Cleaning the ADF
| The inside of the ADF becomes very hot when the scanner is being used.
Before you start cleaning the inside, make sure to turn off the power, unplug the power cable and wait at least 15 minutes for the ADF glass to cool down. |
| Important: |
|
- Turn off the scanner and wait for at least 15 minutes.
- Unplug the power cable.
- Open the ADF.
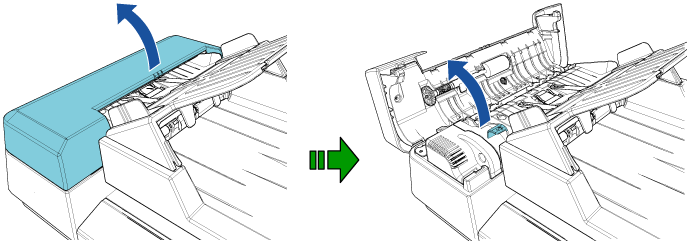
 CAUTION:
Be careful not to have your fingers caught when the ADF closes.
- Clean the following locations with a cloth moistened with Cleaner F1, or a sheet of Cleaning Wipe.
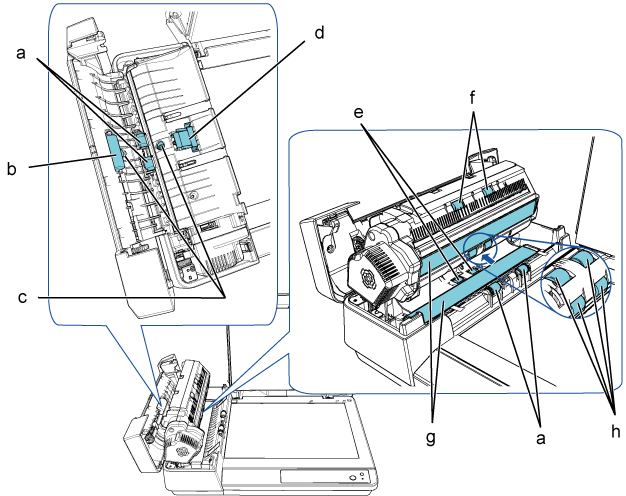
a Plastic Idler Roller (× 4) b Pick Roller Unit (× 1) c Ultrasonic Sensor (× 2) d Pad Unit (× 1) e Rubber Idler Roller (× 2) f Eject Roller (× 2) g Glass (× 2) h Feed Roller (× 4) Pad Unit (× 1)
Gently wipe the dirt and dust off the surface of the rubber pad.
 CAUTION:
To avoid injuries, be careful not to get your fingers caught on the pick spring (metal part).
Ultrasonic Sensor (× 2)
Gently wipe the dirt and dust off the surface of the ultrasonic sensors. If it is difficult to clean, use a cotton swab.
Glass (× 2)
Gently wipe the dirt and dust off the surface of the glass sections.
Pick Roller Unit (× 1)/Plastic Idler Roller (× 4)/Feed Roller (× 4)/Eject Roller (× 2)/Rubber Idler Roller (× 2)
Gently wipe the dirt and dust off the rollers as you rotate the roller with your hand, taking care not to damage the surface of the roller. In particular, if black foreign matter gets on the rollers, make sure that they are cleaned properly.
Important: - Vertical streaks may appear on scanned images if the glass is dirty.
- When cleaning, be careful not to damage the following parts with your hands, a cloth, or a Cleaning Wipe.
- Pick spring (metal part)
- Mylar sheet
- Document sensor
- Anti-static brush
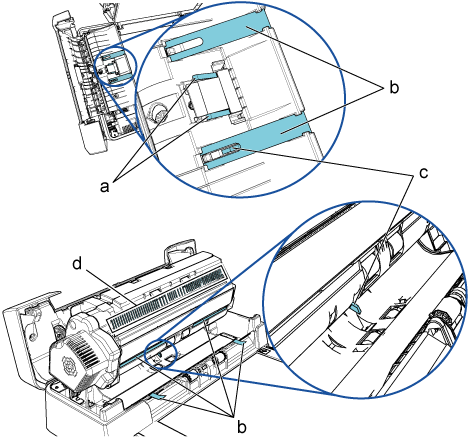
a Pick Spring (Metal Part) b Mylar Sheet c Document Sensor d Anti-Static Brush
- Close the ADF.

 CAUTION:
Be careful not to have your fingers caught when the ADF closes.
Important: Check that the ADF is closed properly. Otherwise, the document may not be fed into the ADF.
- Connect the power cable, and turn on the scanner.
Cleaning the Flatbed
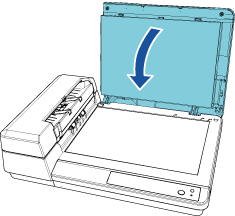
- Open the document cover.
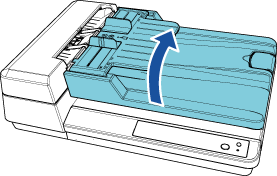
- Clean the document pad and the document bed with a cloth moistened with Cleaner F1, or a sheet of Cleaning Wipe.
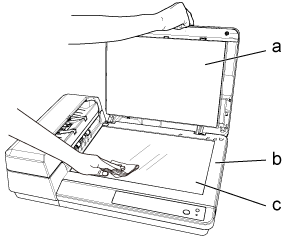
a Document Pad b Plastic Frame c Document Bed
Important: Be careful not to let the cleaner in between the document bed and the plastic frame.
- Wait for the cleaned parts to dry.
- Close the document cover.
