Archived content
NOTE: this is an archived page and the content is likely to be out of date.
Replacing Pad ASSY
- Remove all documents from the ADF paper chute.
- Open the ADF by pushing down the ADF button.
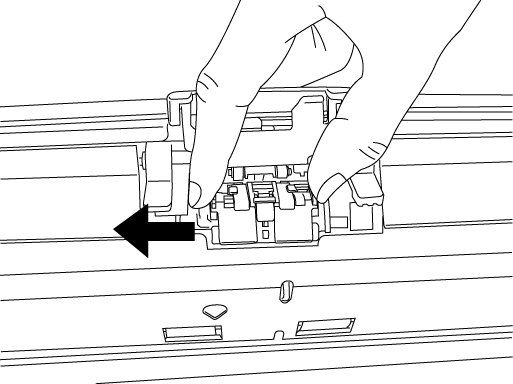
- Remove old Pad ASSY
Pinch both ends of the Pad ASSY, and then slide to the direction shown in figure below and remove the Pad ASSY
- Insert the claws of the Pad ASSY into the holes on the ADF. Pressing down the Pad ASSY and slide it in reverse direction of removal.
- Push in the center of the ADF to return it into its original position till the ADF button is locked.
- Reset the Pad counter.
-
- When turning on the power, check that the scanner is connected to your PC.
- Open the [Scanners and Cameras] from the control panel of your PC.
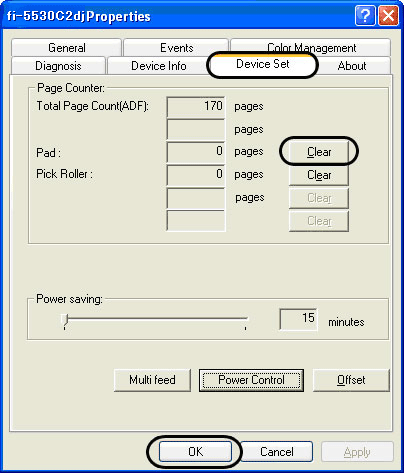
- Open the [Properties] of [fi-5530C2dj] from the [Scanners and Cameras].
- The [Properties of fi-5530C2dj] dialog box appears.
- Click the "Device Set" tab. The following panel opens.

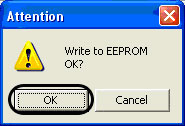
- After clicking the [Clear] button besides "Pad" in [Page Counter], click the [OK] button.
This procedure will reset the pad counter. -

Click the [OK] button.
The Pad counter returns to "0".


