Archived content
NOTE: this is an archived page and the content is likely to be out of date.
Replacing the print cartridge
Follow the instructions below to replace the print cartridge.
- Turn off the scanner.
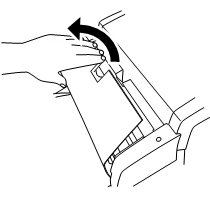
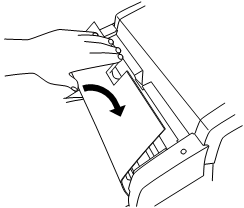
- Open the Print Cartridge Cover by grasping its center and turning it towards you, as shown below.
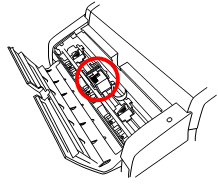
- Open the cover of the Print Cartridge Holder by slightly pinching and lifting up its locking lever with your finger as shown below.
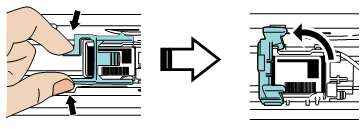
- Remove the old Print Cartridge from the Print Cartridge Holder.
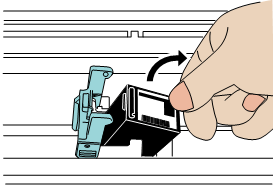
- Take the new Print Cartridge out of its pouch and detach the protection tape from the Print Cartridge.
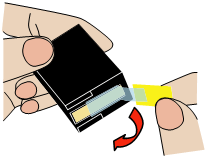
Do not touch the metal part of the cartridge or put the tape back on again.
- Insert the print cartridge into the holder as shown below with its tab pointing to the right.
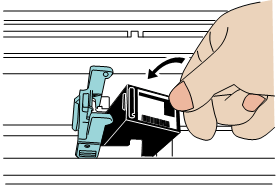
- Lower the locking lever of the Print Cartridge Holder until it locks in and fixes the cartridge in place.
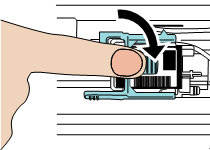
- Position the Print Cartridge Holder along where the document will pass through.
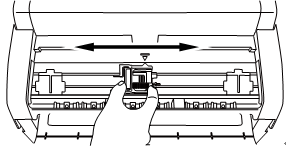
Be sure to position the print cartridge to have enough space from the document edge.
If you position the Print Cartridge too close to the document edge, printing may be performed out of the document width. - Close the print cartridge cover and turn on the scanner.
- Confirm the scanner is connected correctly to your computer, then power on the scanner.
- Select the [start] menu -> [All Programs] -> [Scanner Utility for Microsoft Windows] -> [Software Operation Panel].
-> The [FUJITSU Software Operation Panel] window appears. - From the tree listing on the left, select [Device Setting].
-> The following panel appears.
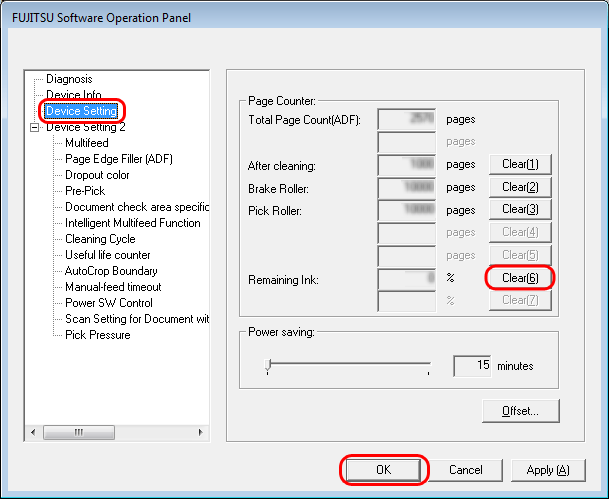
- Click the [Clear] button beside the [Remaining Ink].
- Click the [OK] button on the confirmation panel displayed.
-> The the remaining ink indication (percentage) is reset to 100. - Click the [OK] button on the [FUJITSU Software operation Panel] window.


