Archived content
NOTE: this is an archived page and the content is likely to be out of date.
Resetting the Ink Counter
Reset the ink counter in the following procedure:
- Confirm that the scanner is connected to the computer, then turn on the scanner.
- Open the [Software Operation Panel] window.
- Windows Server® 2008/Windows® 7
Select [Start] menu → [All Programs] → [fi Series] → [Software Operation Panel]. - Windows Server® 2012
Right-click the Start screen, and select [All apps] on the app bar → [Software Operation Panel] under [fi Series]. - Windows Server® 2012 R2/Windows® 8.1
Click [↓] on the lower left side of the Start screen and select [Software Operation Panel] under [fi Series].
To display [↓], move the mouse cursor. - Windows® 10/Windows Server® 2016
Select [Start] menu → [fi Series] → [Software Operation Panel].
- Windows Server® 2008/Windows® 7
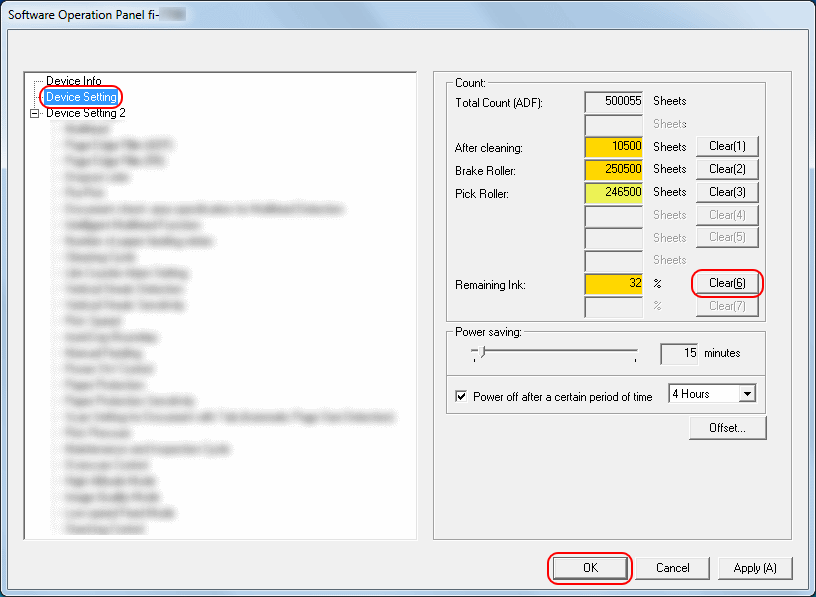
- From the listing on the left, select [Device Setting].

- Click the [Clear] button for the ink counter.
The counter is reset to "100". - Click the [OK] button on the [Software Operation Panel] window.
A message window appears. - Click the [OK] button.


