- ScanSnap >
- How to change ScanSnap Evernote Edition
How to change ScanSnap Evernote Edition
Important: The distribution of ScanSnap Manager Evernote Edition and the tool for changing a ScanSnap Evernote Edition scanner to iX500 terminated on March 31, 2023.
1. Overview
By changing ScanSnap Evernote Edition to ScanSnap iX500, the following things will become possible.
How to save to Evernote before changing

How to save to Evernote after changing

Other differences after changing
- Using the software "ScanSnap Home" with the scanner, ScanSnap Evernote Edition works same as ScanSnap iX500.
- Saving data to Evernote directly from the scanner itself.
- Generating a title for a note automatically by extracting text in a document.
2. Prominent differences after changing from ScanSnap Evernote Edition to ScanSnap iX500
Saving data to Evernote directly from a scanner itself
You can save scanned images directly to Evernote by connecting the ScanSnap to a wireless network without using a computer. Settings must be made on the computer or smart device(*1).(*2)
Detecting a document type automatically and generating a title for a note
Detects document types for documents, business cards, receipts, and photos automatically, and saves the scanned image data automatically to notebooks of each document type.(*1)
ScanSnap Evernote Edition saves scanned image data with note title "Scanned document - yyyy/MM/dd HH:mm". After changing to ScanSnap iX500, scanner extracts text in a document and generates a title for a note automatically.
Other differences when saving to Evernote
- You cannot scan by specifying a document type. The document type (documents/business cards/receipts/photos) can be detected automatically or save into specified notebook without specifying the document type.
- Documents will not be tagged automatically.
Other differences
-
The system requirements, the image quality that can be changed, and options in the software are different between ScanSnap Evernote Edition and iX500. For details about the differences in the specifications and functions, refer to the following.
-
The mobile application "Scannable" cannot be used with iX500.
"ScanSnap Connect Application" which is a mobile application for the ScanSnap only, can be used with iX500.
(*1) Configuring the settings for ScanSnap Cloud is necessary. You can configure the settings from the software "ScanSnap Home" on a computer, or from the application "ScanSnap Cloud" on a smart device.
(*2) "local mode" is available with iX500 which allows you to scan without a network environment.
In this mode, an Evernote client software is required when you save scanned images.
In addition, the following functions are not available.
- Saving data automatically to notebooks of each document type
- Creating a note for contacts from a business card
3. The procedure for changing ScanSnap Evernote Edition to ScanSnap iX500
3.1 Preparation
The following items are required for this procedure.
- ScanSnap Evernote Edition, and the bundled USB cable
- A Computer (Windows or Mac OS)
Make sure that the computer and the OS of the computer are supported by the software "ScanSnap Home". - An E-mail address and the environment for receiving E-mails
It is necessary to acquire a ScanSnap account in order to link the scanner with cloud services.
3.2 Downloading and running the tool
Important: The distribution of ScanSnap Manager Evernote Edition and the tool for changing a ScanSnap Evernote Edition scanner to iX500 terminated on March 31, 2023.
3.3 Downloading and installing ScanSnap Home
After the firmware update is complete, install the software "ScanSnap Home" and specify the settings.
The procedure from the point you download ScanSnap Home to the point you scan a document with the application:
- (1) Download ScanSnap Home
- (2) Register a ScanSnap account
- (3) Install ScanSnap Home
- (4) Configure the Settings for ScanSnap Home (Cloud Linkage)
- (5) Check whether the setup is complete
(1)Download ScanSnap Home
Download ScanSnap Home from the button below.
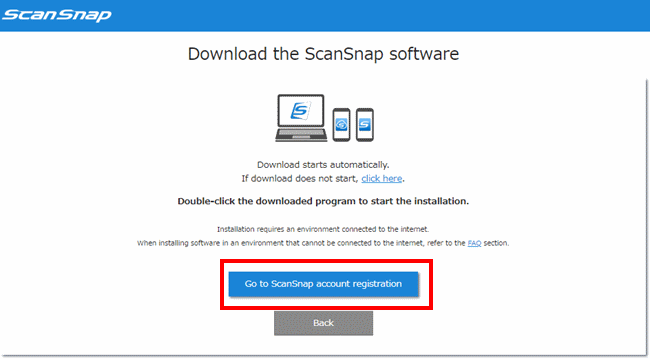
(2)Register a ScanSnap account
After you click the download button, click the following account registration button in order to proceed to the ScanSnap account registration process.
Register a ScanSnap account, and agree to link the scanner to the cloud service (ScanSnap Cloud service).
(3)Install ScanSnap Home
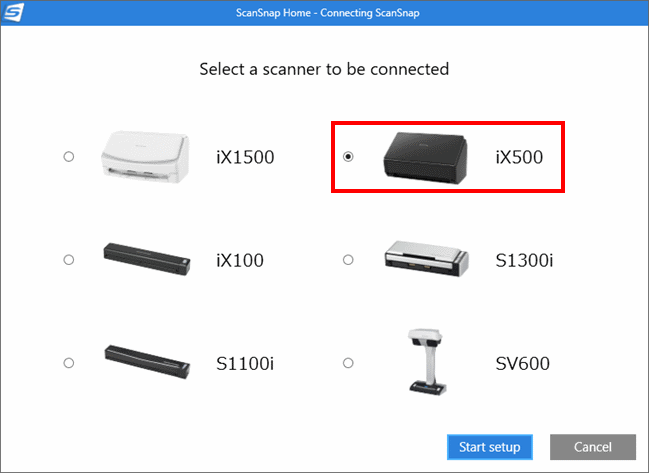
Starting up the software that you downloaded in order to install it.
Select [iX500] in the window for selecting a model.
In the setup window, connect the ScanSnap to a wireless access point.
(4)Configure the Settings for ScanSnap Home (Cloud Linkage)
Configure the settings in ScanSnap Home in order to link the scanner to a cloud service.
When the following message appears while you configure the settings, select [Yes] and continue configuring the settings.
- Configuring the settings for a profile is required
- Sign in is required
-
Select [Try out] in the window (Let's use it!) to open the scan window.
*Even if you close this window, you can configure the setting by selecting the [Settings] menu -> [Scan Settings] in the ScanSnap Home.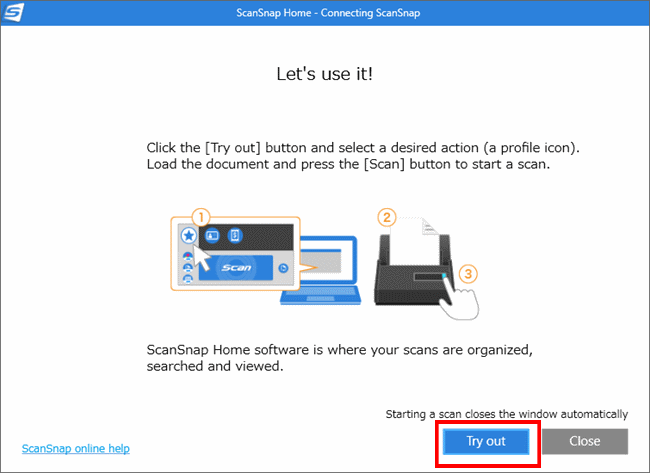
-
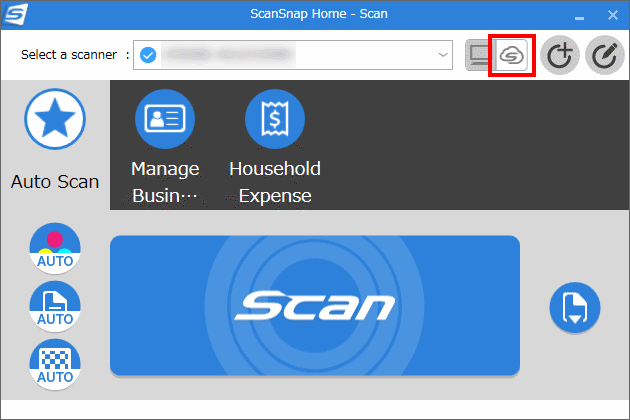
Click the button for switching the cloud mode
-
Sign in with the ScanSnap account that you created in the account window.
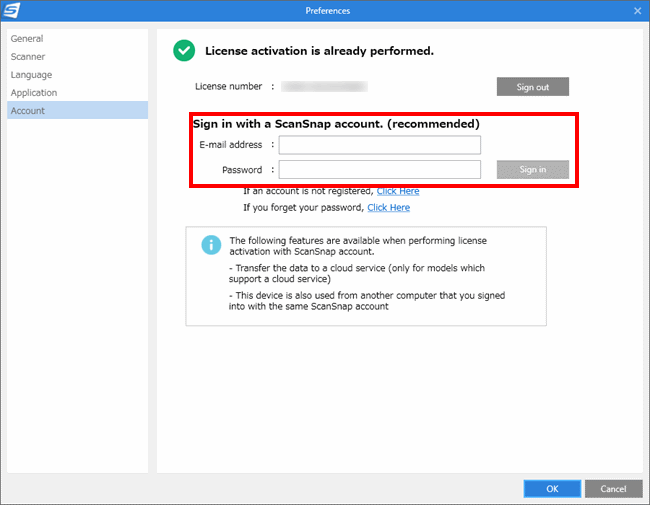
-
Make sure that the ScanSnap Cloud settings are displayed, and close the window for the account.
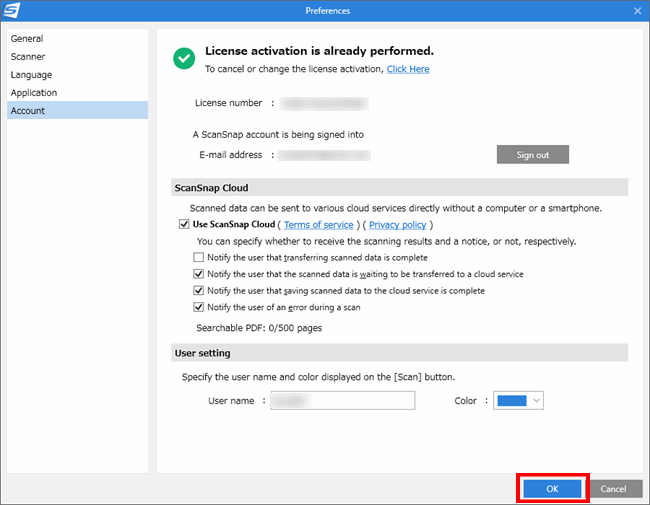
-
Select "Evernote" for the Cloud Service for each document type, and click the [Save] button.
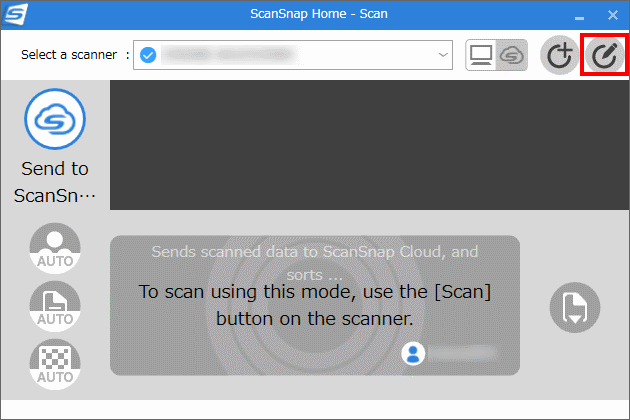
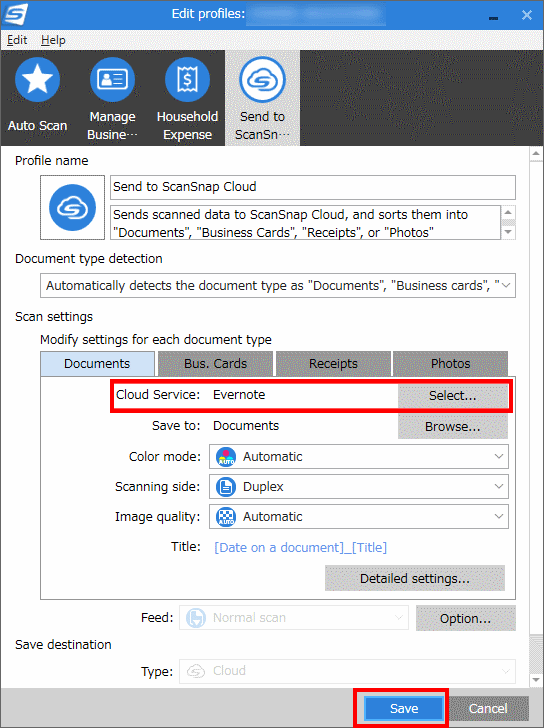
When you create a note for contacts from a business card, you need to clear the [Save images only to a cloud service] checkbox in the "Business Cards" tab in the scan settings.
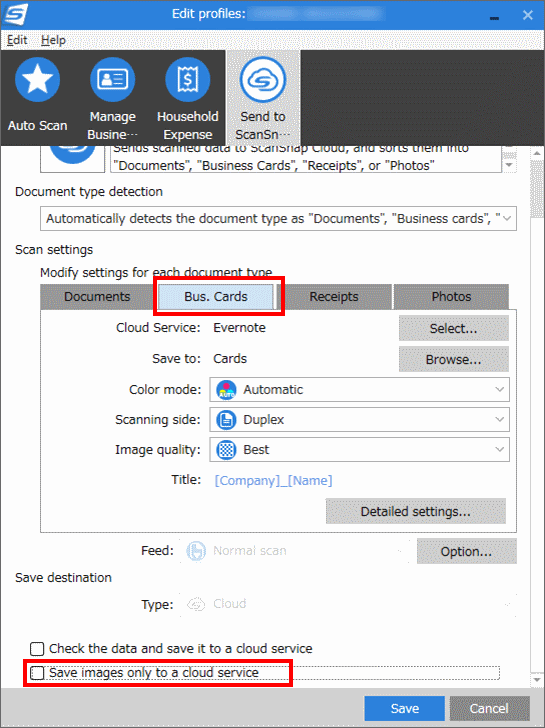
"Save images only to a cloud service" Not selected

"Save images only to a cloud service" Selected

You can configure other scan settings in this window.
(5)Check whether the setup is complete
- When the scanner is in the following conditions, images are saved directly to Evernote simply by scanning a document.
- [Send to ScanSnap Cloud] is selected in the scan window.
- The Wi-Fi indicator and the lower half of the scan button on the scanner lights up in yellow.
(Before)
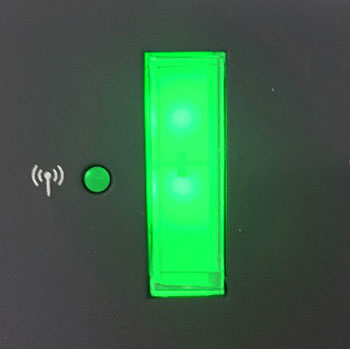
(After: The scanner is linked with a cloud service)
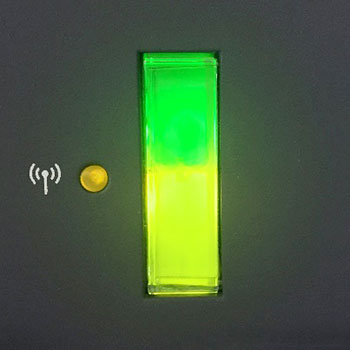
[Note] The scan button on the standard ScanSnap iX500 lights up in purple when the scanner is linked with cloud services.
In the Help for ScanSnap iX500, it is explained that the scan button lights up in purple. - ScanSnap Manager Evernote Edition is not necessary for using ScanSnap Home. Uninstall it from the computer.
4. Other ways of use
For information about how to operate iX500 and use ScanSnap Home, refer to the following Help.

