Managing Scanned Images in the Picture Folder (as JPEG Files)
This section explains how to save the scanned image as a JPEG file to Picture Folder.
HINT
The following folder is set as the "Pictures folder" by default:
DriveName (such as C): \Users\UserName\Pictures\ScanSnap
- Click the [Scan to Picture Folder] icon
 in the Quick Menu.
- The [Scan to Picture Folder] window appears.
HINTYou can configure the settings to not show the [Scan to Picture Folder] window. If you configure the settings to not show the [Scan to Picture Folder] window, scanned images are saved directly to Picture Folder.
For details about changing the settings, refer to Changing the Settings of Linked Applications.
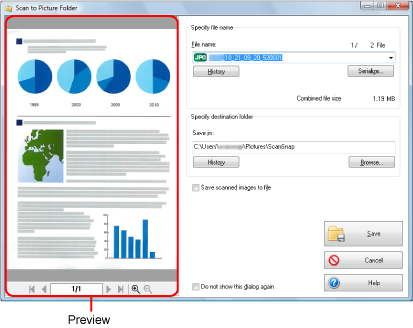
- Check the scanned image in the preview area.
In the [Scan to Picture Folder] window, you can change file names or destination folders, and specify whether to save the scanned image in the folder specified for [Image saving folder].
For details about the [Scan to Picture Folder] window, refer to the ScanSnap Manager Help.
- Click the [Save] button.
- The scanned image is saved in the Pictures folder.
ATTENTION
- You cannot start scanning after the Quick Menu is displayed and before the [Scan to Picture Folder] window is closed. Close the [Scan to Picture Folder] window before scanning the next document.
- Do not move, delete, or rename the scanned image in other applications after the Quick Menu is displayed and before the [Scan to Picture Folder] window is closed.
HINT
- You can change the settings for [Scan to Picture Folder]. For details, refer to Changing the Settings of Linked Applications.
- Profiles can also be used for the linkage function. For details, refer to Profile.