Using ScanSnap Folder to Perform Scanning
This section explains how to use ScanSnap Folder to perform scanning.
The following explains an example in which the scanned image file is attached to an e-mail in Outlook.
- Click [Insert] in the menu.
A ribbon is displayed.
- Click [Attach File].
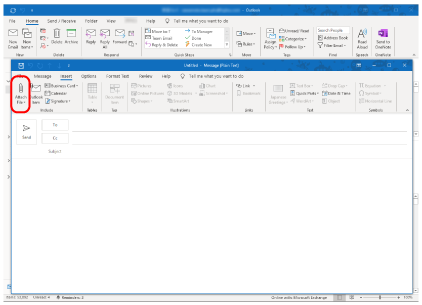
- Click [Browse this PC].
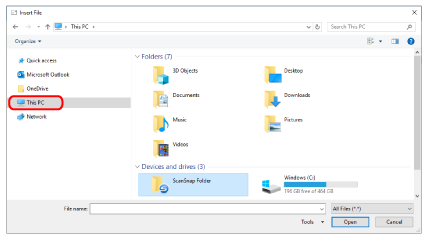
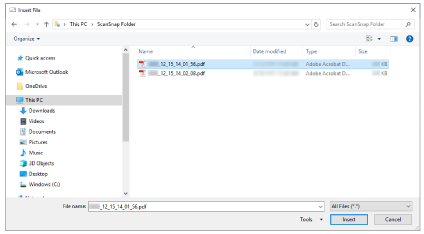
- The [Insert File] window appears.
- Click [This PC].
 HINT
HINTFor Windows 8.1/Windows 7, when you select the ScanSnap Folder located in [Favorites], scanning becomes available in some applications.
- Select ScanSnap Folder.
- A notification appears from the ScanSnap Manager icon in the notification area, and scanning becomes available.
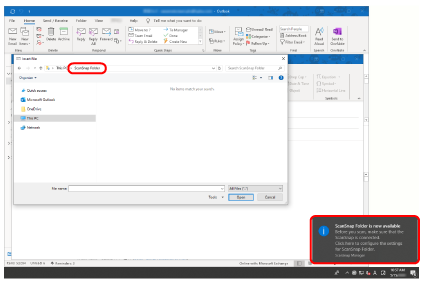
ATTENTIONSelecting "ScanSnap Folder" from some applications may terminate those applications.
If your application ends, take an alternate measure. Use your application separately after starting an application in the Quick Menu to process and save the scanned image.
- A notification appears from the ScanSnap Manager icon in the notification area, and scanning becomes available.
- Scan documents with the ScanSnap.
For details about how to scan documents, refer to here in the Basic Operation Guide.
- When scanning is completed, the [ScanSnap Folder] window appears.
- Check the scanned image in the preview area.
In the [ScanSnap Folder] window, you can rename the file and convert the file format.
For details about the [ScanSnap Folder] window, refer to the ScanSnap Manager Help.
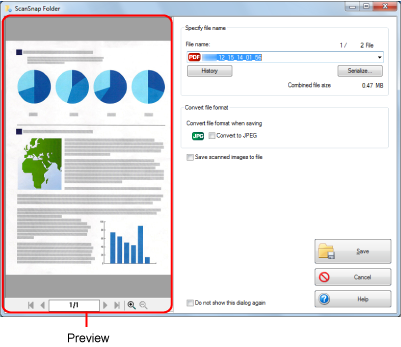
- Click the [Save] button.
- The file is saved to ScanSnap Folder.
- The file is saved to ScanSnap Folder.
- Select the file to be attached, and click the [Insert] button.
- The file is attached.
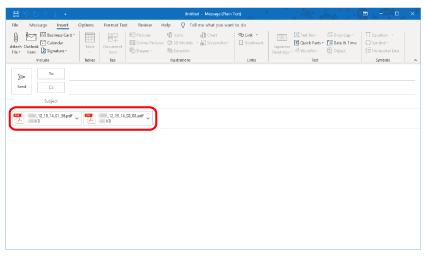
- The file is attached.
You can enable or disable ScanSnap Folder. For details, refer to Enabling or Disabling ScanSnap Folder.