Turning the ScanSnap On
- Turn on the computer.HINT
For iX1600/iX1500/iX1300/iX500/iX100, if you connect the ScanSnap and a mobile device via a wireless LAN and then scan a document, you do not have to turn on the computer.
- The computer starts up and the ScanSnap Manager icon
 appears in the notification area located at the far right of the taskbar.
HINT- If the ScanSnap Manager icon is not displayed in the notification area, start ScanSnap Manager. Start ScanSnap Manager in the following procedure.
- Windows 11
Select [Start] menu → [All apps] → [ScanSnap Manager] → [ScanSnap Manager].
- Windows 10
Select [Start] menu → [ScanSnap Manager] → [ScanSnap Manager].
- Windows 11
- If ScanSnap Manager does not automatically start when you log on to your computer, change the setting in the following procedure:
- Right-click the ScanSnap Manager icon
 in the notification area and select [Preferences] from the Right-Click Menu.
- The [ScanSnap Manager - Preferences] window appears.
- In the [Auto Startup] list, select the [Start up ScanSnap Manager when you log on] checkbox.
- Right-click the ScanSnap Manager icon
- The computer starts up and the ScanSnap Manager icon
- Turn on the ScanSnap.
iX1600/iX1500
Open the ADF paper chute (cover) of the ScanSnap.
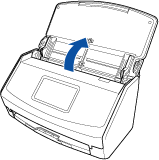
- The touch panel is activated.
iX1400
Open the ADF paper chute (cover) of the ScanSnap.
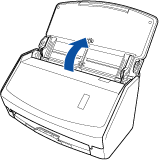
- The [Scan] button flashes in blue. The button returns to being lit normally when document scanning is enabled.
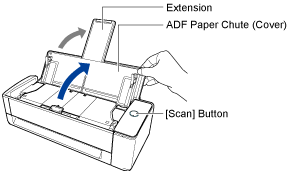
iX1300
The ScanSnap is turned on by performing one of the following operations.
- Holding the right side of the ADF paper chute (cover) then opening it
Open the ADF paper chute (cover) fully so that the [Scan] button lights up in blue.
When the ADF paper chute (cover) is opened, the extension will rise automatically.
- Pressing the [Scan] button

- Inserting a document into the manual feeder
When a document is inserted into the manual feeder, the document is fed into the ScanSnap and is held firmly.
If you press the [Scan] button with the document held firmly in the ScanSnap, it starts scanning.
 HINT
HINTIf the ScanSnap has been set to turn on by inserting a document into the manual feeder, inserting a document such as a semi-transparent document (e.g. tracing paper), thin document, or transparent sheet may not turn on the ScanSnap.
If the ScanSnap is not turned on, perform one of the following to turn it on.
- Opening the ADF paper chute (cover)
- Pressing the [Scan] button
iX500/S1300i
Open the ADF paper chute (cover) of the ScanSnap.
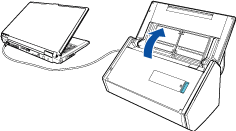
Example: iX500
- The [Scan] button flashes in blue. The button returns to being lit normally when document scanning is enabled.
iX100/S1100i
Open the feed guide of the ScanSnap.
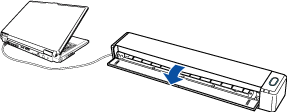
Example: iX100
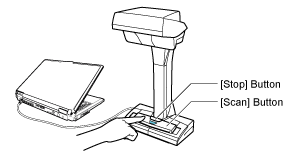
- The [Scan/Stop] button flashes in blue. The button returns to being lit normally when document scanning is enabled.
Press the [Scan] or [Stop] button on the ScanSnap.
 ATTENTION
When turning the power on, do not cover the white sheet with a hand.
- The [Scan] button lights up in blue.
When the ScanSnap is turned on, the ScanSnap Manager icon in the notification area changes from
to .ATTENTIONFor iX1600/iX1500/iX1400/iX1300/iX500/iX100/S1300i/S1100i, with some computers, the initialization of the ScanSnap may be performed several times when the computer is started up depending on some computers.
HINT- It may take more time for the ScanSnap Manager icon in the notification area to change to depending on computer performance, operating environment, or loading, for example, when many software programs are running at the same time.
- When the ScanSnap is turned on, a notification informs you of the ScanSnap's communication status.To disable notifications of the ScanSnap's communication status, change the setting in the following procedure:
- Right-click the ScanSnap Manager icon in the notification area and select [Preferences] from the Right-Click Menu.
- The [ScanSnap Manager - Preferences] window appears.
- Clear the [Notify of the communication status] checkbox in the [Status Display] list.
- Right-click the ScanSnap Manager icon