Saving Receipt Data to a Computer
This section explains how to digitize receipts and save the receipt data in ScanSnap Home.
- Scan receipts with the ScanSnap.
For details about how to perform a scan, refer to Scanning Documents.
- The Quick Menu appears.
- The Quick Menu appears.
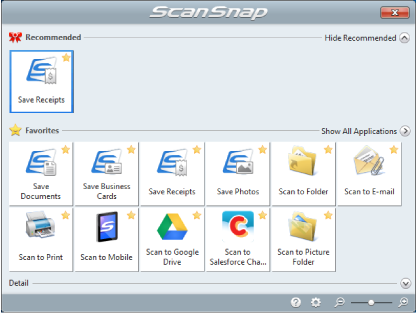
- Click the [Save Receipts] icon
 in the Quick Menu.
- A scanned image together with meta information (such as character strings that were recognized by the text recognition function and the date when you scanned it) of a receipt that you scanned is saved as a content data record in ScanSnap Home.
In addition, the main window of ScanSnap Home appears, so that you can check the content data record created from the receipt that you scanned.
HINTA scanned image together with meta information is referred to as content data record in ScanSnap Home.
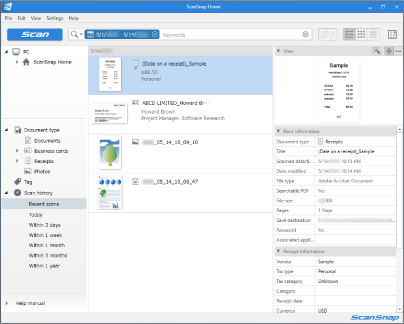
- A scanned image together with meta information (such as character strings that were recognized by the text recognition function and the date when you scanned it) of a receipt that you scanned is saved as a content data record in ScanSnap Home.
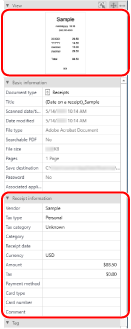
- Check the receipt data.
Check whether characters in the image that is displayed in [View] are entered in [Receipt information] correctly.
If the receipt information must be corrected, click the text to be corrected and then directly edit it.
HINT
For details about ScanSnap Home operations, refer to the ScanSnap Home Help.