Loading Basic Documents
- Load documents in the ScanSnap.
- When scanning documents all at once (U-turn Scan)
-
-
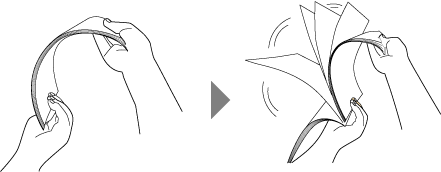
Fan out the documents first to prevent them from sticking together when being fed into the ScanSnap.
-
Straighten the edges of the documents and slightly displace the top edges at an angle.
-
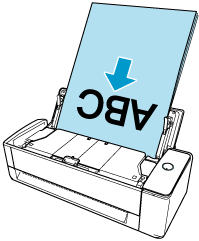
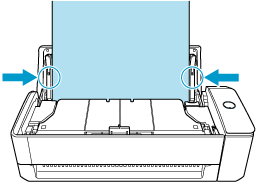
Load the documents in the ADF paper chute (cover).
You can load a stack of documents in the ADF paper chute (cover) with a thickness of 2 mm or less.
To scan documents more than the amount that can be loaded in the ADF paper chute (cover), divide the documents into multiple batches and scan them continuously.
-
Align the side guides with both ends of the documents.
 ATTENTION
-
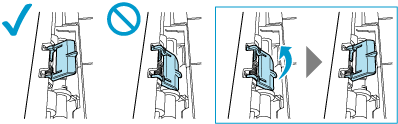
Make sure that the document support tab is open.
Otherwise, a paper jam may occur.
If the document support tab is closed, pull it up with your fingers.
-
If the document support tab comes off, contact the distributor/dealer where you purchased this product.
-
-
- When scanning documents one by one (Return Scan)
-
-
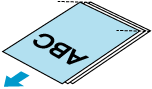
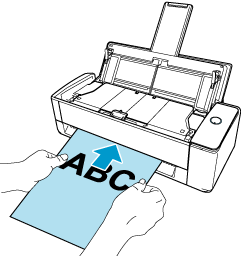
Insert a document into the manual feeder.
Insert the top end of the document straight into the middle of the manual feeder.
Make sure that the document is fed into the ScanSnap and is held firmly.
 ATTENTION
-
When a document is scanned with Return Scan, it sticks out from the back of the ScanSnap.
Leave enough space at the back of the ScanSnap to allow the document to stick out.
-
-
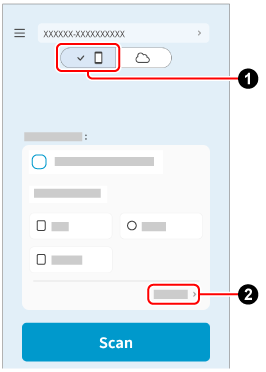
- To save scanned images to a mobile device, specify the feeding method.
 Tap
Tap  on the Scan screen of ScanSnap Home on the mobile device.
 Tap [Detailed settings] and on the [Scan settings] screen, select [Scan] → [Feed (ADF)] to change the settings.