Modifying the Crop Area of a Document
After scanning a document, modify the size of a frame that is used to crop a scanned image.
- Scan a document.
-
In the [ScanSnap Home - Image scanning and file saving] window of ScanSnap Home, select [Crop and save flat document images as-is], and then click the [Check/Correct] button.
- Select a scanned image to modify the crop area in [Cropped image] in the [ScanSnap Home - View cropped images] window.
-
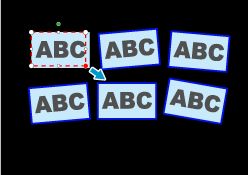
Modify the crop area of the scanned image.
Drag the operating points of the crop frame to modify the crop area.
To move a crop frame, place the mouse pointer inside the crop frame and drag it when all the operating points have turned red.
Click any position on the window to fix a crop area.
-
Click the [Save and Exit] button.
If the [Next] button is displayed, clear the [Continue with Point Retouch] checkbox. The [Next] button changes to the [Save and Exit] button.
A crop area of the scanned image is modified and the image is saved.
- Scan a document.
-
In the [ScanSnap Home - Image scanning and file saving] window of ScanSnap Home, select [Flat document], and then click the [Check/Correct] button.
- Select a scanned image to modify a crop area in the list of scanned images in the [ScanSnap Home - View cropped images] window.
-
Modify the crop area of the scanned image.
Drag the operating points of the crop frame to modify the crop area.
To move a crop frame, place the mouse pointer inside the crop frame and drag it when all the operating points have turned red.
Click any position on the window to fix a crop area.
-
Click the [Save and Exit] button.
If the [Next] button is displayed, clear the [Continue with Point Retouch] checkbox. The [Next] button changes to the [Save and Exit] button.
A crop area of the scanned image is modified and the image is saved.