Troubleshooting
| Q1 | What do I do when imported Excel images become skewed? |
| A1 | Depending on the size of the Excel sheet, 1 sheet may spread across 2 pages. Go to the [Page Insertion] tab - [Conversion of unsupported file formats...] in [Viewer Settings], change [Page Resolution] to 400 dpi and check the image again. If the problem is not solved, open the file in Excel, go to [File] - [Print] and select "Raku2 ImageWriter" for printer name and click the [Print Preview] button. Configure the settings for margins and reduce the page size so that it fits into 1 page. Then execute [Print] and either import the file directly into Rack2-Filer, or perform [Insert from File...] in Rack2-Viewer after saving and closing in Excel. (Note) When you import files from [Print] in Excel, the original file (digital data) will not be attached. |
| Q2 | Why are text extraction results different before and after importing? |
| A2 | The reason is that performance and character recognition ratios differ for digital files (Word etc.) that have been imported with "Automatically create key text blocks for inserted pages (by OCR / extraction)" and cases where text extraction is performed as text is imported from ScanSnap ("Convert to Searchable PDF" or "Searchable PDF(OCRs during scan)" marked) and the text extraction is performed after the data has been imported. However, extracting performance and character recognition ratios remain basically the same when processing scanner created data. |
| Q3 | A message saying "After selecting (or starting) the target binder (Rack2-Viewer) at the destination, click the OK button" appears when I am scanning documents and a Rack2-Filer binder is open. What should I do? |
| A3 | This message is displayed when either "Continue scanning" or "Show scanning results" is displayed in Windows while scanning. Correct this issue by disabling any of the following items if they have been checked: (Note)
|
| Q4 | A message stating "Program could not continue to process operation. Uninstall Rack2-Viewer, restart your computer, and install Rack2-Viewer again" appears when I try to modify and save electronic data files and I cannot modify the data file in question. What should I do? |
| A4 | Since this is likely caused by a Raku2 ImageWriter error, uninstall Rack2-Filer from [Add and Remove Programs] and reinstall it. |
| Q5 | A message stating "Program could not access LibRoot Folder. Please review LibRoot Folder setting and check its attributes." appears in [Viewer Settings] and I cannot complete the configuration. What should I do? |
| A5 | There may be an incorrect folder linkage specification in Rack2-Filer's [Viewer Settings]. Use Explorer or another means to check to see whether or not the specified folder exists. Remove the folder linkage and reconfirm operations in cases where the linkage specifies a non-existent folder. |
| Q6 | An error message stating "Specifying multiple files is not supported" appears on my screen. What should I do? (This issue does not affect ScanSnap scanners) |
| A6 | This error message is displayed when "Generate one PDF file per xx page(s)" is enabled in ScanSnap Manager settings ([File Option] tab - [Option]). Place a check in the "multipage PDF (whole batch in one PDF)" instead, and try scanning once again. |
| Q7 | Highlighted areas occasionally spread out onto the next page and then disappear when using Rack2-Viewer in 2-page mode. |
| A7 | Computer related issues (i.e. Display driver) occasionally cause highlighted areas to spread beyond an image's boarder. This issue can be prevented by ensuring that all highlighted areas remain within the limits of a single page. |
| Q8 | Why do "sticky notes" occasionally move beyond the area of displayed pages when Rack2-Viewer is in 2-page mode? |
| A8 | Computer related issues (i.e. Display driver) occasionally result in sticky notes being displayed in areas beyond the displayed page(s). You can avoid this from happening by ensuring that a portion of each sticky note touches the displayed page area. |
| Q9 | Even if I have run OCR, no key text block is created and pages cannot be searched. |
| A9 | The cause may be one of the following. Check the contents.
|
| Q10 | When a PowerPoint file is imported, the [Creating image data from source file. Please wait.] dialog box appears, and the import process may not finish. |
| A10 | For a password-protected PowerPoint file, a password input dialog box may appear behind the window. Perform the following to display the password input dialog box in the foreground window and enter the password.
|
| Q11 | When trying to import a source file, [Program encountered error while reading or inputting files. Check file contents and amount of free disk space, and try again.] appears. |
| A11 | The cause may be one of the following. Check the contents.
|
| Q12 | Problems arising from use in an environment with antivirus software installed. |
| A12 | When using Rack2-Filer in an environment in which antivirus software is installed or running, communication or operation may be blocked according to the firewall or monitoring function, and normal operation may not be possible.
Communication or operation may be blocked for the following operations:
- Refer to the manual or homepage for the antivirus software, and change the settings to allow external connection and operation of this product not to block communication and operation. |
| Q13 | An extra blank space may appear around pictures or documents imported into a Rack2-Filer binder. Also, the content may shrink after importing. |
| A13 |
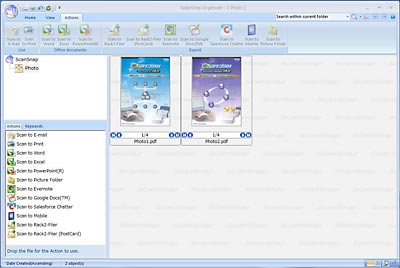
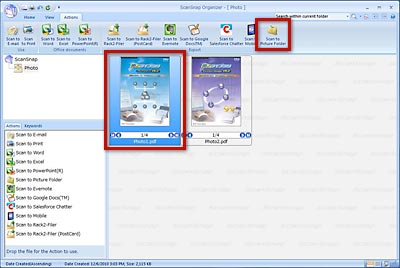
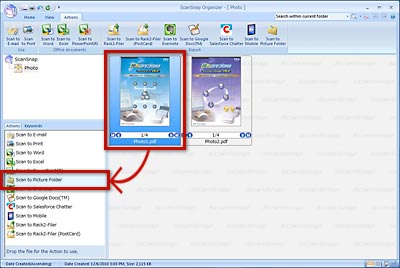
An extra blank space may appear in the data of an imported picture or document that is not a common size, such as a PDF file from scanned pictures or a PDF file trimmed with ScanSnap Organizer. To prevent this situation, import the data after converting it to an image file such as JPEG and TIFF files. [Reference] How to convert PDF file to JPEG or TIFF image files with ScanSnap Organizer
|
| Q14 | My computer fails to connect to an iPad/iPhone/iPod touch device. |
| A14 |
The following are possible causes of this issue:
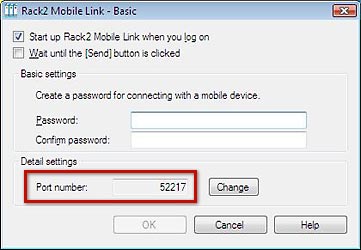
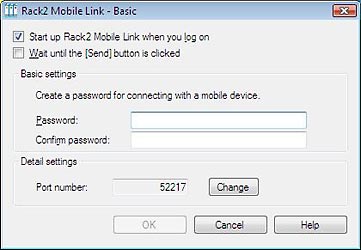
Rack2 Mobile Link is blocked by Windows Firewall.Change the setting of your security software (if any) and Windows Firewall to unblock Rack2 Mobile Link. For further details refer to chapter 8 "Exporting to a Cloud Service/Mobile Device" in the Rack2-Filer Users Guide. The computer port number is used by another application.Specify port number that is not in use on your computer and the mobile device. Port number (Computer)
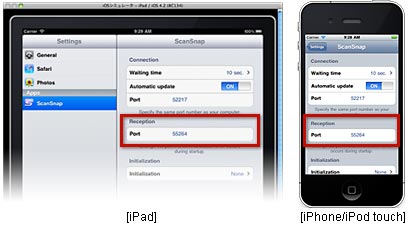
Port number (Mobile device)Follow these steps to check and change the mobile device port number.
(Note)
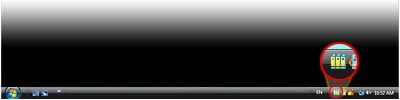
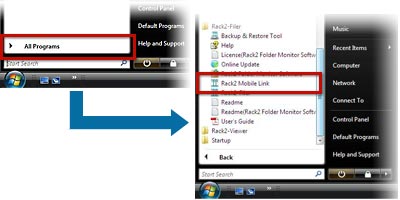
Rack2 Mobile Link application is not running on the computer.Check if the Rack2 Mobile Link icon appears in the taskbar.
If the icon does not appear in the taskbar, launch Rack2 Mobile Link application.
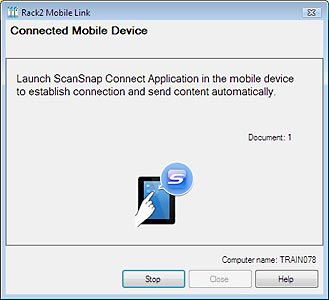
ScanSnap Connect Application is not running on the mobile device.Launch ScanSnap Connect Application to wirelessly sync the mobile device to the computer. The "Rack2 Mobile Link - Basic" dialog box is open.You cannot connect from a mobile device while the "Rack2 Mobile Link - Basic" dialog box is open. Close the dialog box first and then connect from the mobile device.
The computer is connected to the mobile device under another user.Log in to the user who is connected to the mobile device and end their connection. After that, log in with your information and sync the computer to the mobile device. Another iPad/iPhone/iPod touch device is currently connected to the computer.Only one mobile device can sync to the computer at a time. Terminate the connection of the other mobile device and then sync the mobile device with the computer. |
| Q15 | I cannot open the "Rack2 Mobile Link - Basic" dialog box. |
| A15 |
When the computer is connected to another mobile device:
When the computer is not connected to a mobile device:
|
| Q16 | When I launch the Rack2-WorkArea window repeatedly, the window shifts or does not display. |
| A16 |
This is a known issue after installing the Rack2-Filer V5.0 Service Pack 5 (V5.0L60). |
| Q17 | Rack2-Filer cannot export data to Google Docs™. |
| A17 |
Rack2-Filer's "[Export to]-[Google Docs™]" cannot function for the change of the authentication method in Google Docs™ from April 20th, 2015. This issue is resolved in Rack2-Filer V5.0 Service Pack 9. (*)
|
| Q18 | It takes time to import files from ScanSnap to Rack2-Filer. |
| A18 |
Rack2-Filer V5.0L63 (Service Pack 8) or earlier:The Rack2 ImageWriter dialog appears during file importing from ScanSnap to Rack2-Filer and takes long time to end.
This symptom occurs when using ScanSnap Manager V6.5 or later, and was fixed in Rack2-Filer V5.0 Service Pack 9. Download the latest update installer and update the Rack2-Filer to the latest. Rack2-Filer V5.0L64 (Service Pack 9):It may take time (a few seconds for each page) to import PDF file to Rack2-Filer when the PDF is created by ScanSnap Manager and contains search text in it. This symptom occurs when using ScanSnap Manager V6.5 or later, and was fixed in Rack2-Filer V5.0 Service Pack 10. |
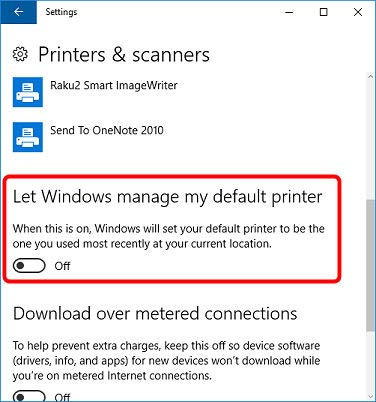
| Q19 | I cannot import my Excel files to Rack2-Filer on Windows® 10 where Microsoft® Excel® is installed. |
| A19 |
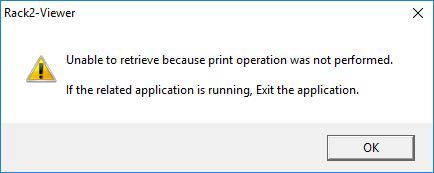
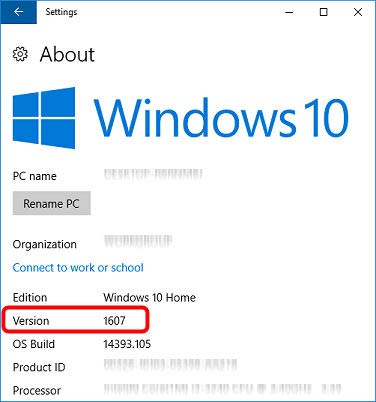
When using Microsoft® Excel® 2010 or earlier on 1607 or later version of Windows® 10, Excel files may not be imported to Rack2-Filer with the following dialog:
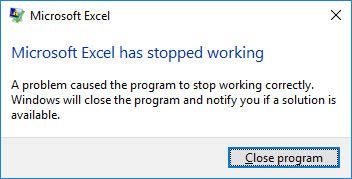
Note: The error message below may appear before the dialog above is displayed.
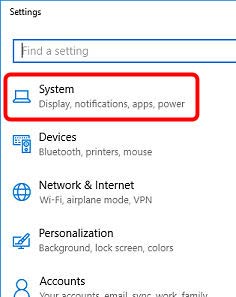
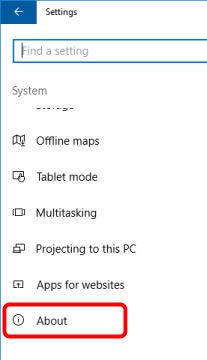
Follow the instructions below to confirm the installed version of Windows® 10:
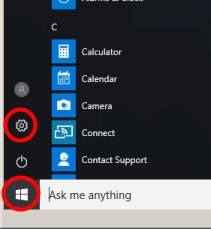
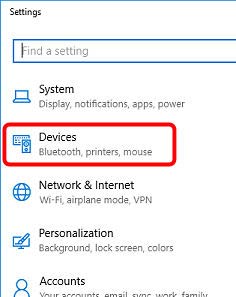
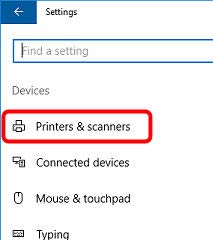
Follow the steps below and change the setting in Windows® 10 to avoid the problem.
|