Archived content
NOTE: this is an archived page and the content is likely to be out of date.
Replacing the Print Cartridge
Replace the print cartridge in the following procedure:
- Turn off the scanner.
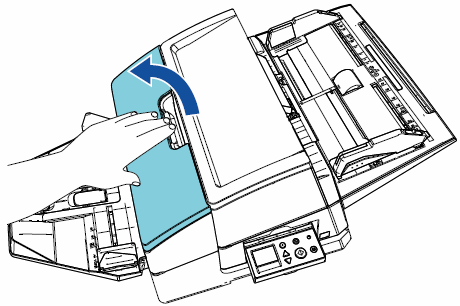
- Open the print cartridge cover from the middle part as shown below.
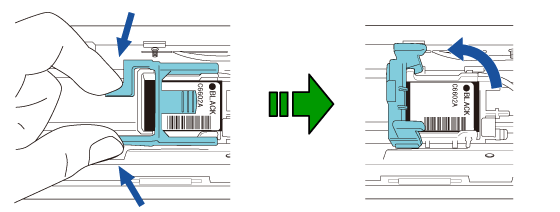
- Squeeze both ends of the print cartridge holder to release the print cartridge holder lock and lift it open as shown below.
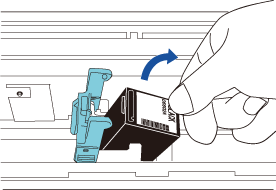
- Remove the old print cartridge.
- Remove the protective tape from the new print cartridge.
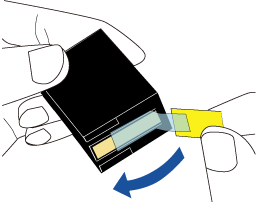
ATTENTION
Do not touch the metal part of the cartridge or put the protective tape back on. - Insert the print cartridge with the tab part to the right.
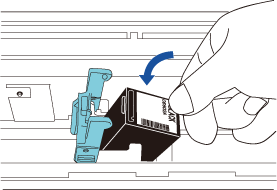
ATTENTION
Be careful not to scratch or damage the wiring film with the print cartridge.a Wiring Film - Lower the print cartridge holder lock slowly until the cartridge locks in place.
Check that the retaining clips on either sides of the print cartridge holder lock are in place.
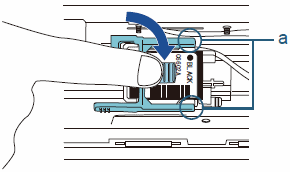
a Retaining Clip - Move the print cartridge to the printing position that you want.
Make sure that the print cartridge is within document width.
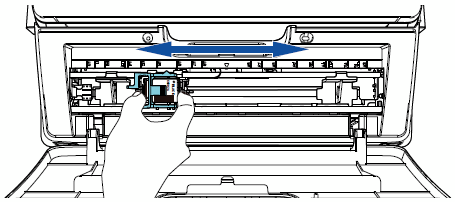
ATTENTION
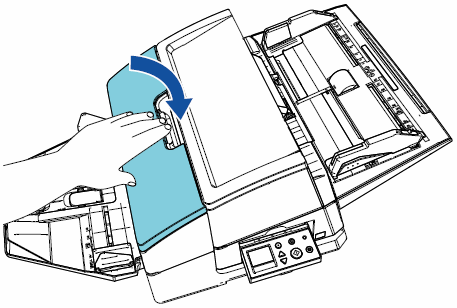
Note that, depending on the position of the print cartridge, when content to be printed is on the edge of a document, a part of the content may be printed outside of the document width. - Close the print cartridge cover.
- Turn on the scanner.
- Reset the ink counter.
For details about resetting the counter, refer to "Resetting the Ink Counter".


