Loading Long Page Documents
Load a document with a length of up to 1,726 mm (67.9 in.). Load a document with a length of up to 1,117 mm (44 in.).
When the document type of the documents being scanned is automatically detected and the scanned images are saved to a cloud service, the images of the long documents that you scan are saved as "documents". In addition, you cannot change the document type of the saved images.
-
Scanning long page documents is available for U-turn Scan, in which a document is loaded in the ADF paper chute (cover) and scanned.
The long document length that can be scanned varies depending on what is set for [Scanning side] in the ScanSnap Home [Scan settings].
Scanning side |
Document length |
|---|---|
Duplex |
863 mm (34 in.) |
Simplex (*1) |
1,726 mm (67.9 in.) 1,117 mm (44 in.) |
| *1: | When scanning is set to automatically detect the document type of the documents being scanned and save scanned images to a cloud service, set [Auto document type detection] to off on the [Edit settings] screen that appears when you tap [Detailed settings] on the ScanSnap Home Scan screen. If [Auto document type detection] is set to on, both sides of the documents are scanned. |
-
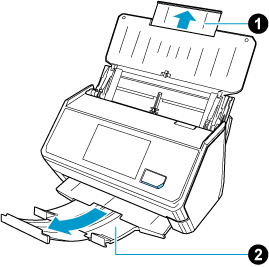
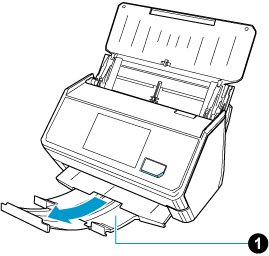
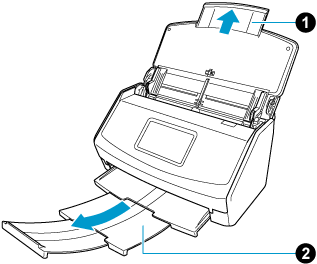
Pull out the extension
 and the stacker
  on the ScanSnap.
-
Extend the stacker on the ScanSnap. Pull out the extension and the stacker on the ScanSnap. Pull out the extension on the ScanSnap.
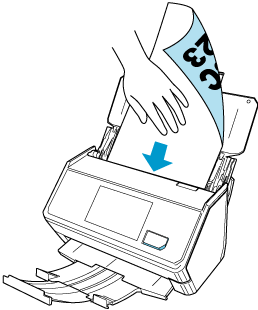
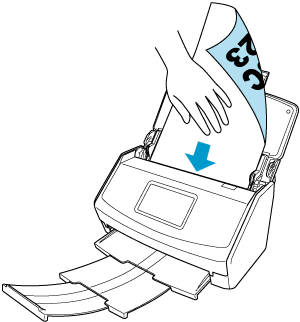
- Load only one document in the ScanSnap.
Hold down the document with your hand so that it does not fall out of the ADF paper chute (cover).

Use the Receipt Guide provided with the ScanSnap to efficiently scan documents such as smaller size business cards and receipts that tend to curl easily.
-
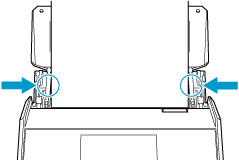
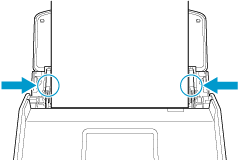
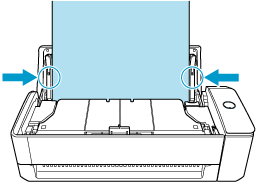
Align the side guides with both ends of the documents.
 ATTENTION
-
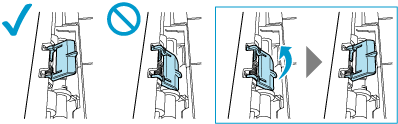
Make sure that the document support tab is open.
Otherwise, a paper jam may occur.
If the document support tab is closed, pull it up with your fingers.
-
If the document support tab comes off, contact the distributor/dealer where you purchased this product.
-
- Specify the feeding method on the touch panel.
Press the arrow at the bottom of the touch panel to display the scan settings. Press
 in the scan settings to display the [Setting for current scan] screen.
 In [Feed] that appears when you press the feed icon, select [Normal scan] or [Continuous scan].
For details about feed setting items, refer to Displayed Screens on the Touch Panel.
 In [Long page scan] that appears when you press the long page scan icon, select [Enable].
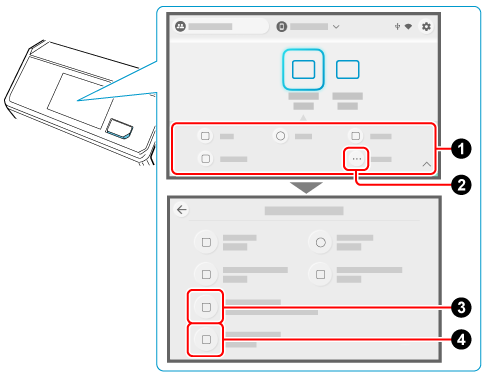
-
Specify the feeding method.
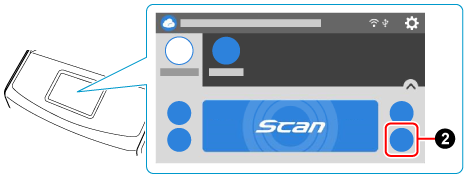
- When saving scanned images to a mobile device
-
Tap
 on the Scan screen of ScanSnap Home on the mobile device. Tap [Detailed settings] and on the [Scan settings] screen, select [Scan] → [Feed (ADF)] and then select [Manual Scan]. Tap [Detailed settings] and on the [Scan settings] screen, select [Normal] or [Better] for [Image quality].
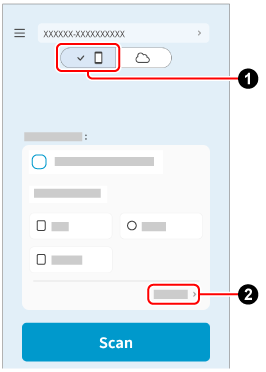
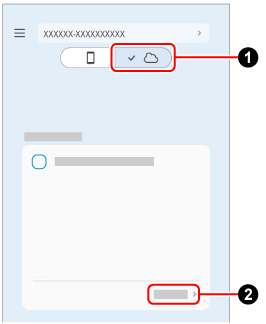
- When saving scanned images to a cloud service
-
Tap
 on the Scan screen of ScanSnap Home on the mobile device. Tap [Detailed settings], select the scan settings you wish to use, and select [Normal] or [Better] for [Image quality].
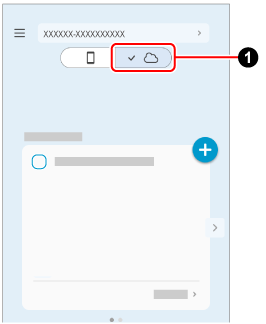
 Select [Manual scan] for [Feed mode setting] that appears when you press the feed mode setting icon on the ScanSnap touch panel.
For details about feed mode setting items, refer to Displayed Screens on the Touch Panel.