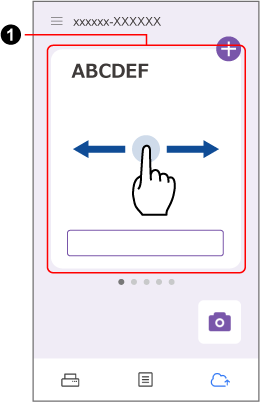
By simply taking a photo of a document with ScanSnap Home's camera function, a photo image that is automatically cropped to the same size as the document is created.
- Tap the [Cloud settings] icon
 at the bottom of the ScanSnap Home screen to display the Cloud settings screen.
If the settings to link with a cloud service are incomplete, follow the instructions on the screen to complete the settings.
- Start the camera function by tapping
 .
.
If  is disabled, swipe the currently displayed batch of cloud settings (
 ) to the left or right to switch to the batch of cloud settings that enables
  .
.
TIP
If a message for checking the permission to access the camera of the device appears, tap [OK] to approve it.
If the "Unable to access the camera" message appears, on the mobile device, go to [Settings] → [Privacy] → [Camera], and enable [ScanSnap Home].
- Select a photo-taking mode.
The automatic photo-taking mode is set by default.
To take a photo in manual photo-taking mode, tap  in the upper right of the screen to switch to
  .
.
- Swipe right or left on the photo-taking mode screen to select the document type of a document that you want to take a photo of.
If [Business cards] is selected, check the side to take a photo of.
- Hold the camera so that the document is at the center of the screen.
Set the lens of the camera in parallel with the document placed on a flat surface and adjust the camera position so that the whole document is within the camera frame.
- Hold the camera so that the document is at the center of the screen and take a photo.
You can take photos of documents consecutively.
In Automatic Photo-Taking Mode
Hold the camera still with the crop area displayed on the screen.
In Manual Photo-Taking Mode
Tap the Photo-Taking button.
ATTENTION
When the color of the document and the background color of where you place the document are similar, the automatic photo-taking mode may not work.
From the second document onwards, the document type will be the same as the first document.
When you want to change the document type, send the photo images of documents that were already taken with the camera function to a cloud storage service.
- Tap the thumbnail in the lower right of the screen to check that the photo of the document has been taken correctly in the Preview screen, and edit it if needed.
In the Preview screen and the Edit screen, the following edit operations are available.
Preview Screen

Displays the screen to edit the scanned image.

Modifies the level of background removal for the scanned image.

Rotates the scanned image.

Modifies the crop area of the scanned image.
Edit Screen
To show this screen, tap  in the Preview screen.
This screen is used to arrange the order of scanned images, or to select multiple images and edit them collectively.

Deletes unnecessary scanned images.

Rotates the scanned image.
- When you finish editing, tap [Finish] in the Preview screen.
The scanned image is uploaded to the cloud service specified for the cloud storage service via the ScanSnap Cloud server.
