- ScanSnap Home Mobile Help
- Scanning Documents
- How to Scan Documents
- Saving a Scanned Image in a Cloud Service (Document Type is Fixed)
This website is designed to be used with ScanSnap Home 1.4.
If you are using ScanSnap Home 2.0 or later, refer to here.
Saving a Scanned Image in a Cloud Service (Document Type is Fixed)
With ScanSnap Cloud, use the Cloud settings with the document type fixed as "Documents", "Business Cards", "Receipts", or "Photos" to save images created from the scanned documents to a cloud service.
The type of document to be scanned, the cloud service to be used as the save destination, and the scan settings are saved in the Cloud settings.
You can add more than one batch of Cloud settings with the document type fixed as a different option.
For regions where ScanSnap Cloud can be used, refer to here.
-
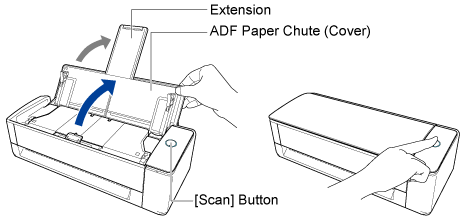
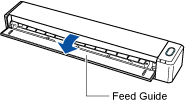
Open the ADF paper chute (cover) of the ScanSnap to turn the power on. Hold the right side of the ADF paper chute (cover) of the ScanSnap then open it or press the [Scan] button to turn it on. Open the feed guide of the ScanSnap to turn the power on.
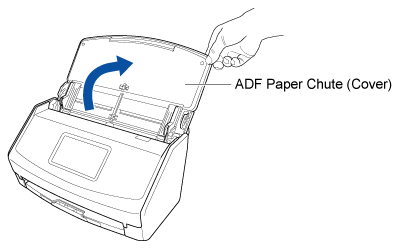
Open the ADF paper chute (cover) fully so that the [Scan] button lights up in blue.
When the ADF paper chute (cover) is opened, the extension will rise automatically.
-
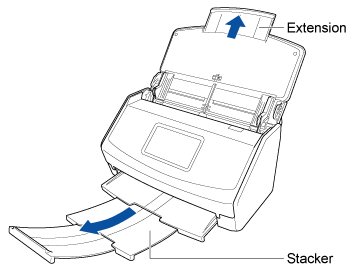
Pull out the extension and the stacker on the ADF paper chute (cover).
- Tap the [Cloud settings] icon
 at the bottom of the ScanSnap Home screen to display the Cloud settings screen.
If the settings to save the scanned image to a cloud service are incomplete, follow the instructions on the screen to complete the settings.
- Configure the cloud settings for saving scanned images to a cloud service.
If the cloud settings have already been configured, proceed to step 5.
- Fix the document type of the documents to be scanned and display the Cloud settings for saving scanned images to a cloud service.
When adding a new batch of Cloud settings
Tap the
 icon at the top of the screen and follow the instructions on the displayed screen to specify the document type and the cloud service to be used as the save destination for scanned images. The added batch of Cloud settings is automatically named.
If your ScanSnap is not registered with a ScanSnap account, follow the instructions on the screen to register it.
When using an existing batch of Cloud settings
Make sure that the batch of displayed Cloud settings is the one to be used to scan documents.
If multiple batches of Cloud settings exist, swipe the currently displayed batch of Cloud settings (
 ) to the left or right to display the batch of Cloud settings you want to use.
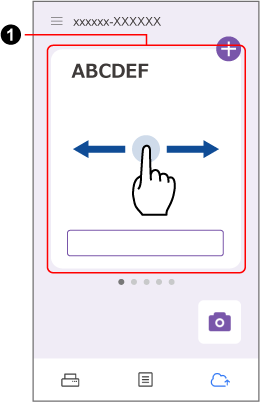
- Tap the [Change the settings] button to configure the scan settings in [Scan settings] in the [Cloud settings] screen.
Configure the scan settings in accordance with the intended use of the scanned documents and images.
- Fix the document type of the documents to be scanned and display the Cloud settings for saving scanned images to a cloud service.
-
Load documents in the ScanSnap.
For details about loading documents and the scan settings to be configured for each document type, refer to Loading the Document in the ScanSnap.
For details about loading documents and the scan settings to be configured for each document type, refer to Loading the Document in the ScanSnap.
-
In the home screen on the touch panel, select the profile with the same name as the batch of Cloud settings to be used from the profile list.
If a user icon is displayed in the upper left of the home screen on the touch panel, press the user icon to display the [Selecting a User] screen and select [All (Cloud/network-folder)].
If a user icon is displayed in the upper left of the home screen on the touch panel, press the user icon to display the [Selecting a User] screen and select [All cloud users].
-
Press the [Scan] button in the home screen on the touch panel to start scanning the document.
When scanning a long page document with a length exceeding 360 mm, hold down the [Scan] button for 3 seconds or longer.
To continue scanning, load the next document to be scanned in the ScanSnap and press the [Scan] button.
To finish scanning, press the [Finish] button without loading any document in the ScanSnap.
TIP-
You can change the feed mode setting by pressing the feed mode setting icon in the screen (for confirming whether or not you want to continue scanning) that appears on the touch panel.
When scanning the following types of documents, change the feed mode setting to [Manual scan].
Documents folded in half
Envelopes
Documents with sticky notes attached
Documents with multiple sheets overlapped such as transfer paper
Long page documents such as long receipts
Plastic cards
-
- On the cloud service that is displayed in the Cloud settings screen, check whether the document was scanned properly.
The scanned image can also be checked on the Scanned data screen that appears when you tap the [Data] icon
 at the bottom of the ScanSnap Home screen.
Scanned images saved to cloud services can be displayed by tapping
 at the top of the Scanned data screen.
Tap the file that you want to check to display the Preview screen.
TIP-
If the scanned image is not saved in the destination cloud service, the document type for the scanned document may have been detected incorrectly. Check the save destination for the file in the Scanned data screen.
To change the cloud service for the save destination, follow the procedures below.
Tap the applicable file in the Scanned data screen to display the Preview screen.
Tap
 and select a cloud service for destination.
-