This website is designed to be used with ScanSnap Home 2.xx.
If you are using ScanSnap Home 3.0 or later, refer to here.
Placing a Document
When you place documents under the ScanSnap, use the Background Pad.
If you scan a document without the Background Pad, the edges of the document may not be detected correctly and the created scanned image may be different from the document.
Scan area
Place a document with the scanned side face-up in the following scan area.
Use the following to determine the scan area.
Area: Reference marks of the Background Pad
Height: Lines on the base of the ScanSnap
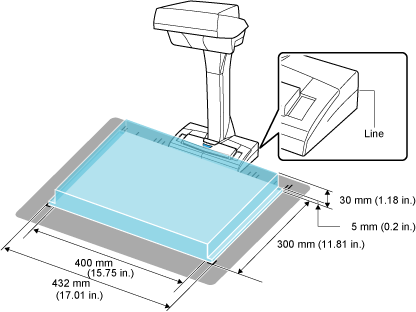
If a document is placed outside of the scan area, part of the scanned image may be left out or blurred.
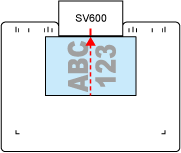
When placing a standard size document
When you select an option other than [Automatic detection] for the paper size in the profile settings, align the center of the document with the centering mark on the ScanSnap.
When placing a book
Place a book as follows:
Open a book horizontally.
Align the center of the opened book face-up with the centering mark.
Hold the book down with fingers within the appropriate areas.
When holding the book down, use your fingers as follows:
Keep your fingers straight.
When using multiple fingers to hold down the book, keep fingers apart by at least 2 cm (0.79 in.).

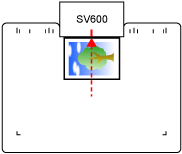
When placing a photo
Align the center of the photo with the centering mark of the ScanSnap.
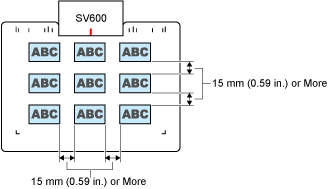
When placing multiple documents at once
To scan multiple documents at once, place them in the following conditions:
The documents must be placed at least 15 mm (0.59 in.) apart from each other.
The number of documents placed must not exceed 10.