Scanning Documents Larger Than A4 or Letter Size (with the Optional Sheet)
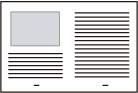
By folding the document in half and scanning in duplex mode, the two sides are merged into a single image.
For details about documents that can be loaded, refer to here in the ScanSnap Help.
-
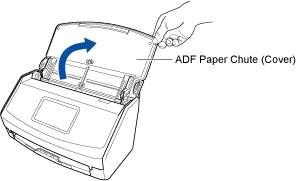
Open the ADF paper chute (cover) of the ScanSnap to turn it on.
-
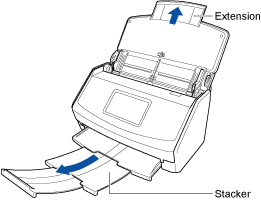
Pull out the extension and the stacker on the ADF paper chute (cover).
- On the home screen on the touch panel, select [Scan to Cloud] from the profile list.
If a user icon is displayed in the upper left of the touch panel, press the user icon to display the [Selecting a User] screen and select [All cloud users].
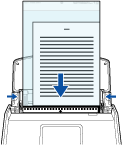
- Load a document in the ScanSnap.
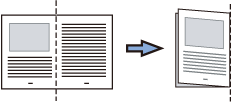
- Fold the document in half with the side to be scanned facing out.
Fold it tightly and smooth out any creases.
- Open the Carrier Sheet to bind the document.
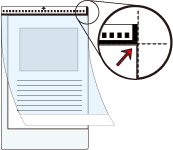
Note that the front side of the Carrier Sheet has a black and white pattern at the top and a thick vertical line in the upper right-hand corner.
Align the top and the fold line of the document with the Carrier Sheet so that there is no space in the upper right-hand corner of the Carrier Sheet.
- Load the Carrier Sheet with the end which has the black and white pattern as the leading edge into the ScanSnap.
Align the side guides with both ends of the Carrier Sheet.
- Fold the document in half with the side to be scanned facing out.
- Press the [Scan] button on the home screen on the touch panel to scan the document.
Both sides of the document are scanned and saved as one double-page spread image.
A new scan history is added to the scan history list of the ScanSnap Cloud application by updating the list. For details about the scan history list, refer to Main Screen.
HINTWhen a scanned image is sent to the ScanSnap Cloud service or saved in a cloud storage service, a push notification is sent to your mobile device.
-
On a cloud storage service that supports the scanned document type, check the scanned image to make sure the document was scanned properly.
Scanned images can be checked on the Detail View Screen of the ScanSnap Cloud application.
HINTIf the scanned image is not saved in a specified cloud storage service, the document type for the scanned document may have been detected incorrectly. In such a case, the scanned image can be transferred to another cloud storage service. For details, refer to Transferring a Scanned Image to Another Cloud Storage Service.
If it is difficult to do so, disable the detection of the document type and specify one cloud storage service. Scanned images will always be saved in the specified cloud storage service, regardless of the document type. For details, refer to [Select cloud storage services] Screen.
There may be a line or a gap appearing between the front and back side images. Also when you scan a thick document in the Carrier Sheet, the scanned image on the left and the scanned image on the right of a double-page spread image may skew towards each other from the top.
These symptoms may be improved when you place the document in the Carrier Sheet as follows:
Fold the document properly
Neatly align the edges of the document with the edges of the Carrier Sheet
Turn over the Carrier Sheet to the other (reverse) side
Part of the scanned image around where the document is folded may appear missing. In that case, place the document so that its edge is about 1 mm (0.04 in.) inside from the edge of the Carrier Sheet.