Scanning Documents of Different Sizes in One Batch
-
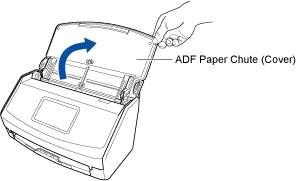
Open the ADF paper chute (cover) of the ScanSnap to turn it on.
-
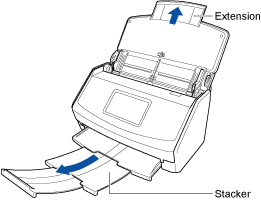
Pull out the extension and the stacker on the ADF paper chute (cover).
- On the home screen on the touch panel, select [Scan to Cloud] from the profile list.
If a user icon is displayed in the upper left of the touch panel, press the user icon to display the [Selecting a User] screen and select [All cloud users].
-
Check that the feed mode setting icon is
 or
or  .
.
If the feed mode setting icon is
 , press the icon to display the [Feed mode setting] screen and change the feed mode on the screen.
 - Load documents in the ScanSnap.
- Align the leading edge and the center of the documents.
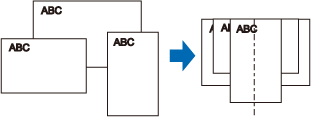
- Load the documents face-down and top-first with the back of the last document facing you.
The pick roller feeds the documents. Load all documents over one another above the pick roller (center). Documents that are not loaded above the pick roller cannot be fed.
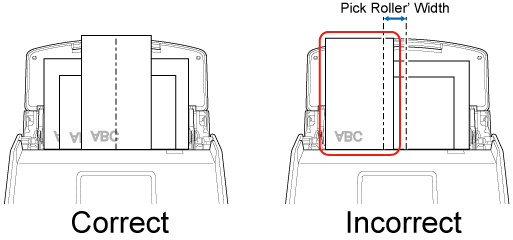 ATTENTION
Also, adjust the side guides to the widest document in the batch. Load the other documents so that they can be scanned straight. If the documents are skewed during scanning, the following problems may occur:
Part of the scanned image appears missing
Slant lines appear in the scanned image
The size of the scanned image differs from the document size
- Align the leading edge and the center of the documents.
- Press the [Scan] button on the home screen on the touch panel to scan the document.
A new scan history is added to the scan history list of the ScanSnap Cloud application by updating the list. For details about the scan history list, refer to Main Screen.
HINTWhen a scanned image is sent to the ScanSnap Cloud service or saved in a cloud storage service, a push notification is sent to your mobile device.
-
On a cloud storage service that supports the scanned document type, check the scanned image to make sure the document was scanned properly.
Scanned images can be checked on the Detail View Screen of the ScanSnap Cloud application.
HINTIf the scanned image is not saved in a specified cloud storage service, the document type for the scanned document may have been detected incorrectly. In such a case, the scanned image can be transferred to another cloud storage service. For details, refer to Transferring a Scanned Image to Another Cloud Storage Service.
If it is difficult to do so, disable the detection of the document type and specify one cloud storage service. Scanned images will always be saved in the specified cloud storage service, regardless of the document type. For details, refer to [Select cloud storage services] Screen.