This website is designed to be used with ScanSnap Home 2.xx.
If you are using ScanSnap Home 3.0 or later, refer to here.
[Feed option] Window
The [Feed option] window appears when you click the [Option] button for [Feed] in the [Add new profile] window or the [Edit profiles] window. The scan setting items related to paper feeding can be specified in more detail. The [Feed option] window appears when you click the [Option] button for Feed in the [Add new profile] window or the [Edit profiles] window. The scan setting items related to paper feeding can be specified in more detail.
This section explains the setting items which are available when a local folder or network folder is the save destination for scanned images. One of the local folders is a folder that is synchronized with a cloud service.
When [Network folder] is selected for [Type] in [Managing options] in the [Add new profile] window or [Edit profiles] window, only the [Feed] and [Paper size] are displayed.
You cannot scan documents with the ScanSnap while the [Feed option] window is displayed.
- [ADF] tab/[Manual Feeder] tab
Switch the window for configuring the feeding method for the U-turn Scan in which a document is loaded in the ADF paper chute (cover) or Return Scan in which a document is inserted into the manual feeder.
- Feed mode
Select a feeding method for scanning documents.
The setting has an affect on [Feed] in [Scan settings] of the [Add new profile] window or of the [Edit profiles] window.
Normal scan
Scanning automatically finishes when all of the documents loaded in the ScanSnap are scanned.
Scanning automatically finishes when all of the documents inserted in the ScanSnap are scanned.
Scanning automatically finishes when all of the documents placed under the ScanSnap are scanned.
Continuous scan
Scans documents continuously in multiple batches.
Select this feeding method to scan documents more than the amount that can be loaded in the ADF paper chute (cover) on the ScanSnap.
Manual scan
Scans documents that are loaded one sheet at a time.
Select this feeding method to scan documents that can be damaged quite easily such as photographs, documents with overlapped areas such as envelopes, or large documents (larger than A4/Letter size) folded in half.
- [Scanning long page documents] checkbox (ScanSnap iX1600 Receipt Edition)
-
Appears when [Normal scan] or [Continuous scan] is set for [Feed].
If you select this checkbox, documents with a length of up to 3,000 mm (118.11 in.) can be scanned.
The length of a document that can be scanned varies depending on the setting for [Image quality] in the scan settings and the number of bits for the operating system of the computer that you are using.
Image quality Document length Automatic - For 32-bit OS
863 mm (34 in.)
- For 64-bit OS
3,000 mm (118.11 in.)
Normal Better Best Excellent 360 mm (14.17 in.)
- Feed mode
Select a feeding method for scanning documents.
The setting has an affect on [Feed mode setting] in [Scan settings] of the [Add new profile] window or of the [Edit profiles] window.
When the [ADF] tab is selected
Normal scan
Scanning automatically finishes when all of the documents loaded in the ADF paper chute (cover) on the ScanSnap are scanned.
Continuous scan
Scans documents continuously in multiple batches.
Select this feeding method to scan documents more than the amount that can be loaded in the ADF paper chute (cover) on the ScanSnap.
If you scan documents after the first scan, you can use the ADF paper chute (cover) or the manual feeder for scanning.
When the [Manual Feeder] tab is selected
Normal scan
Scanning automatically finishes when a document inserted into the manual feeder of the ScanSnap is scanned.
Continuous scan
Scans documents continuously in multiple batches.
If you scan documents after the first scan, you can use the ADF paper chute (cover) or the manual feeder for scanning.
- Multifeed detection
This is displayed when [ADF] tab is selected.
Multifeed refers to an error where more than one sheet is fed into the scanner at once.
Select a multifeed detection method.
None
Does not detect multifeed.
Check length
Detects multifeeds by the length of the document.
If a document is longer than the first scanned document when a batch of documents are loaded in the ScanSnap, this document size is determined to be an anomaly and a multifeed error is detected.
Never
Does not detect multifeed.
Check length
Detects multifeeds by the length of the document.
If a document is longer than the first scanned document when a batch of documents are loaded in the ScanSnap, this document size is determined to be an anomaly and a multifeed error is detected.
- [Automatically scan the second and subsequent sheets during a continuous scan] checkbox
-
This is displayed when [Manual Feeder] tab is selected.
If you select this checkbox, when you scan documents with [Continuous scan] selected for [Feed mode], inserting the second document (or subsequent documents to be scanned) into the manual feeder starts a scan automatically.
- [Scanning will not start if the inserted document is skewed] checkbox
-
This is displayed when [Manual Feeder] tab is selected.
If you select this checkbox, when a document is inserted skewed into the manual feeder, an error window appears and the scan is stopped.
This reduces damage to a document when a document is inserted skewed.
A skewed document may not be detected as an error depending on the degree of the skew or the size of the document.
- [Merge both sides of an image] checkbox
-
This is available when [Automatic detection] is selected for [Paper size].
This is displayed when [Manual Feeder] tab is selected.
Select this checkbox to automatically merge the front and back images into one image when a document larger than A4/Letter size folded in half is scanned. This is available only for the documents that satisfy the following conditions.
A3, B4, or double letter size documents with a double-page spread
Documents folded in half that have characters, a figure, or table on the fold line
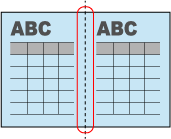
When a merged image is created automatically
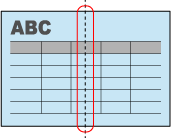
When a merged image is not created automatically
- Document type
Select the type of document to be scanned.
Select later
Specify this option to select the document type after scanning is complete.
Flat
Specify this option to scan documents other than books or magazines.
Double-page spread (Book/Magazine)
Specify this option to scan books or magazines.
Disables the setting for [Rotation] in the [Scan] tab in the [Detailed settings] window.
- Save option for double-page spread documents
Select a page order when you scan books or magazines.
Save as single-page image
Saves a double-page spread image as a single-page image.
Save as double-page spread image (left to right)
Splits a double-page spread image to the left and right and saves the split images separately. The left page becomes the first page.
Save as double-page spread image (right to left)
Splits a double-page spread image to the left and right and saves the split images separately. The right page becomes the first page.
- Document size
Specify the size of documents to be scanned.
Automatic detection
A4 (210 × 297 mm)
A5 (148 × 210 mm)
A6 (105 × 148 mm)
B5 (182 × 257 mm)
B6 (128 × 182 mm)
Postcard (100 × 148 mm)
Business card (90 × 55 mm, 55 × 90 mm)
Letter (8.5 × 11 in., 216 × 279.4 mm)
Legal (8.5 × 14 in., 216 × 355.6 mm)
Automatic detection (Maximum)
Automatic detection (A4/Letter landscape)
A3L (420 × 297 mm)
A4L (297 × 210 mm)
A5L (210 × 148 mm)
A6L (148 × 105 mm)
B4L (364 × 257 mm)
B5L(JIS) (257 × 182 mm)
B6L(JIS) (182 × 128 mm)
PostcardL (148 × 100 mm)
Business card (90 × 55 mm)
LetterL (11 × 8.5 in., 279.4 × 216 mm)
17 × 11 in. (431.8 × 279.4 mm)
LegalL (14 × 8.5 in., 355.6 × 216 mm)
- [Customize] button
-
This is available when [Flat] is selected in [Document type].
The [Additional custom size settings] window appears when you click this button.
A single paper size of your choice can be specified. Change the document size and click the [OK] button to overwrite the settings.
- [Carrier sheet] button
This is displayed when [Manual Feeder] tab is selected.
The [Carrier Sheet settings] window appears when you click this button.
The window is used to configure the settings such as the way in which a scanned image is saved and the size of the saved image when the Carrier Sheet or Photo Carrier Sheet is used to scan a document.
The window is used to configure the settings such as the way in which a scanned image is saved and the size of the saved image when the Carrier Sheet, Photo Carrier Sheet, or Booklet Carrier Sheet is used to scan a document.
The window is used to configure the settings such as the way in which a scanned image is saved and the size of the saved image when the Carrier Sheet is used to scan a document.
- Save as
-
one double-page spread image
Use this option to scan a document larger than A4/Letter size such as Double Letter, A3, or B4, by folding the document in half. Both sides of the document are scanned into one image.
two separate images (front and back)
Use this option to scan documents such as photos or non-standard size documents such as clippings that you do not want to damage.
Use this option to scan documents or booklets such as photos or non-standard size documents such as clippings that you do not want to damage.
- Paper size
-
Select a paper size to output the scanned image from the following options.
-
When [one double-page spread image] is selected
Automatic selection
A3 (297 × 420 mm)
B4 (257 × 364 mm)
11 ×17 in. (279.4 × 431.8 mm)
-
When [two separate images (front and back)] is selected
Automatic detection
Carrier Sheet size
-
- [Reduce vertical streaks] checkbox
-
Select this checkbox to reduce vertical streaks that are not on the document, but that appear in a scanned image.
- [Merge both sides of an image] checkbox
-
This is available when [Automatic detection] is selected for [Paper size].
Select this checkbox to automatically merge the front and back images into one image when a document larger than A4/Letter size folded in half is scanned. This is available only for the documents that satisfy the following conditions.
A3, B4, or double letter size documents with a double-page spread
Documents folded in half that have characters, a figure, or table on the fold line
When a merged image is created automatically
When a merged image is not created automatically
- [Detect multiple documents] checkbox
This is available when you select the following:
[Select later] or [Flat] is selected in [Document type].
[Automatic detection (Maximum)] or [Automatic detection (A4/Letter landscape)] is selected in [Document size].
When multiple (up to 10) documents are placed and scanned at once, the documents are detected and the scanned images are cropped automatically.
- [Check the image to be saved after scanning] checkbox
-
This is available when you select the following:
Select [Flat] or [Double-page spread (Book/Magazine)] for [Document type]
Select [Automatic detection (Maximum)] or [Automatic detection (A4/Letter landscape)] for [Document size]
When you select this checkbox, a window for checking the image to be saved is displayed after you scan a document.
When [Flat] is selected
The [ScanSnap Home - View cropped images] window appears.
When [Double-page spread (Book/Magazine)] is selected
The [ScanSnap Home - Book Image Viewer] window appears.
- [Reduce fluorescent lamp flicker] checkbox
Reduces the effects of ambient light.
However, the scanning speed is also reduced.
- [Thicken color images] checkbox
This is available when [Color] is selected for [Color mode] in the scan settings.
When you select this checkbox, scanned images are output in darker colors than the actual documents because color correction is not performed.
Select this checkbox if scanned images are faded or come out white.
- [Notify when glossy paper is detected.] checkbox
When you select this checkbox, a notification is sent when a glossy paper (a paper that reflects strong light) is detected.
- [Specify the waiting time to start scanning after pressing the [Scan] button] checkbox
Specifies a time period between the time you press the [Scan] button on the ScanSnap and the time the ScanSnap starts scanning a document.
When you clear this checkbox, the value in seconds is set to "0".
- Waiting time
Specifies the time period between the time you press the [Scan] button on the ScanSnap and the time the ScanSnap starts scanning a document.
Any time period between 1 and 10 seconds can be specified.
- [Configure settings for starting the next scan] checkbox
When you select this checkbox, you can configure settings for starting the next scan when you scan documents continuously.
When you clear this checkbox, perform one of the following operations to scan documents continuously.
Press the [Scan] button on the ScanSnap
In the window of ScanSnap Home, where "Load the next document." is displayed, click the [Continue Scanning] button
- Condition
-
Timed interval (Timed mode)
After the ScanSnap becomes ready for scanning and a specified time interval passes, the next scan starts automatically.
Page turning detection mode
When you turn the page of a book or magazine, the next scan starts automatically.
- Scan interval
Specifies a time period between the time the ScanSnap becomes ready for scanning and the time the next scan starts in the case of continuous scanning of documents.
Any time period between 0 and 10 seconds can be specified.
- [Correct skewed text] checkbox
When the checkbox is selected and the type of a document selected in [Type] is scanned, the horizontally skewed text, lines, or graphics in the scanned image are automatically corrected.
- Type
-
Flat
Corrects the following scanned images:
An image of a document that is scanned with a profile where [Flat] is selected for [Document type]
An image that is saved by selecting [Crop and save flat document images as-is] in the [ScanSnap Home - Image scanning and file saving] window that appears after a scan
Double-page spread
Corrects the following scanned images:
An image of a document that is scanned with a profile where [Double-page spread (Book/Magazine)] is selected for [Document type]
An image that is saved by selecting [Correct and save double-page spread document images (book/magazine)] in the [ScanSnap Home - Image scanning and file saving] window that appears after a scan
Both
Corrects all of the scanned images.
Flat
Corrects the following scanned images:
An image of a document that is scanned with a profile where [Flat] is selected for [Document type]
An image that is saved by selecting [Flat] in the [ScanSnap Home - Image scanning and file saving] window that appears after a scan
Double-page spread
Corrects the following scanned images:
An image of a document that is scanned with a profile where [Double-page spread (Book/Magazine)] is selected for [Document type]
An image that is saved by selecting [Correct and save double-page spread document images (book/magazine)] in the [ScanSnap Home - Image scanning and file saving] window that appears after a scan
Both
Corrects all of the scanned images.
- Multifeed detection
Multifeed refers to an error where more than one sheet is fed into the scanner at once.
Select a multifeed detection method.
None
Does not detect multifeed.
Check length
Detects multifeeds by the length of the document.
If a document is longer than the first scanned document when a batch of documents are loaded in the ScanSnap, this document size is determined to be an anomaly and a multifeed error is detected.
Check overlapping [Ultrasonic]
Detects multifeeds by sensing the overlapping of documents.
Never
Does not detect multifeed.
Check length
Detects multifeeds by the length of the document.
If a document is longer than the first scanned document when a batch of documents are loaded in the ScanSnap, this document size is determined to be an anomaly and a multifeed error is detected.
Check overlapping [Ultrasonic]
Detects multifeeds by sensing the overlapping of documents.
- [Merge both sides of an image] checkbox
-
This is available when [Automatic detection] is selected for [Paper size].
This is available when [Automatic detection] is selected for [Document size].
Select this checkbox to automatically merge the front and back images into one image when a document larger than A4/Letter size folded in half is scanned. This is available only for the documents that satisfy the following conditions.
A3, B4, or double letter size documents with a double-page spread
Documents folded in half that have characters, a figure, or table on the fold line
When a merged image is created automatically
When a merged image is not created automatically
- [Reduce vertical streaks] checkbox
-
Select this checkbox to reduce vertical streaks that are not on the document, but that appear in a scanned image.