Loading Documents such as Photographs and Clippings (with the (Carrier) Sheet)
To scan documents that can be damaged quite easily such as photographs, or non-standard size documents such as clippings, load the documents using the optional Carrier Sheet or Photo Carrier Sheet.
Note that multiple Carrier Sheets or Photo Carrier Sheets can be loaded and scanned in one go with the ScanSnap.
The procedure to perform a scan with the Photo Carrier Sheet is described as an example below.
When you save scanned images directly from the ScanSnap to a network folder, the optional Carrier Sheet and Photo Carrier Sheet cannot be used.
-
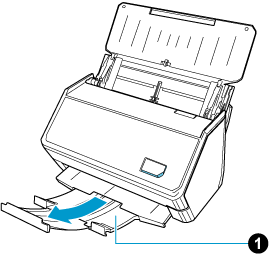
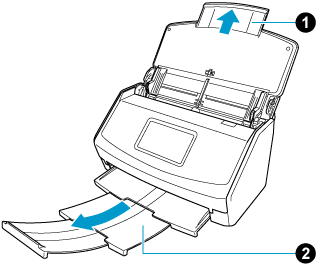
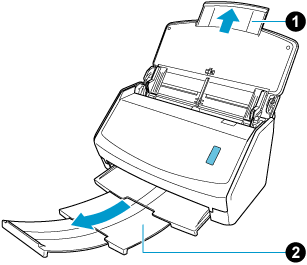
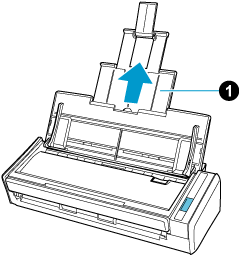
Extend the stacker
 on the ScanSnap. Pull out the extension and the stacker
  on the ScanSnap. Pull out the extension on the ScanSnap.

- Load a document in the ScanSnap.
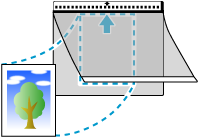
- Open the Photo Carrier Sheet and put the document inside.
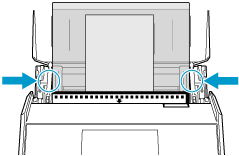
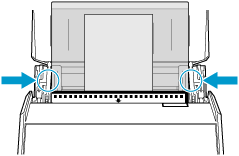
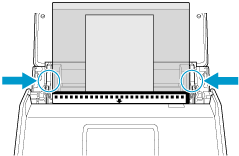
- Load the Photo Carrier Sheet in the ScanSnap.
Align the side guides with both ends of the Photo Carrier Sheet.

- Open the Photo Carrier Sheet and put the document inside.
- Modify the settings for a profile.
When [Cloud] is selected for [Type] in [Managing options] in the [Edit profiles] window, you do not need to modify the settings.
- Click the [Edit profiles] button to display the [Edit profiles] window.
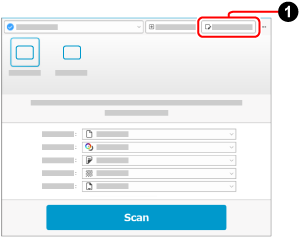
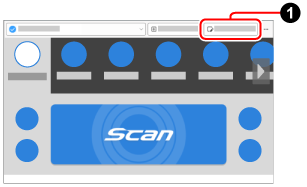
- Modify the settings for a profile in the [Edit profiles] window.
Select a profile that you use when scanning a document from the profile list. Click the [Option] button for [Feed] to display the [Feed option] window.
![[Edit profiles] Window](../../../jp/pc/images/common/ope_PF_edit_03.png)
![[Edit profiles] Window](../../../jp/pc/images/common/ope_PF_edit_old_03.png)
 Click the [Carrier sheet] button to display the [Carrier Sheet settings] window.
![[Feed option] Window](../../../jp/pc/images/common/ope_PF_edit_feed_03.png)
 Select [two separate images (front and back)] for [Save as].
 Select a paper size to output the scanned image for [Paper size].
![[Carrier Sheet settings] Window](../../../jp/pc/images/common/ope_PF_edit_feed_cs_03.png)
- Click the [Edit profiles] button