This website is designed to be used with ScanSnap Home 2.xx.
If you are using ScanSnap Home 3.0 or later, refer to here.
Replacing the Pad Assy
Replace the consumable (pad assy) of the ScanSnap when the replacement cycle is reached.
The suggested replacement cycle is as follows:
Every 10,000 sheets scanned
Every one year of use
Replace the consumable when either the number of sheets scanned or the period of use reaches the suggested replacement cycle.
Before replacing consumables, you must turn off the ScanSnap and unplug the power connection cable (power cable or USB bus power cable) from the power supply source (AC outlet or computer). Not doing so may cause fire or electrical shock.
Do not place internal parts such as the pad assy and the pick roller assembly within reach of small children. Doing so may cause injury.
The bottom part of the ScanSnap may become hot when the ScanSnap is being used, but this does not affect ScanSnap operation or cause any physical harm. Be careful not to drop the ScanSnap when carrying it.
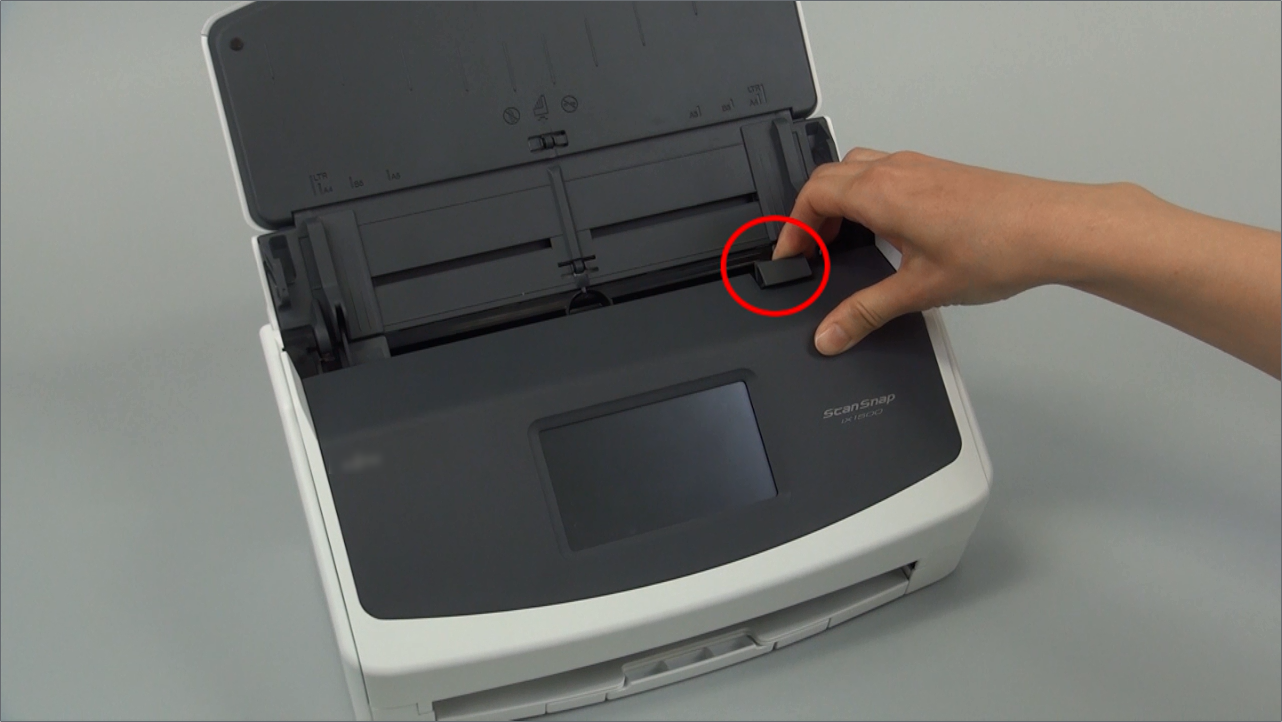
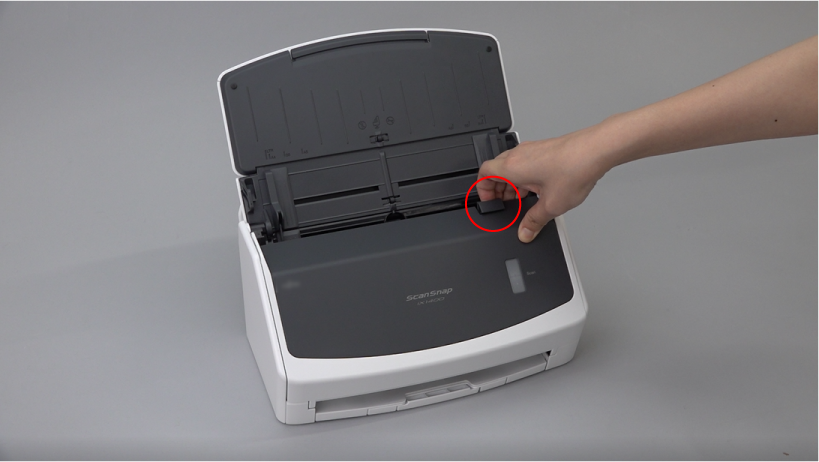
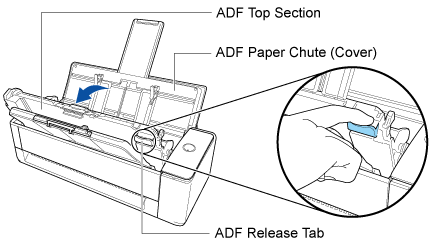
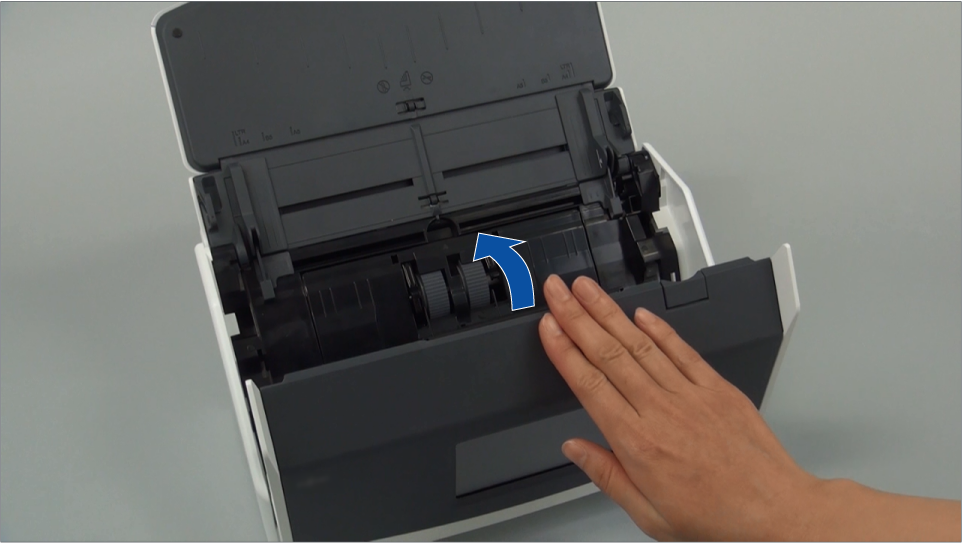
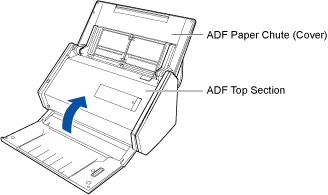
- Pull the ADF release tab towards you to open the ADF top section.
The body of the ScanSnap may vary in color depending on the region where you purchased the ScanSnap.

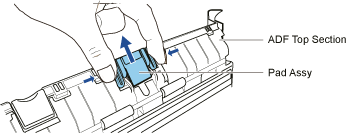
- Remove the pad assy.
Squeeze both ends of the pad assy and pull it out in the direction of the arrow.
- Attach the new pad assy while pressing the pad plate.
 ATTENTION
Attach the pad assy with the front side up.
If the pad assy is attached upside down, paper jams or other feeding errors may occur.

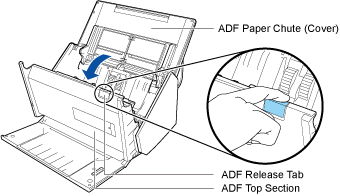
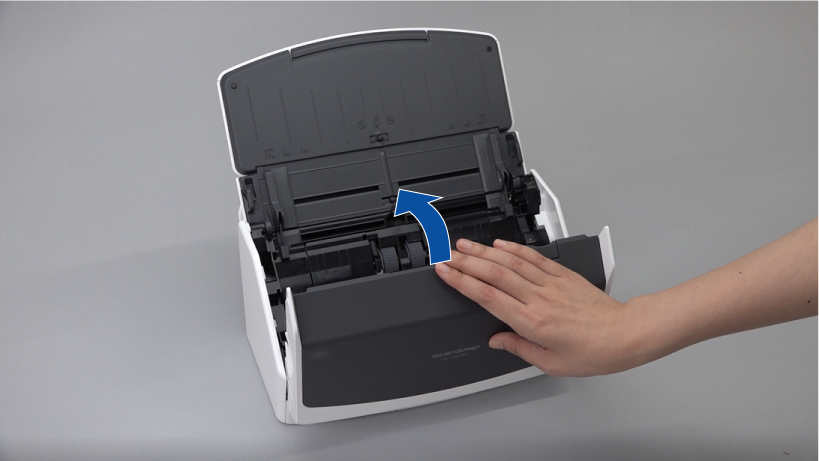
- Close the ADF top section.
Close the ADF top section until it locks in place.
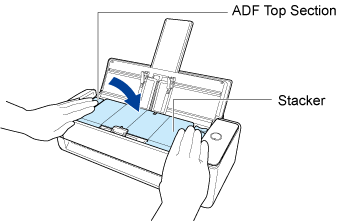
Close the ADF top section together with the stacker until it locks into position, indicated by a clicking sound.
 ATTENTION
Make sure that the ADF top section is completely closed.
Otherwise, paper jams or other feeding errors, or image faults may occur.
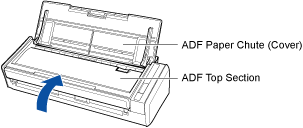
- Pull the ADF release tab towards you to open the ADF top section.
The body of the ScanSnap may vary in color depending on the region where you purchased the ScanSnap.
- Remove the pad assy.
Squeeze both ends of the pad assy and pull it out in the direction of the arrow.
- Attach the new pad assy while pressing the pad plate.
ATTENTION
Attach the pad assy with the front side up.
If the pad assy is attached upside down, paper jams or other feeding errors may occur.
- Close the ADF top section.
Close the ADF top section until it locks in place.
Close the ADF top section together with the stacker until it locks into position, indicated by a clicking sound.
ATTENTIONMake sure that the ADF top section is completely closed.
Otherwise, paper jams or other feeding errors, or image faults may occur.
- Reset the pad assy count.
- Display the Main Window of ScanSnap Home.
Click the [ScanSnap Home] icon
 in the application list that appears when you click Launchpad in the Dock.
- Display the Main Window of ScanSnap Home.