This website is designed to be used with ScanSnap Home 2.xx.
If you are using ScanSnap Home 3.0 or later, refer to here.
[Scan to Print] Window (Windows)
In the [Scan to Print] window, you can specify the settings such as a printer to be used or the number of copies in order to print the scanned images with a printer.
Also, you can check images to change the orientation of pages, remove unnecessary pages, or display the viewer window of ScanSnap Home to edit images before printing them with a printer.
The [Scan to Print] window is displayed in any of the following cases:
Selecting [Scan to Print] in the Quick Menu
Scanning a document by using a profile in which [Scan to Print] is set for [Send to] in [Application] in the [Edit profiles] Window.
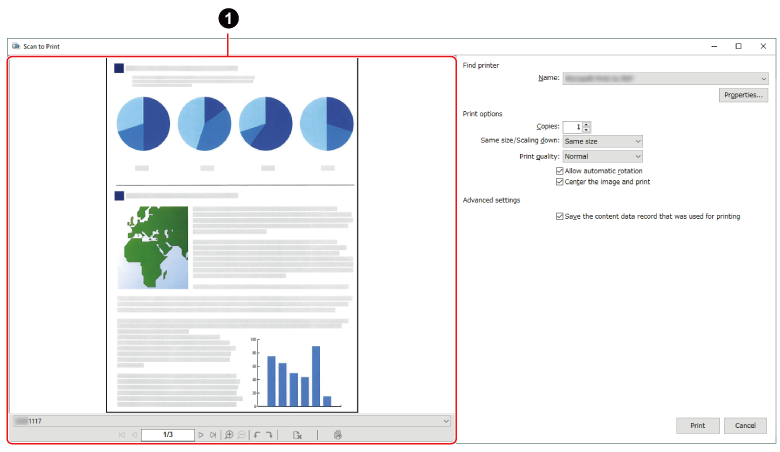

- Preview (
 )
) The image created from the document that you scanned is displayed.

Displays the first page.

Displays the previous page.

Displays a page specified in the page number field.

Displays the next page.

Displays the last page.

Magnifies the page.

Shrinks the page.

Deletes the selected page.

Rotates the selected page 90 degrees counterclockwise.

Rotates the selected page 90 degrees clockwise.

Displays images of the content data record selected in [Specify a title] or [Specify file name] in the viewer window.
If you display the viewer window from the [Scan to Print] window, some functions become unavailable.
The operations that are available are as follows:
- Find printer
-
- Name
Shows a list of printers that are recognized by the operating system. Select a printer to print scanned images.
By default, it is set to the [Default Printer] specified in the operating system.
- [Properties] button
Displays the properties window for a printer that you selected for [Name].
If some setting items in the properties window and the [Scan to Print] window are the same, priority is given to the settings in the [Scan to Print] window.
- Print options
-
- Copies
Specify the number of copies from 1 to 99.
- Same size/Scaling down
You can output images by one of the following preferences:
Shrink to paper size
Shrinks images to fit the output paper size when images to be printed are larger than the specified paper size.
Images are printed in their original size when images to be printed are smaller than the specified paper size.
Same size
Images are printed in their original size regardless of the output paper size. When images to be printed are larger than the specified paper size, images that go outside of the paper area are cropped.
- Print quality
Select the resolution for printing
Normal
Prints at a resolution of 150 dpi.
Fine
Prints at the same resolution as the resolution of an image created from the document that you scanned.
- [Allow automatic rotation] checkbox
Select this checkbox to rotate the images so that the length-to-width ratio is the same as the paper size used to print the image.
- [Center the image and print] checkbox
Select this checkbox to print the image on the center of the page.
- Advanced settings
-
- [Save the content data record that was used for printing] checkbox
If you clear this checkbox, images created from documents that you scanned are not saved to your computer.
- [Print] button
Prints the scanned images according to the settings configured in this window.
- [Cancel] button
Cancels the settings and returns to the Quick Menu (when the Quick Menu is used).
Cancels the settings and displays a message to confirm whether or not to delete the scanned images (when the Quick Menu is not used).