Switching the ScanSnap You Use
Connecting the ScanSnap to a computer registers the ScanSnap with ScanSnap Home. If multiple ScanSnap units have been connected so far, you can switch the ScanSnap you use by selecting a ScanSnap unit from the list of ScanSnap units at the top of the scan window.
When connecting two or more ScanSnap units with a USB cable, turn off a ScanSnap that is not being used and then switch to the ScanSnap that you want.
-
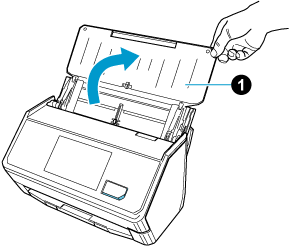
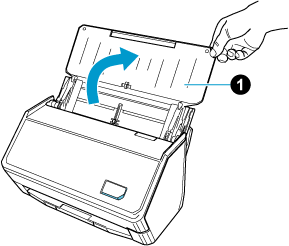
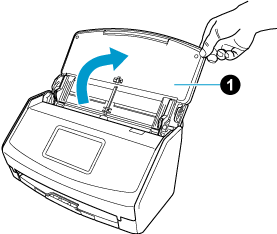
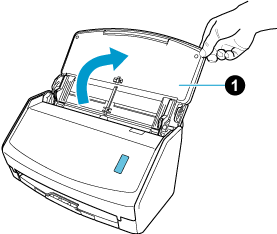
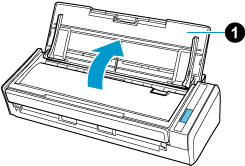
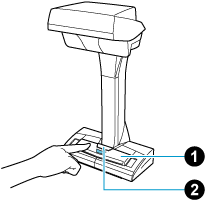
Open the ADF paper chute (cover)
 of the ScanSnap. Hold the right side of the ADF paper chute (cover)
  of the ScanSnap then open it or press the [Scan] button
  . Open the feed guide of the ScanSnap. Press the [Scan] button or [Stop] button on the ScanSnap.
When the ADF paper chute (cover) is opened, the power is turned on.
When the ADF paper chute (cover) is opened or the [Scan] button is pressed, the power is turned on.
Open the ADF paper chute (cover) fully so that the [Scan] button lights up in blue.
When the ADF paper chute (cover) is opened, the extension
will rise automatically.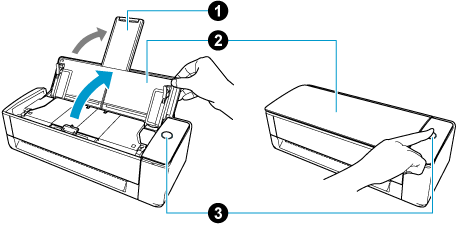
When the feed guide is opened, the power is turned on.
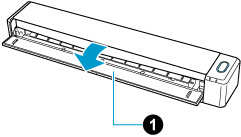
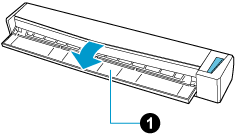
Press the [Scan] button or [Stop] button on the ScanSnap to turn the power on.
- Check the scanner name of the ScanSnap you use.
- Press
 in the home screen on the touch panel of the ScanSnap to display the [Settings] screen.
- Press [Install the app] to display the [Install the app] screen.
- Check the scanner name that is displayed in [Scanner name].
- Press
 in the home screen on the touch panel of the ScanSnap to display the [Settings] screen.
- Press
 to display the [Connecting Devices] screen.
- Check the scanner name that is displayed in [Scanner name].
- Press
-
Open the list of ScanSnap units at the top of the window and select the scanner name of the ScanSnap to be used .


When the [Connect to the scanner] button is displayed, click the button.
The [Connect to the scanner] button is displayed when [Selected user] or [Connected user] is set for [Display of profiles] in the [Scanner settings] screen that can be displayed after displaying the [Settings] screen on the touch panel.
When the [Connect to the scanner] button is displayed, click the button.
The default scanner name of the ScanSnap is "ModelName-<Serial No.>".
If you changed the scanner name by using ScanSnap Wireless Setup Tool, select that scanner name.
The scanner name of the ScanSnap is "ModelName-<Serial No.>".
When the indicator for the connection status of the scanner in the list of ScanSnap units turns to  , the ScanSnap is synchronized with ScanSnap Home and becomes ready to scan.
When you switch the ScanSnap that you use, the profile that was created with the ScanSnap you newly chose is displayed in the profile list in the scan window. However, if you are using multiple ScanSnap iX2500 units, profiles for all ScanSnap iX2500 units are displayed by the profile synchronization function.
When you switch the ScanSnap that you use, the profile that was created with the ScanSnap you newly chose is displayed in the profile list in the scan window.
A profile needs to be created for each ScanSnap that you use.