This website is designed to be used with ScanSnap Home 2.xx.
If you are using ScanSnap Home 3.0 or later, refer to here.
The ScanSnap Does Not Turn On
If the ScanSnap does not turn on, check the following:
Is the power cable connected to the ScanSnap and the AC outlet?
Connect the power cable to the ScanSnap and the AC outlet.
Note that the power cable is not required when the USB bus power cable is connected.
Is the battery indicator flashing in orange?
The remaining battery power is low.
Connect the ScanSnap to the computer with a USB cable to charge the battery.
The remaining battery power can be checked in the [Details] window of ScanSnap Home.
For details, refer to Checking the Information of the ScanSnap.
Is the USB bus power cable connected to the computer and the ScanSnap?
Perform one of the following:
Note that the USB bus power cable is not required when the power cable is connected.
Connect the USB bus power cable to the computer and the ScanSnap.
If you are using a USB hub, connect the USB bus power cable to the computer directly.
Unplug the USB bus power cable from the computer and the ScanSnap, then plug it back in.
Make sure to leave at least 5 seconds between unplugging and plugging the cable.
Is the USB cable connected to the computer and the ScanSnap?
Perform one of the following:
Connect the USB cable to the computer and the ScanSnap.
If you are using a USB hub, connect the ScanSnap directly to the computer via a USB cable.
Unplug the USB cable from the computer and the ScanSnap, then plug it back in.
Make sure to leave at least 5 seconds between plugging and unplugging the cable.
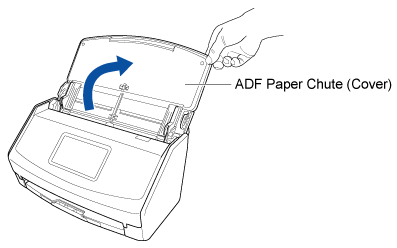
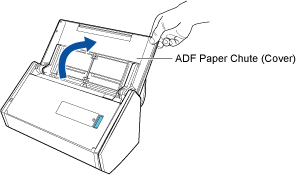
Is the ADF paper chute (cover) open?
If the ADF paper chute (cover) is closed, open the ADF paper chute (cover) to turn on the ScanSnap.

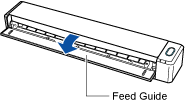
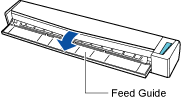
Is the feed guide open?
If the feed guide is closed, open the feed guide to turn on the ScanSnap.
Did you press the [Scan] button or the [Stop] button on the ScanSnap?
Turn the ScanSnap on by pressing the [Scan] button or the [Stop] button on the ScanSnap.
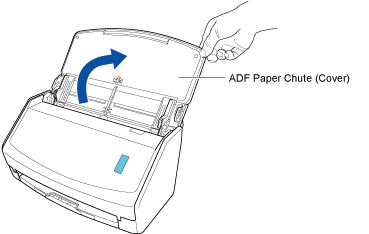
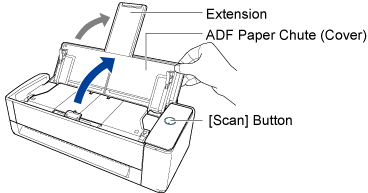
Is the ADF paper chute (cover) opened fully?
Open the ADF paper chute (cover) fully so that the [Scan] button lights up in blue.
When the ADF paper chute (cover) is opened, the extension will rise automatically.
Did you set the ScanSnap to turn on by inserting a document into the manual feeder?
If the ScanSnap has been set to turn on by inserting a document into the manual feeder, inserting a document such as a semi-transparent document (e.g. tracing paper), thin document, or transparent sheet may not turn on the ScanSnap.
Perform one of the following to turn on the ScanSnap.
Opening the ADF paper chute (cover)
Pressing the [Scan] button
Are you using the AC adapter and cables that are bundled with the ScanSnap?
Use only the AC adapter and cables that are bundled with the ScanSnap.
Is the AC adapter and the AC cable connected properly?
Insert the AC cable plug all the way into the AC adapter.
Has the computer just been started up, or resumed from sleep mode?
When the ADF paper chute (cover) is open while the ScanSnap and the computer are connected via a USB cable, the ScanSnap is turned on/off in conjunction with the computer's power.
When the feed guide is open while the ScanSnap and the computer are connected via a USB cable, the ScanSnap is turned on/off in conjunction with the computer's power.
When the startup of the computer is not completed or the computer is in sleep mode, the ScanSnap may be turned off.
When the ScanSnap is turned on, it is turned off in conjunction with the computer power-off.
Wait until the touch panel of the ScanSnap is ready to be used.
Wait until the [Scan] button on the ScanSnap lights on.
Wait until the [Scan/Stop] button on the ScanSnap lights on.
Turn the ScanSnap on by pressing the [Scan] button or the [Stop] button on the ScanSnap.
Is the temperature of the ScanSnap high or low?
To ensure safety, the ScanSnap may not turn on if the temperature is outside the assured temperature range (5 to 35 degrees C).
Turn on the ScanSnap when its temperature is within the assured temperature range (5 to 35 degrees C).
An error may have occurred in the ScanSnap
Disconnect all the cables from the ScanSnap, reconnect them after 10 minutes, and then check if the problem is solved.
Reset the ScanSnap by pressing the [Scan/Stop] button on the ScanSnap and the WPS button at the back of the ScanSnap at the same time for more than 5 seconds, and then check if the problem is solved.
If the problem still persists, charge the ScanSnap for more than 3 hours, and then check again if the problem is solved.