This website is designed to be used with ScanSnap Home 2.xx.
If you are using ScanSnap Home 3.0 or later, refer to here.
Saving a Scanned Image in a Cloud Service by Using a Client Application
Save an image created from the document that you scanned with the ScanSnap in a cloud service by using a client application for the cloud service.
To save an image created from a document that you scanned with the ScanSnap to a cloud service, two methods are available.
For details, refer to Differences in the Methods for Establishing a Link with a Cloud Service.
The following cloud services are supported: Download a client application from the download page in accordance with the cloud service that you intend to use, to install it.
Cloud Service (*1) |
Client Application |
|---|---|
Dropbox |
Dropbox Desktop app version 77.4.131 or later Refer to here for the download page. |
Evernote |
Evernote for Windows version 6.20.2 or later Evernote for Mac version 7.11 or later Refer to here for the download page. |
Google Drive |
Google Drive for desktop 50.0.11.0 or later Refer to here for the download page. |
OneDrive |
OneDrive sync client version 19.103.0527 or later(*2) Refer to here for the download page. |
| *1: | A cloud service for businesses are not supported. |
| *2: | If OneDrive sync client is already installed, update the client application to the latest version before using it. |
-
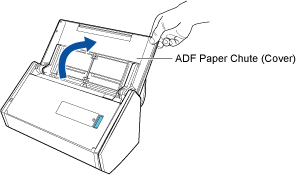
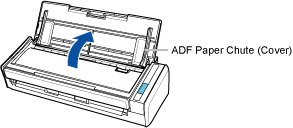
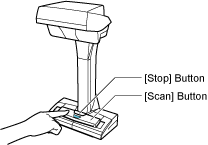
Open the ADF paper chute (cover) of the ScanSnap to turn the power on. Hold the right side of the ADF paper chute (cover) of the ScanSnap then open it or press the [Scan] button to turn it on. Open the feed guide of the ScanSnap to turn the power on. Press the [Scan] button or [Stop] button on the ScanSnap to turn the power on.
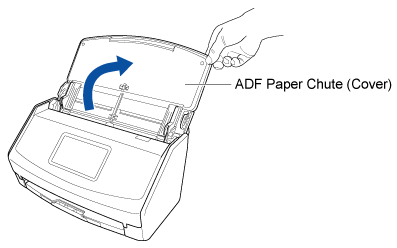
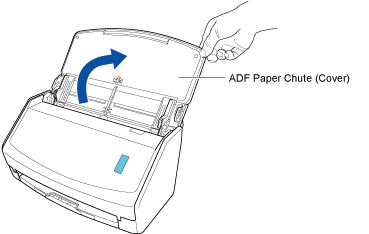
Open the ADF paper chute (cover) fully so that the [Scan] button lights up in blue.
When the ADF paper chute (cover) is opened, the extension will rise automatically.

-
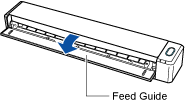
Open the feed guide of the ScanSnap to turn the power on.
TIP
-
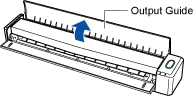
If you want the document to be ejected from the front of the ScanSnap or when there is not enough space where the document exits the ScanSnap, open the output guide.
-
How the document is ejected differs as below depending on whether the output guide is open or closed.
-
When the output guide is closed

-
When the output guide is open

-
-
-
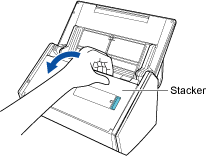
Pull the stacker towards you.
-
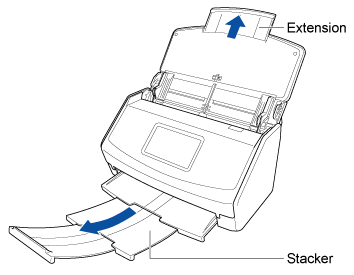
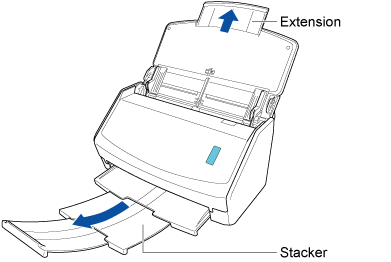
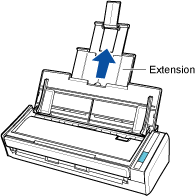
Pull out the extension and the stacker on the ADF paper chute (cover). Pull out the extension on the ADF paper chute (cover) and open the stacker. Pull out the extension.

- Configure the settings for a profile.
- Click the [Scan] button at the top of the Main Window of ScanSnap Home to display the Scan Window.
If the main window is not already displayed, refer to To Display the Main Window.
If the main window is not already displayed, click the [ScanSnap Home] icon
 in the application list that appears when you click Launchpad in the Dock.
 - Click
 to display the [Add new profile] Window.
- Click the [Scan] button at the top of the Main Window of ScanSnap Home to display the Scan Window.
- Scan a document.
-
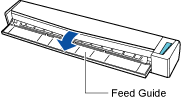
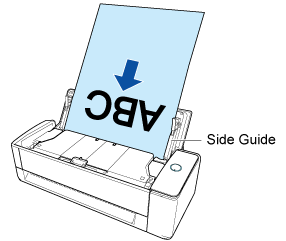
Load the document in the ADF paper chute (cover) of the ScanSnap. Load the documents in the ADF paper chute (cover) or insert the document into the manual feeder. Insert the document straight into the feeding section of the ScanSnap, with the scanning side facing up.
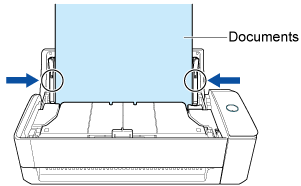
Load the document face-down and head-first with the back facing you (when loading multiple documents, the last page is on the top). Adjust the number of documents so that they do not go beyond
 within the side guides when they are loaded.
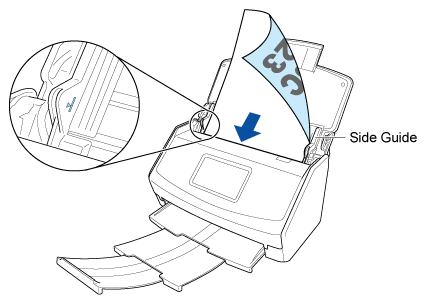
Make sure that the document is fed into the ScanSnap and is held firmly.
 TIP
TIPThe ScanSnap can scan documents in various sizes.
For details about loading documents, refer to How to Scan Documents.
For details about loading documents, refer to How to Scan Documents.
For details about loading documents, refer to How to Scan Documents.
For details about inserting a document refer to How to Scan Documents.
When scanning documents all at once (U-turn Scan)
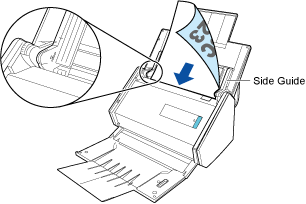
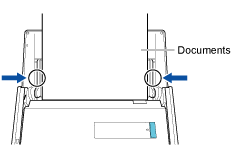
Load the documents in the ADF paper chute (cover), and align the side guides with both ends of the documents.
Load the document face-up and head-first with the front facing you (when loading multiple documents, the first page is on the top).
Hold each side guide in the middle to adjust them. Otherwise, the document may be fed skewed.
 ATTENTION
-
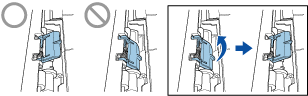
Make sure that the document support tab is open.
Otherwise, a paper jam may occur.
If the document support tab is closed, pull it up with your fingers.
-
If the document support tab comes off, contact the distributor/dealer where you purchased this product.
-
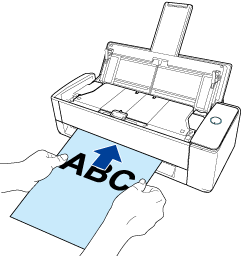
When scanning documents one by one (Return Scan)
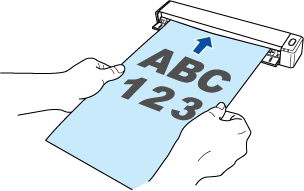
Insert a document into the manual feeder.
Face the front side of a document upwards and insert the top end of the document straight into the middle of the manual feeder.
Make sure that the document is fed into the ScanSnap and is held firmly.
 ATTENTION
The document comes out from the back of the ScanSnap during the scan.
Leave space (about the length of the document) at the back of the ScanSnap.
TIPYou can scan a document with the ADF paper chute (cover) closed.
-
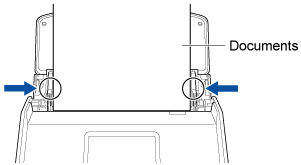
Align the side guides with both ends of the document.
Hold each side guide in the middle to adjust them. Otherwise, the document may be fed skewed.
-
Load the document in the ADF paper chute (cover) of the ScanSnap. Load the documents in the ADF paper chute (cover) or insert the document into the manual feeder. Insert the document straight into the feeding section of the ScanSnap, with the scanning side facing up.
Images created from the document that you scanned are saved in a cloud service via a client application for the cloud service.
To check the scanned images, log into the cloud service that is specified for the save destination.
You can receive a notification on your computer about the transfer status or errors for the scanned images after the scanning of documents is complete.
For details, refer to Specifying Actions of ScanSnap Home.