Saving Scanned Images Directly from the ScanSnap to a Cloud Service
Save an image created from the document that you scanned in a cloud service by using ScanSnap Cloud.
To use ScanSnap Cloud, you must sign in to a ScanSnap account.
For regions where ScanSnap accounts can be used, refer to here.
-
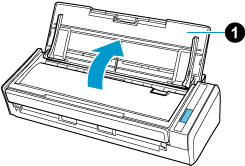
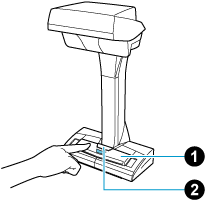
Open the ADF paper chute (cover)
 of the ScanSnap. Hold the right side of the ADF paper chute (cover)
  of the ScanSnap then open it or press the [Scan] button
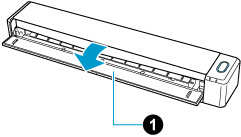
  . Open the feed guide of the ScanSnap. Press the [Scan] button or [Stop] button on the ScanSnap.
When the ADF paper chute (cover) is opened, the power is turned on.
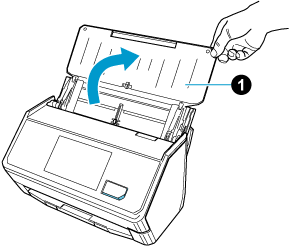
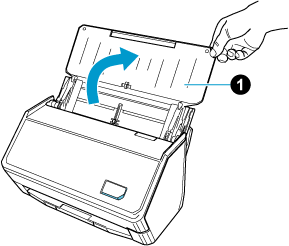
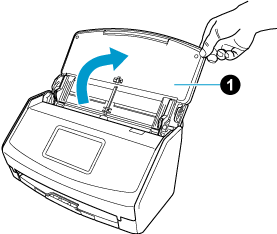
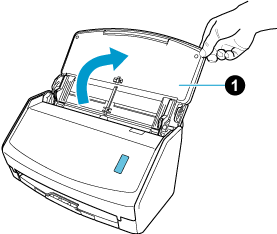
When the ADF paper chute (cover) is opened or the [Scan] button is pressed, the power is turned on.
Open the ADF paper chute (cover) fully so that the [Scan] button lights up in blue.
When the ADF paper chute (cover) is opened, the extension
will rise automatically.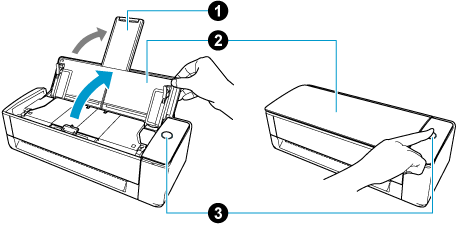
When the feed guide is opened, the power is turned on.
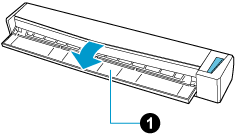
Press the [Scan] button or [Stop] button on the ScanSnap to turn the power on.
- Configure the settings for a profile.
When you establish a link with a cloud service by using ScanSnap Cloud, the methods for creating a profile vary depending on your needs.
To establish a link with a cloud server via ScanSnap Cloud, modify the settings in the [Scan to Cloud] profile that is available as a default profile in order to create a profile. You can configure the scan settings for each document type in order to detect a document type automatically.
Only one profile per ScanSnap account can be created by using the [Scan to Cloud] profile.
- When you want to scan all documents in one go without thinking about which type of document to select every time
-
Create a profile that is used to automatically detect a type of image ("Documents", "Business Cards", "Receipts" or "Photos") created from a document that you scan, and sort and save the scanned images to a cloud service that you specified for each document type.
Create a profile that is used to automatically detect a type of image ("Documents", "Business Cards", "Receipts/Invoices" or "Photos") created from a document that you scan, and sort and save the scanned images to a cloud service that you specified for each document type.
Use the template profile [Scan to Cloud] to create a new profile.
Modify the settings in the [Scan to Cloud] profile that is available as a default profile in order to create a profile. The scan settings can be specified for each document type.
Only one profile per ScanSnap account can be created by using the [Scan to Cloud] profile.
Display the Scan Window of ScanSnap Home on the computer.
Click the [Add profiles] button
to display the [Add new profile] Window (When Using ScanSnap Cloud).Click the [Edit profiles] button
to display the [Edit profiles] Window (When Using ScanSnap Cloud).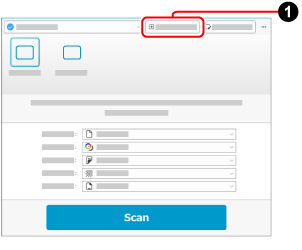
In the [Add new profile] window, create a profile.
Modify the settings for a profile in the [Edit profiles] window.
Select [Scan to Cloud] from [Cloud services (via ScanSnap Cloud server)] on the template list. Select [Scan to Cloud] from the profile list. In the list that is displayed when you click the [Select] button for [Cloud Service], select a cloud service to specify it as a save destination. In the [ScanSnap Cloud - Select Save Destination] window that is displayed when you click the [Select] button for [Save to], select the save destination for scanned image that is set for a cloud service that you established a link with.![[Add new profile] Window](../../../jp/pc/images/common/ope_PF_add_scloud_send_01.png)
![[Edit profiles] Window](../../../jp/pc/images/common/ope_PF_edit_scloud_old_01.png)
Click the [Add] button in the [Add new profile] window.
Click the [Save] button in the [Edit profiles] window.
- When you want to use a created profile depending on the type of a document
-
Create a profile that is used to save an image (created from a document that you scanned) to a cloud service that has been set for one of the four document types ("Documents", "Business Cards", "Receipts", or "Photos").
Create a profile that is used to save an image (created from a document that you scanned) to a cloud service that has been set for one of the four document types ("Documents", "Business Cards", "Receipts/Invoices", or "Photos").
Use a template profile to create a new profile.
Display the Scan Window of ScanSnap Home on the computer.
Click the [Add profiles] button
to display the [Add new profile] Window (When Using ScanSnap Cloud).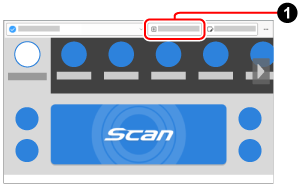
In the [Add new profile] window, create a profile.
Select a template profile other than [Scan to Cloud] and [Email Directly] from [Cloud services (via ScanSnap Cloud server)] on the template list. Select a document type for [Document type detection]. In the list that is displayed when you click the [Select] button for [Cloud Service], select a cloud service to specify it as a save destination. In the [ScanSnap Cloud - Select Save Destination] window that is displayed when you click the [Select] button for [Save to], select the save destination for scanned image that is set for a cloud service that you established a link with.
![[Add new profile] Window](../../../jp/pc/images/common/ope_PF_add_scloud_01.png)
![[Add new profile] Window](../../../jp/pc/images/common/ope_PF_add_scloud_old_01.png)
Click the [Add] button in the [Add new profile] window.
- Click the [Edit profiles] button to display the [Edit profiles] Window (When Using ScanSnap Cloud).
- Modify the settings for a profile in the [Edit profiles] window.
Select [Scan to Cloud] from the profile list. In the list that is displayed when you click the [Select] button for [Cloud Service], select a cloud service to specify it as a save destination. In the [ScanSnap Cloud - Select Save Destination] window that is displayed when you click the [Select] button for [Save to], select the save destination for scanned image that is set for a cloud service that you established a link with.
-
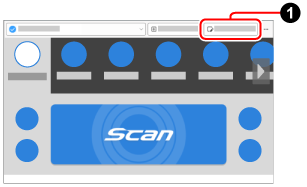
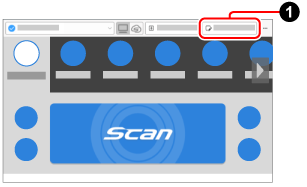
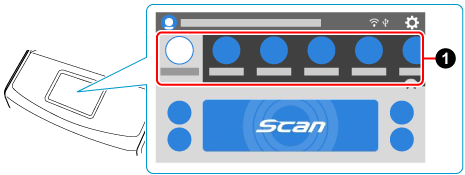
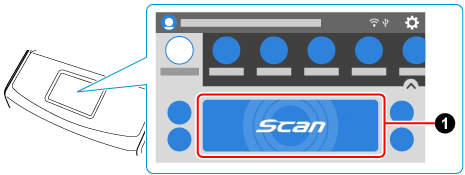
From the profile list on the touch panel, select the profile that you have configured in step 4. Click
 in the scan window and check whether the [Scan] button on the ScanSnap lights up in purple. Click in the scan window and check that the [Scan/Stop] button on the ScanSnap lights up in purple.

-
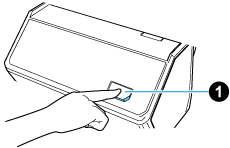
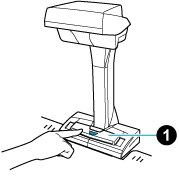
Press the [Scan] button to scan the documents. Press the [Scan] button on the touch panel to scan the documents. Press the [Scan/Stop] button to scan the document. Press the [Scan] button to scan the documents.
To scan documents which are longer than 360 mm (14.17 in.), hold down the [Scan] button for 3 seconds or longer.
To scan documents which are longer than 360 mm (14.17 in.), hold down the [Scan] button for 3 seconds or longer.


If the [Scan] button is still flashing in blue when the scanning of documents is complete, press the [Scan] button again to finish the scan.
If the [Scan] button is still flashing in blue when the scanning of documents is complete, press the [Scan] button again to finish the scan.
If the [Scan/Stop] button is still flashing in blue when the scanning of documents is complete, press the [Scan/Stop] button again to finish the scan.
If the power LED is still flashing in blue when the scanning of documents is complete, press the [Stop] button to finish the scan.
An image of the document that you scanned is saved in a cloud service via the ScanSnap Cloud server.
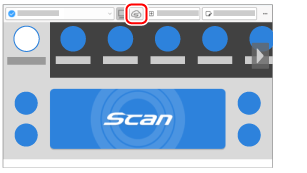
You can check the image that is saved on the ScanSnap Cloud server by clicking on the toolbar in the main window of ScanSnap Home. The image that is saved on the ScanSnap Cloud server is kept for two weeks.
If the settings in a profile have already been configured, you can save an image of a document that you scanned in a cloud service by selecting the profile on the touch panel without having to start up a computer.
If the [Scan] button on the ScanSnap lights up in purple, you can save an image of a document that you scanned in a cloud service without having to start up a computer.
If the [Scan/Stop] button on the ScanSnap lights up in purple, you can save an image of a document that you scanned in a cloud service without having to start up a computer.