This website is designed to be used with ScanSnap Home 2.xx.
If you are using ScanSnap Home 3.0 or later, refer to here.
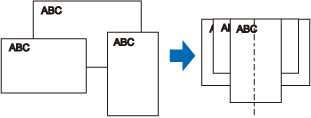
Scanning Documents of Different Sizes in One Go
Load and scan the documents of different widths and lengths together in the ADF paper chute (cover) on the ScanSnap.
Scanning documents of different sizes in one batch is only available for U-turn Scan, in which a document is loaded in the ADF paper chute (cover) and scanned.
For details about documents that can be scanned with U-turn Scan, refer to Documents That Can Be Scanned with the ScanSnap in the ScanSnap Help.
-
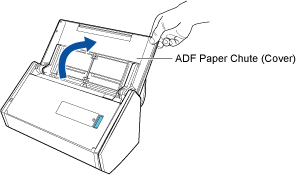
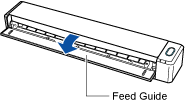
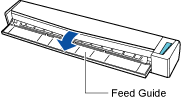
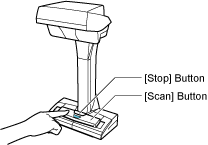
Open the ADF paper chute (cover) of the ScanSnap to turn the power on. Hold the right side of the ADF paper chute (cover) of the ScanSnap then open it or press the [Scan] button to turn it on. Open the feed guide of the ScanSnap to turn the power on. Press the [Scan] button or [Stop] button on the ScanSnap to turn the power on.
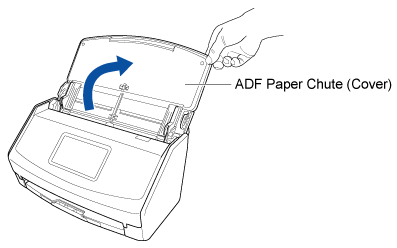
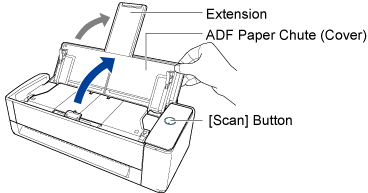
Open the ADF paper chute (cover) fully so that the [Scan] button lights up in blue.
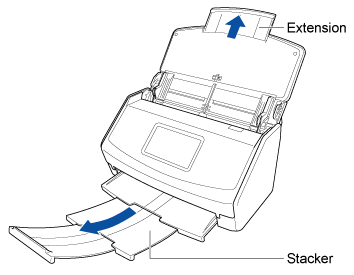
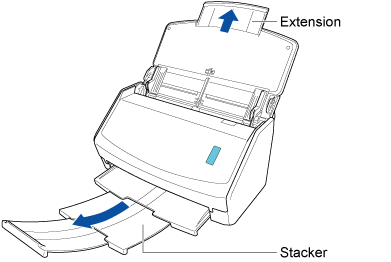
When the ADF paper chute (cover) is opened, the extension will rise automatically.

-
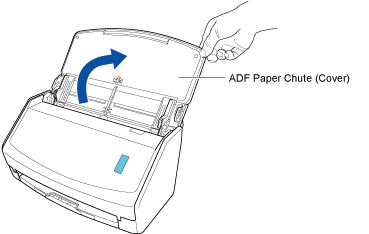
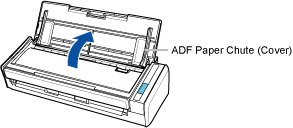
Hold the right side of the ADF paper chute (cover) on the ScanSnap, and then open it to turn it on.
Open the ADF paper chute (cover) fully so that the [Scan] button lights up in blue.
When the ADF paper chute (cover) is opened, the extension will rise automatically.
-
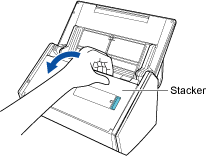
Pull the stacker towards you.
-
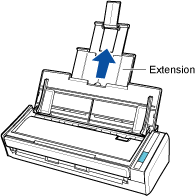
Pull out the extension and the stacker on the ADF paper chute (cover). Pull out the extension on the ADF paper chute (cover) and open the stacker. Pull out the extension.

- Configure the settings for a profile.
- Click the [Scan] button at the top of the Main Window of ScanSnap Home to display the Scan Window.
If the main window is not already displayed, refer to To Display the Main Window.
If the main window is not already displayed, click the [ScanSnap Home] icon
 in the application list that appears when you click Launchpad in the Dock.
 - Click
 to display the [Edit profiles] Window.
 - Select a profile for which you want to modify the settings from the profile list.
TIP
When creating a new profile, click
 .
.From the template list in the [Add new profile] window that appears when you click
, select a template profile and modify the settings.
- Click the [Scan] button at the top of the Main Window of ScanSnap Home to display the Scan Window.
- Click the [Scan] button at the top of the Main Window of ScanSnap Home to display the Scan Window.
If the main window is not already displayed, refer to To Display the Main Window.
If the main window is not already displayed, click the [ScanSnap Home] icon
in the application list that appears when you click Launchpad in the Dock. -
Specify the feeding method.
When the feed mode setting icon displayed on the right side of the [Scan] button on the touch panel is
 , select [Normal scan] or [Continuous scan] in the [Feed mode setting] screen that is displayed when the icon is pressed.
When the feed mode setting icon displayed on the right side of the [Scan] button on the touch panel is
, select [Normal scan] or [Continuous scan] in the [Feed mode setting] screen that is displayed when the icon is pressed. - Load documents in the ScanSnap.
-
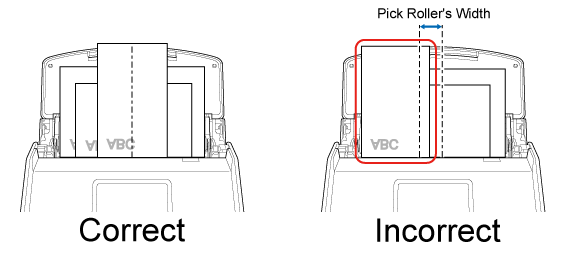
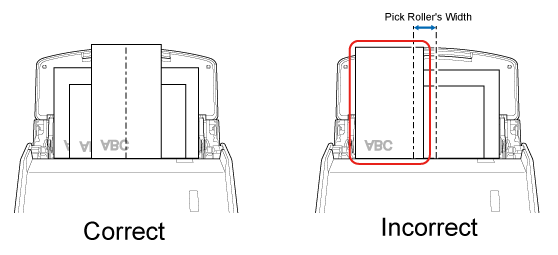
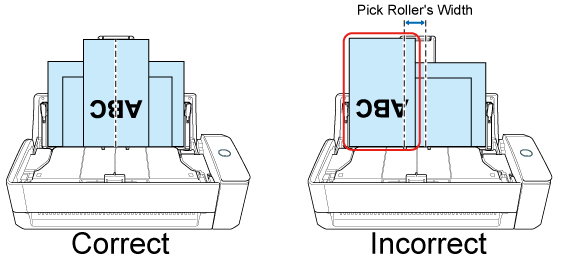
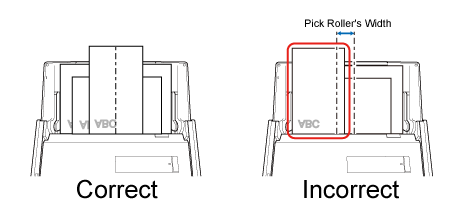
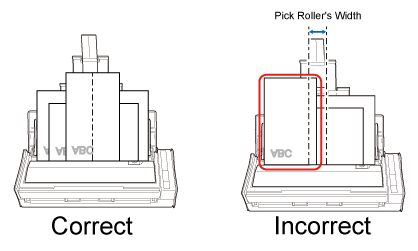
Align the leading edge and the center of the documents.
-
Load the documents face-down and top-first with the back of the last document facing you. Load the documents face-down and top-first with the front of the first document facing you.
The pick roller feeds the documents. Load all documents over one another above the pick roller (center). Documents that are not loaded above the pick roller cannot be fed.
The pick roller feeds the documents. Load all documents over one another above the pick roller (center). Documents that are not loaded above the pick roller cannot be fed.
 ATTENTION
Also, adjust the side guides to the widest document in the batch. Load the other documents so that they can be scanned straight. If the documents are skewed during scanning, the following problems may occur:
Part of the scanned image appears missing
Slant lines appear in the scanned image
The size of the scanned image differs from the document size
-
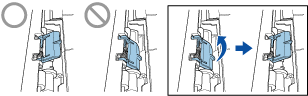
Make sure that the document support tab is open.
Otherwise, a paper jam may occur.
If the document support tab is closed, pull it up with your fingers.
-
If the document support tab comes off, contact the distributor/dealer where you purchased this product.
-
Align the leading edge and the center of the documents.
The image created from the document that you scanned is saved in the folder which is specified for [Save to] in the profile.
If documents are not scanned straight, it is recommended that you try scanning them one by one.
To scan documents one by one, select [Manual scan] in the [Feed mode setting] screen on the touch panel of the ScanSnap. Tap the feed mode setting icon displayed on the right side of the [Scan] button to display the [Feed mode setting] screen.
To scan documents one by one, select [Manual scan] in the [Feed mode setting] screen on the touch panel of the ScanSnap. Tap the feed mode setting icon displayed on the right side of the [Scan] button to display the [Feed mode setting] screen.
-
You can receive a notification on your computer about the document type for the content data records and the save destination for the scanned images after the scanning of documents is complete.
For details, refer to Specifying Actions of ScanSnap Home.
When you establish a link with a cloud service with ScanSnap Cloud, refer to Specifying Actions When Using ScanSnap Cloud.
For details, refer to Specifying Actions of ScanSnap Home.