• HOME
  • ScanSnap Help
  • Scanning Documents
  • How to Scan Documents
  • Scanning Documents such as Photographs and Clippings (with the (Carrier) Sheet)

Scanning Documents such as Photographs and Clippings (with the (Carrier) Sheet)

Using the optional Carrier Sheet or Photo Carrier Sheet allows you to scan documents that can be damaged quite easily such as photographs, or non-standard size documents that are difficult to load directly such as clippings.

Note that multiple Carrier Sheets or Photo Carrier Sheets can be loaded and scanned in one go with the ScanSnap.

The procedure to perform a scan with the Photo Carrier Sheet is described as an example below.

HINT
  • When you save scanned images directly from the ScanSnap to a network folder, the optional Carrier Sheet and Photo Carrier Sheet cannot be used.

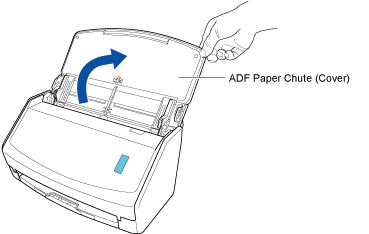
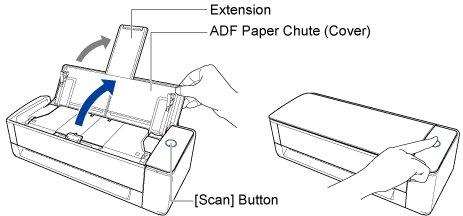
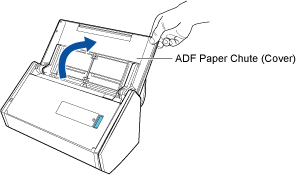
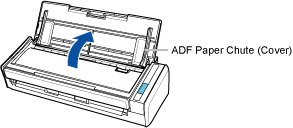
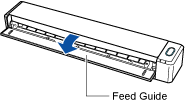
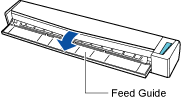
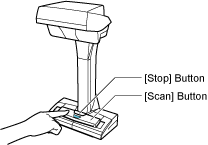
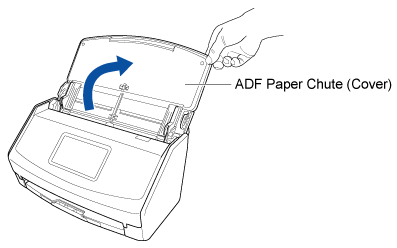
  1. Open the ADF paper chute (cover) of the ScanSnap to turn the power on. Hold the right side of the ADF paper chute (cover) of the ScanSnap then open it or press the [Scan] button to turn it on. Open the feed guide of the ScanSnap to turn the power on. Press the [Scan] button or [Stop] button on the ScanSnap to turn the power on.
    Opening the ADF Paper Chute (Cover)
    Opening the ADF Paper Chute (Cover)

    Open the ADF paper chute (cover) fully so that the [Scan] button lights up in blue.

    When the ADF paper chute (cover) is opened, the extension will rise automatically.

    Opening the ADF Paper Chute (Cover)
    Opening the ADF Paper Chute (Cover)
    Opening the ADF Paper Chute (Cover)
    Opening the Feed Guide
    Opening the Feed Guide
    Turning On
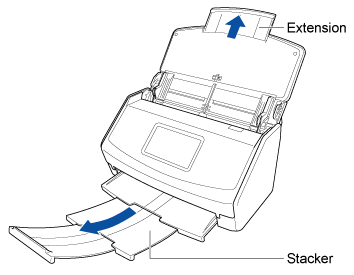
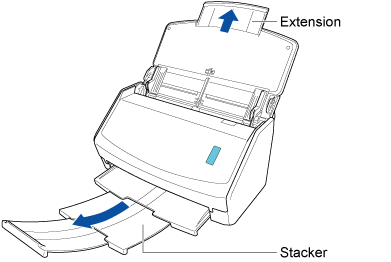
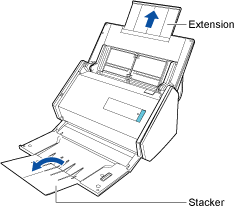
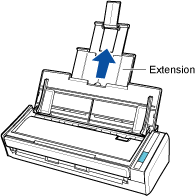
  2. Pull out the extension and the stacker on the ADF paper chute (cover). Pull out the extension on the ADF paper chute (cover) and open the stacker. Pull out the extension.
    Pulling Out the Extension
    Pulling Out the Extension
    Pulling Out the Extension and Opening the Stacker
    Pulling Out the Extension
  3. Configure the settings for a profile.
    1. Click the [Scan] button at the top of the Main Window of ScanSnap Home to display the Scan Window.

      If the main window is not already displayed, refer to To Display the Main Window.

      If the main window is not already displayed, click the [ScanSnap Home] icon ScanSnap Home Icon in the application list that appears when you click Launchpad in the Dock.


    2. Click Edit Profiles to display the [Edit profiles] Window.
    3. Select a profile for which you want to modify the settings from the profile list.
      HINT
      • When creating a new profile, click Add Profiles.

        From the template list in the [Add new profile] Window that appears when you click Add Profiles, select a template profile and modify the settings.

    4. Click the [Option] button for [Feed] to display the [Feed option] Window.
    5. Click the [Carrier sheet] button to display the [Carrier Sheet settings] window.
    6. Select [two separate images (front and back)] in [Save as] and click the [OK] button.
    7. Click the [OK] button to close the [Feed option] window.
    8. Click the [Save] button to close the [Edit profiles] window.
    9. On the touch panel of the ScanSnap, select the profile that you have configured from the profile list in the home screen.
  4. Load a document in the ScanSnap.
    1. Place a document inside the Photo Carrier Sheet.

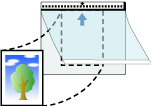
      Open the Photo Carrier Sheet and place the top center of the document against the top center of the Photo Carrier Sheet.

      Placing the Document inside the Photo Carrier Sheet
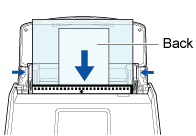
    2. Load the Photo Carrier Sheet with the end which has the black and white pattern as the leading edge in the ADF paper chute (cover) of the ScanSnap.

      Align the side guides with both ends of the Photo Carrier Sheet.

      Loading the Document in the ScanSnap
  5. Press the [Scan] button in the home screen on the touch panel to scan the document.

The image created from the document that you scanned is saved in the folder which is specified for [Save to] in the profile.

HINT
  • In the following cases, place a blank (white) sheet of paper underneath the document when scanning:

    • The scanned image is not saved with the same length and width as those of the document

    • Shadows appear around the edges of the scanned image

    • Black lines appear around the edges of a uniquely shaped cutting document if you place the document in a Photo Carrier Sheet

      Placing a Blank (White) Sheet of Paper underneath the Document
  • When the size of a scanned image to be saved becomes smaller than the size of the original document or a part of the image may appear missing, select [Carrier Sheet size] in [Paper size], and then scan the document.

  • When [Automatically detects the document type as "Documents", "Business Cards", "Receipts", or "Photos" and scans the document with the appropriate scan settings] is selected for [Document type detection] in the settings for a profile, detecting a document type may fail if the size of an image to be saved is smaller than the size of the document.

    If the type of document that you scanned differs from the document type of the content data record displayed in the main window of ScanSnap Home, change the document type of the content data record.

  • You can receive a notification on your computer about the document type for the content data records and the save destination for the scanned images after the scanning of documents is complete.

    For details, refer to Specifying Actions of ScanSnap Home.

    When you establish a link with a cloud service with ScanSnap Cloud, refer to Specifying Actions When Using ScanSnap Cloud.

    For details, refer to Specifying Actions of ScanSnap Home.
See also

  • Power for the ScanSnap
  • Documents That Can Be Scanned with the ScanSnap
  • Scanning Documents such as Photographs and Clippings
  • Creating Digital Albums to Keep Children's Works
  • Managing Photos in a Cloud Service
  • Changing the Document Type for a Content Data Record
  • Cropping a Page
  • Part Numbers of (Carrier) Sheets
  • Cleaning the (Carrier) Sheet
  • Changing Users in order to Display the User's Own Profiles
  • Before Using This Site
  • How to Use This Site
  • Customer Support
  • Cookie Policy

© PFU Limited 2018-2024

  • TOP