This website is designed to be used with ScanSnap Home 2.xx.
If you are using ScanSnap Home 3.0 or later, refer to here.
 Managing Photos in a Cloud Service
Photos are uploaded to a photo management service. Digitizing printed photos to register them with a cloud service allows you to find the photos that you need quickly and edit the photos as you like. You can share them with your family or friends anytime.
This section explains how to establish a link with a cloud service by using ScanSnap Cloud.
Before using ScanSnap Cloud, you need to agree with the Terms of service for ScanSnap Cloud and configure the settings. For details, refer to Saving a Scanned Image in a Cloud Service by Using ScanSnap Cloud.
For regions where ScanSnap Cloud can be used, refer to here.

This section explains how to scan photos and save the photo data in a cloud service.
Note that you should use an optional Photo Carrier Sheet for scanning so as not to damage your precious photos.
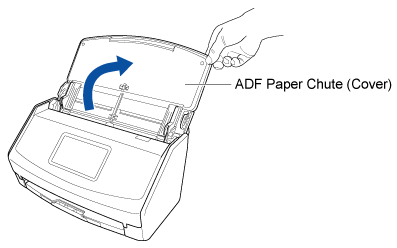
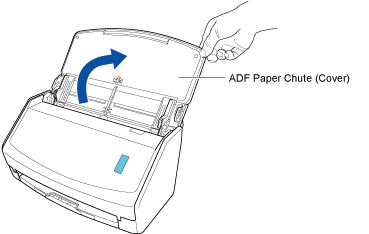
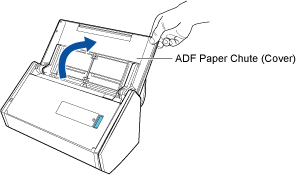
- Open the ADF paper chute (cover) of the ScanSnap to turn the power on. Hold the right side of the ADF paper chute (cover) of the ScanSnap then open it or press the [Scan] button to turn it on. Open the feed guide of the ScanSnap to turn the power on.

- Prepare a profile in ScanSnap Home.
-
Click the [Scan] button at the top of the Main Window of ScanSnap Home to display the Scan Window.
If the main window is not already displayed, refer to To Display the Main Window.
If the main window is not already displayed, click the [ScanSnap Home] icon
 in the application list that appears when you click Launchpad in the Dock.
 -
Click
 to display the [Add new profile] Window (When Using ScanSnap Cloud).
-
Click the [Scan] button at the top of the Main Window of ScanSnap Home to display the Scan Window.
- Scan a document with the ScanSnap.
-
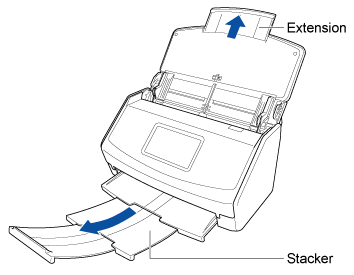
Pull out the extension and the stacker on the ADF paper chute (cover).
-
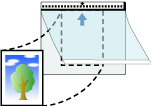
Open the Photo Carrier Sheet and put the document inside.
Note that the front side of the Photo Carrier Sheet has a black and white pattern at the top and a thick vertical line in the upper right-hand corner.
Place the top center of the photo against the top center of the Photo Carrier Sheet.
-
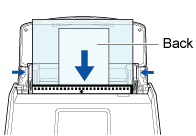
Load the Photo Carrier Sheet with the end which has the black and white pattern as the leading edge into the ScanSnap.
Align the side guides with both ends of the Photo Carrier Sheet.
-
Press the [Scan] button.
TIP
In the following cases, place a blank (white) sheet of paper underneath the document when scanning:
The scanned image is not saved with the same length and width as those of the document
Shadows appear around the edges of the scanned image

-
Pull out the extension and the stacker on the ADF paper chute (cover).
An image of a document that you scanned is saved in the cloud service that you specified for the save destination.
To check if the scanned image is saved in the cloud service that you specified for the save destination, refer to the manual of that cloud service.