This website is designed to be used with ScanSnap Home 2.xx.
If you are using ScanSnap Home 3.0 or later, refer to here.
[Detailed settings] Window
The [Detailed settings] window appears when you click the [Detailed settings] button on the [Add new profile] window or the [Edit profiles] window. The scan settings can be specified more in detail.
This section explains the setting items which are available when a local folder or network folder is the save destination for scanned images. One of the local folders is a folder that is synchronized with a cloud service.
You cannot scan documents with the ScanSnap while the [Detailed settings] window is displayed.
- Document type
When [Automatically detects the document type as "Documents", "Business Cards", "Receipts", or "Photos" and scans the document with the appropriate scan settings] is selected for [Document type detection] in the [Add new profile] window or the [Edit profiles] window, you can select a document type. You can specify the scan settings for each document type.
When a document type is specified in the [Add new profile] window or the [Edit profiles] window, the specified document type is displayed.
TIP-
When the ScanSnap iX1600 Receipt Edition is connected to a computer, "Receipts" in each window of ScanSnap Home will be replaced with "Receipts/Invoices".
For details, refer to Advanced Functions for the ScanSnap iX1600 Receipt Edition.
-
- Document type
A document type is displayed, which is selected in [Document type detection] in the [Add new profile] window or the [Edit profiles] window.
- Scan settings tabs (
 )
) Select a tab to modify the following scan settings.
Title
In the [Title] tab, you can specify a title format for content data records.
- Title format
Select items to be specified in titles.
When the document type is [Photos], only [Use scanned date] and [Customize file names] are displayed.
ATTENTIONFor Windows, if the items or character strings that are to be extracted for a title contain the following symbols in their values, those symbols are replaced with "_" when they are used as the file name of an image.
\/:?*"<>|
- Title is generated automatically
-
When the document type is [Documents]
Extracts the title and date from the document, and specifies the content data record title automatically.
When the document type is [Business Cards] or [Receipts]
Extracts information from the document for the items specified in the [Title options] window, and specifies the content data record title automatically.
- [Use scanned date instead] checkbox
Appears when the document type is [Documents].
Select this checkbox to always use the date when a document is scanned for the title.
- [Option] button
Click this to display the [Title options] Window.
Appears when the document type is [Business Cards] or [Receipts].
- Use scanned date
Specifies the date when a document is scanned as the title.
The date format can be specified in [Date format].
- Customize file names
Specifies the character string you entered in the input field as the title.
- Date format
This option is available when [Title is generated automatically] or [Use scanned date] is specified.
A date format which can be selected is different depending on the use of a scanned date for a title.
When you select [Title is generated automatically]
yyyyMMdd
yyyy-MM-dd
yyyy_MM_dd
MMddyyyy
MM-dd-yyyy
MM_dd_yyyy
ddMMyyyy
dd-MM-yyyy
dd_MM_yyyy
When you use scanned date for a title
yyyyMMdd
yyyy-MM-dd
yyyy_MM_dd
yyyyMMddHHmmss
yyyy-MM-dd-HH-mm-ss
yyyy_MM_dd_HH_mm_ss
MMddyyyy
MM-dd-yyyy
MM_dd_yyyy
MMddyyyyHHmmss
MM-dd-yyyy-HH-mm-ss
MM_dd_yyyy_HH_mm_ss
ddMMyyyy
dd-MM-yyyy
dd_MM_yyyy
ddMMyyyyHHmmss
dd-MM-yyyy-HH-mm-ss
dd_MM_yyyy_HH_mm_ss
- Language of document
- Language of business card
- Location/Region of receipt (Language)
-
Appears when the document type is either [Documents], [Business Cards] or [Receipts], and the item name differs depending on the document type setting.
Set the language of a document that the character string is extracted from. When [Automatic] is selected, the character string is extracted from the document in a language specified for the locale (information of the country and region) of your computer.
When documents are scanned with the ScanSnap, the specified language is used in the following processes:
Detecting a document type
Extracting a title
Extracting a summary of three lines
When the document type is [Documents], and an option other than [Title is generated automatically] is selected, a summary of three lines is also extracted.
Extracting content information
Creating a Searchable PDF file
TIP-
When [Do not recognize text] is selected, the content data record created from a document that you scanned is imported to ScanSnap Home under the following conditions:
When the document type is [Documents], searchable PDF files are not created nor is the title or the summary consisting of three lines extracted
When the document type is [Business Cards], information on the business card is not extracted
When the document type is [Receipts], information on the receipt is not extracted
After content data records are imported to ScanSnap Home, text recognition can be performed again if necessary.
For details, refer to Converting Content Data Records into Searchable Ones.
- Example
-
An example of the title specified in accordance with the title settings is displayed.
File name
In the [File name] tab, select a file name format for saving a scanned image as a file if you do not want the scanned image to be managed in ScanSnap Home.
- File naming method
Select items to specify a file name.
In the following cases, only [Use scanned date] and [Customize file names] are displayed.
When the document type is [Photos]
When [Network folder] is selected for [Type] in [Managing options] in the [Add new profile] window or [Edit profiles] window
When the document type is [Photos], only [Use scanned date] and [Customize file names] are displayed.
ATTENTIONFor Windows, if the items or character strings that are to be extracted for a file name contain the following symbols in their values, those symbols are replaced with "_" when they are extracted for the file name of an image.
\/:?*"<>|
- Generate a file name automatically
-
When the document type is [Documents]
Extracts the title and date from the document, and specifies a file name for a scanned image automatically.
When the document type is [Business Cards] or [Receipts]
Extracts information from the document for the items specified in the [File name option] window, and specifies a file name for the scanned image automatically.
- [Use scanned date instead] checkbox
Appears when the document type is [Documents].
Select this checkbox to always use the date when a document is scanned for a file name.
- [Option] button
Click this to display the [File name option] Window.
Appears when the document type is [Business Cards] or [Receipts].
- Use scanned date
Specifies the date when a document is scanned as a file name.
The date format can be specified in [Date format].
- Customize file names
Specify a character string to be used as a file name and a number of digits for a serial number to be added to the end of a file name when multiple image data files with the same file name are saved.
- File Name
Specifies the character string you entered in the input field as a file name.
- [Serial number] checkbox
-
This is displayed when [PC (Scan to file)] is selected for [Type] in [Managing options] in the [Add new profile] window or [Edit profiles] window.
By selecting this check box, you can select a number of digits to be added to the serial number at the end of a file name of between 0 and 6.
This is displayed when [Mac (Scan to file)] is selected for [Type] in [Managing options] in the [Add new profile] window or [Edit profiles] window.
By selecting this check box, you can select a number of digits to be added to the serial number at the end of a file name of between 0 and 6.
When an option other than [0 digits] is selected
A number from the smallest number not yet in use will be added in order as a serial number.
Example: If "A" is set for [File Name], [3 digits] is set for [Serial number], and image data files are saved in a folder that includes files already named "A001.pdf", "A003.pdf" and "A005.pdf", file names will be given in the following order.
A002.pdf, A004.pdf, A006.pdf, A007.pdf
When [0 digits] is selected
If the image data is saved, the character string entered in the [File Name] input field will be set as the file name.
However, if a file name with the same character string entered in the [File Name] input field already exists, a serial number will be added in order from the smallest number not yet in use.
Example: If "A" is set for [File Name] and [0 digits] is set for [Serial number], file names will be given in the following order.
A.pdf, A1.pdf, A2.pdf
- Date format
This option is available when [Generate a file name automatically] or [Use scanned date] is specified.
A date format which can be selected is different depending on the use of a scanned date for a file name.
When you select [Generate a file name automatically]
yyyyMMdd
yyyy-MM-dd
yyyy_MM_dd
MMddyyyy
MM-dd-yyyy
MM_dd_yyyy
ddMMyyyy
dd-MM-yyyy
dd_MM_yyyy
When you use scanned date for a file name
yyyyMMdd
yyyy-MM-dd
yyyy_MM_dd
yyyyMMddHHmmss
yyyy-MM-dd-HH-mm-ss
yyyy_MM_dd_HH_mm_ss
MMddyyyy
MM-dd-yyyy
MM_dd_yyyy
MMddyyyyHHmmss
MM-dd-yyyy-HH-mm-ss
MM_dd_yyyy_HH_mm_ss
ddMMyyyy
dd-MM-yyyy
dd_MM_yyyy
ddMMyyyyHHmmss
dd-MM-yyyy-HH-mm-ss
dd_MM_yyyy_HH_mm_ss
- Language of document
- Language of business card
- Location/Region of receipt (Language)
-
This is displayed when one of the following is selected for [Type] in [Managing options] in the [Add new profile] window or [Edit profiles] window.
PC (Manage in ScanSnap Home)
PC (Scan to file)
Mac (Manage in ScanSnap Home)
Mac (Scan to file)
Appears when the document type is either [Documents], [Business Cards] or [Receipts], and the item name differs depending on the document type setting.
Set the language of a document that the character string is extracted from. When [Automatic] is selected, the character string is extracted from the document in a language specified for the locale (information of the country and region) of your computer.
When documents are scanned with the ScanSnap, the specified language is used in the following processes:
Detecting a document type
Extracting a file name
Creating a Searchable PDF file
- Example
-
An example of the file name specified in accordance with the file name settings is displayed.
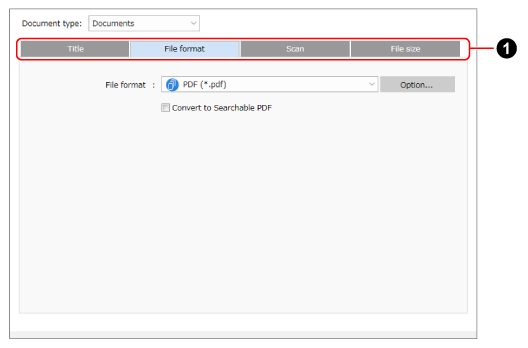
File format
In the [File format] tab, you can specify a file format for scanned images.
- File format
Displays the file format of a scanned image.
The following settings are available.
PDF (*.pdf)
Saves a scanned image in a PDF format (*.pdf).
JPEG (*.jpg)
Saves a scanned image in a JPEG format (*.jpg).
When multiple documents are scanned, multiple scanned images in a JPEG format are saved as a single multi-page image.
- [Option] button
-
This is displayed when one of the following is selected for [Type] in [Managing options] in the [Add new profile] window or [Edit profiles] window.
PC (Manage in ScanSnap Home)
PC (Scan to file)
Mac (Manage in ScanSnap Home)
Mac (Scan to file)
Click this to display the [PDF file option] Window.
When [JPEG (*.jpg)] is selected in [File format], this button is disabled.
- [Convert to Searchable PDF] checkbox
-
This checkbox is displayed in the following cases:
When [Documents] is selected for document type and [PC (Manage in ScanSnap Home)] or [PC (Scan to file)] is selected for [Type] in [Managing options]
When the document type is [Documents]
When the document type is [Business Cards], [PC (Scan to file)] is selected for [Type] in [Managing options], and an option other than [Quick Menu] is selected for [Send to]
If this checkbox is selected, text on the image is recognized in the language that is specified in the [Title] tab or the [File name] tab, and a searchable PDF file is created.
The setting has an affect on the [Convert to Searchable PDF] checkbox in the [PDF file option] window.
If [ABBYY Scan to Searchable PDF] is selected for [Send to] in the [Add new profile] Window or the [Edit profiles] Window, this checkbox is disabled.
TIPEven if you select [ABBYY Scan to Searchable PDF] for [Send to] in the [Add new profile] window or the [Edit profiles] window, you can create a searchable PDF.
In this case, you can select a language of text to be recognized from among more languages.
This checkbox is displayed in the following cases:
When [Documents] is selected for document type and [Mac (Manage in ScanSnap Home)] or [Mac (Scan to file)] is selected for [Type] in [Managing options]
When the document type is [Documents]
When the document type is [Business Cards], [Mac (Scan to file)] is selected for [Type] in [Managing options], and an option other than [Quick Menu] is selected for [Send to]
If this checkbox is selected, text on the image is recognized in the language that is specified in the [Title] tab or the [File name] tab, and a searchable PDF file is created.
The setting has an affect on the [Convert to Searchable PDF] checkbox in the [PDF file option] window.
If [ABBYY Scan to Searchable PDF] is selected for [Send to] in the [Add new profile] Window or the [Edit profiles] Window, this checkbox is disabled.
TIPEven if you select [ABBYY Scan to Searchable PDF] for [Send to] in the [Add new profile] window or the [Edit profiles] window, you can create a searchable PDF.
In this case, you can select a language of text to be recognized from among more languages.
Scan
In the [Scan] tab, you can specify the image quality and color of the scanned images.
- Color mode
Select a color mode for scanned images.
The setting has an affect on [Color mode] in [Scan settings] of the [Add new profile] window or of the [Edit profiles] window.
Automatic
Automatically detects the color of each document and scans in color, gray, or black and white.
Color
Always saves the scanned image in color.
Gray
Always saves the scanned image in gray.
B & W
Always saves the scanned image in black and white.
Suitable for scanning black and white documents that only contain text.
- Scanning side
Select a scanning side for documents.
The setting has an affect on [Scanning side] in [Scan settings] of the [Add new profile] window or of the [Edit profiles] window.
Displays the selected scanning side.
Duplex
Scans both sides of a document.
When a document type is "Business Cards", scan the front side and then the back side of a business card to make the scanned images of both sides of the business card into a single content data record.
When a document type is "Documents", "Receipts", or "Photos", [Duplex] cannot be selected.
Simplex
Scans only one side of a document.
- Image quality
Select an image quality level (resolution) for scanned images.
The setting has an affect on [Image quality] in [Scan settings] of the [Add new profile] window or of the [Edit profiles] window.
Automatic
Scans documents at an optimal resolution according to the paper size of the documents.
The image quality is determined based on the length of the short side of the document.
When the short side is longer than 115 mm: Better
When the short side is 115 mm or shorter: Best
Normal
A scan is performed at a resolution of 150 dpi when [Color mode setting] is set to [Color] or [Gray], and 300 dpi when it is set to black and white.
Better
A scan is performed at a resolution of 200 dpi when [Color mode setting] is set to [Color] or [Gray], and 400 dpi when it is set to black and white.
Best
A scan is performed at a resolution of 300 dpi when [Color mode setting] is set to [Color] or [Gray], and 600 dpi when it is set to black and white.
Excellent
This is displayed when one of the following is selected for [Type] in [Managing options] in the [Add new profile] window or [Edit profiles] window.
PC (Manage in ScanSnap Home)
PC (Scan to file)
Mac (Manage in ScanSnap Home)
Mac (Scan to file)
A scan is performed at a resolution of 600 dpi when [Color mode setting] is set to [Color] or [Gray], and 1200 dpi when it is set to black and white.
Selecting [Excellent] may slow down the speed of scanning documents depending on your system environment.
- Rotation
Select which way to rotate the image to correct the image orientation.
The setting has an affect on [Rotation] in [Scan settings] of the [Add new profile] window or of the [Edit profiles] window.
Do not rotate
Does not rotate the image.
Automatic
Appears if the following conditions are met:
When the document type is [Documents], [Business Cards], or [Receipts]
When [PC (Manage in ScanSnap Home)] or [PC (Scan to file)] is selected for [Type] in [Managing options]
When the document type is [Documents], [Business Cards], or [Receipts]
When [Mac (Manage in ScanSnap Home)] or [Mac (Scan to file)] is selected for [Type] in [Managing options]
Appears when the document type is [Documents], [Business Cards], or [Receipts].
Automatically rotates the image when you scan a document sideways or upside down.
Since this option determines the page orientation based on the character strings printed on the document, select an option other than [Automatic] when scanning the following documents.
Documents with many extremely large or small characters
Documents on which pitches between lines or characters are extremely narrow, or characters are overlapped
Documents with many characters contacting underlines or borders
Documents with many photographs or figures and few characters
Documents with characters on an unevenly colored background such as shaded characters.
Documents with many decorated characters such as embossed or outlined characters
Documents with characters on a patterned background such as characters overlapping illustrations or diagrams
Documents with characters printed in various directions such as drawings
Documents written using only capital letters
Documents with handwritten characters
Skewed documents
Documents with complex layouts
Documents with a large amount of image noise
Documents with faint characters
Documents with faded characters
[Automatic (by face detection)]
Appears when the document type is [Photos].
Automatically rotates the image when you scan a photo sideways or upside down.
Images are rotated in accordance with the way the face of a person in a photo is orientated. If a photo is not of a person such as a landscape photo, images will not be rotated.
Rotate 90° CW/Rotate 180°/Rotate 90° CCW
Rotates the image to the specified angle.
When [Duplex] is selected for [Scanning side], you can specify which way to rotate the front and back scanned images of a document respectively.
Rotation
How images are rotated
Rotate 90° CW (vertical bound)
Front: Rotate 90° CW
Back: Rotate 90° CCW
Rotate 90° CW (horizontal bound)
Both sides: Rotate 90° CW
Rotate 90° CW
Rotate 90° CW
Rotate 180° (vertical bound)
Both sides: Rotate 180°
Rotate 180° (horizontal bound)
Front: Rotate 180°
Back: Do not rotate
Rotate 180°
Rotate 180°
Rotate 90° CCW (vertical bound)
Front: Rotate 90° CCW
Back: Rotate 90° CW
Rotate 90° CCW (horizontal bound)
Both sides: Rotate 90° CCW
Rotate 90° CCW
Rotate 90° CCW
- [Blank page removal] checkbox
Select this checkbox to remove blank pages from the scanned images automatically.
For example, when you scan both sides of a document which has contents on only one side, only the image on the side with contents will be saved because this option removes blank pages (the other side).
If all scanned images are recognized as blank pages, no image will be saved.
- Image settings
-
Appears when the document type is [Photos].
The colors in photos are adjusted only when color photos are scanned.
TIPThe following models support the color adjusting function in [Image settings].
ScanSnap iX1600
ScanSnap iX1500
ScanSnap iX1400
ScanSnap iX1300
ScanSnap iX100
- [Auto Enhancement] checkbox
Selecting this checkbox adjusts the contrast of a photo giving it more color.
- [Red Eye Correction] checkbox
-
Selecting this checkbox detects the face of a person and removes the red-eye effect in a photo.
- [Fading Correction] checkbox
Selecting this checkbox corrects a photo that has faded colors giving it more color.
- [Option] button
-
The [Scanning options] Window appears.
File size
In the [File size] tab, you can specify a compression rate for the file size of scanned images.
- Compression rate
Select a compression rate for the file size of scanned images.
The compression rate can be selected when the [Color mode] of the image is either [Color] or [Gray].