This website is designed to be used with ScanSnap Home 2.xx.
If you are using ScanSnap Home 3.0 or later, refer to here.
 Naming Scanned Images and Saving Them to a Folder (Windows)
Name images created from documents that you scanned and save them to a folder.
The saved images cannot be managed in ScanSnap Home.
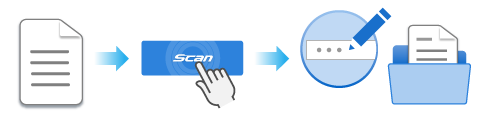
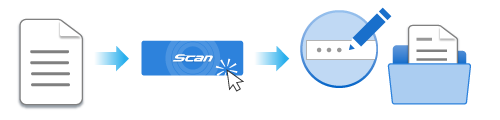
This section explains how to scan basic documents, and how to name the images created from the documents that you scanned in order to save them to a folder.
For details about how to scan various documents, refer to How to Scan Documents.
For details about how to scan various documents, refer to How to Scan Documents.
For details about how to scan various documents, refer to How to Scan Documents.
For details about how to scan various documents, refer to How to Scan Documents.
For details about how to scan various documents, refer to How to Scan Documents.
For details about how to scan various documents, refer to How to Scan Documents.
For details about how to scan various documents, refer to How to Scan Documents.
For details about how to scan various documents, refer to How to Scan Documents.
For details about how to scan various documents, refer to How to Scan Documents.
For details about how to scan various documents, refer to How to Scan Documents.
-
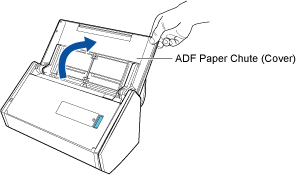
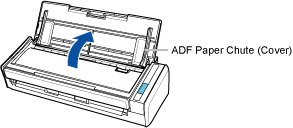
Open the ADF paper chute (cover) of the ScanSnap to turn the power on. Hold the right side of the ADF paper chute (cover) of the ScanSnap then open it or press the [Scan] button to turn it on. Open the feed guide of the ScanSnap to turn the power on.
Open the ADF paper chute (cover) fully so that the [Scan] button lights up in blue.
When the ADF paper chute (cover) is opened, the extension will rise automatically.

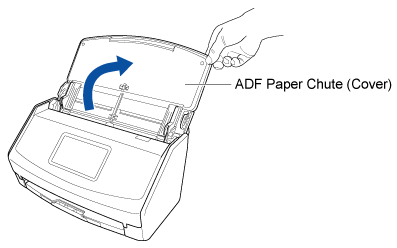
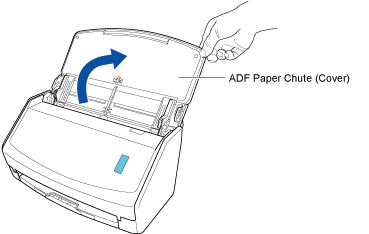
- Open the ADF paper chute (cover) of the ScanSnap to turn the power on. Hold the right side of the ADF paper chute (cover) of the ScanSnap then open it or press the [Scan] button to turn it on. Open the feed guide of the ScanSnap to turn the power on.
 TIP
TIP-
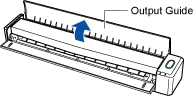
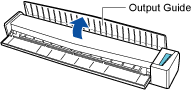
If you want the document to be ejected from the front of the ScanSnap or when there is not enough space where the document exits the ScanSnap, open the output guide.
-
How the document is ejected differs as below depending on whether the output guide is open or closed.
-
When the output guide is closed


-
When the output guide is open


-
-
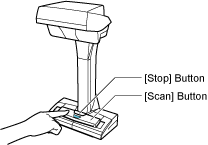
- Press the [Scan] button or [Stop] button on the ScanSnap to turn the power on.
-
Prepare a profile in ScanSnap Home.
-
Click
 to display the [Add new profile] Window.
-
Click
-
Scan a document with the ScanSnap.
-
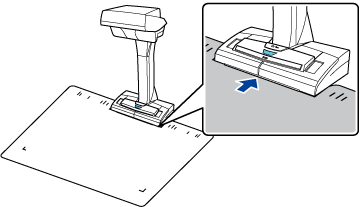
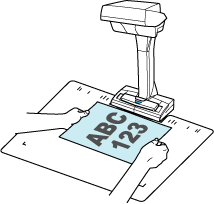
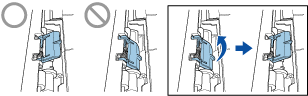
Place the Background Pad on the front side of the ScanSnap.
Place the Background Pad so that it is in contact with the ScanSnap.
-
Place the document in the scan area of the ScanSnap.
For details about the scan area, refer to Placing a Document.
-
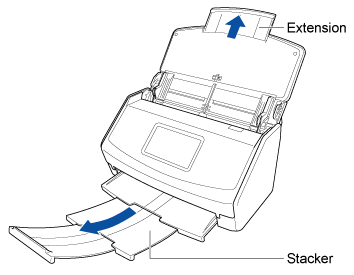
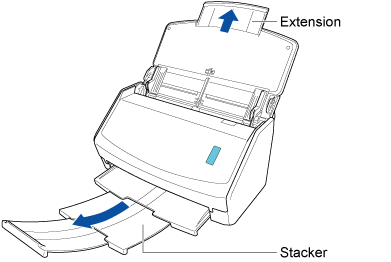
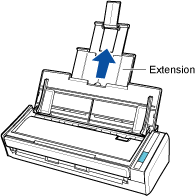
Pull out the extension and the stacker on the ADF paper chute (cover).
-
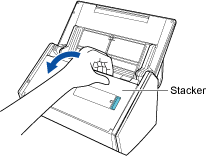
Pull the stacker towards you.
-
Pull out the extension.
-
Insert the document straight into the feeding section of the ScanSnap, with the scanning side facing up.
Make sure that the document is fed into the ScanSnap and is held firmly.
 TIP
TIP-
When you perform a scan with the output guide closed, leave enough space at the back of the ScanSnap to allow the document to be completely ejected. In addition, when you scan a long page document, hold the document that you scanned with your hands to prevent them from falling off the base where the ScanSnap is placed on.
Make sure that the area where the document exits the scanner is clear of any obstacles. Otherwise, a paper jam may occur.

-
-
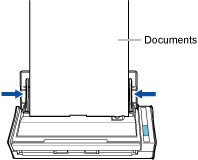
Load the document in the ADF paper chute (cover).
Load the document face-down and head-first with the back facing you (when loading multiple documents, the last page is on the top).
Adjust the number of documents so that they do not go beyond
 within the side guides when they are loaded.
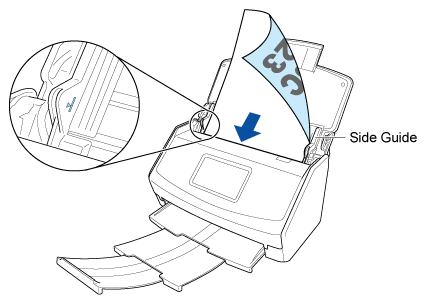

-
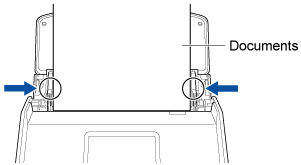
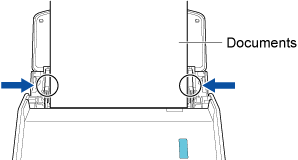
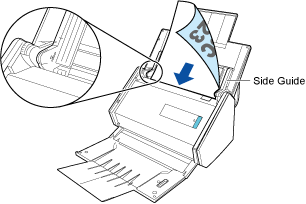
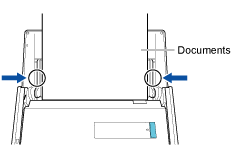
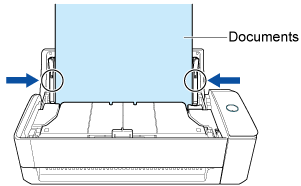
Align the side guides with both ends of the document.
Hold each side guide in the middle to adjust them. Otherwise, the document may be fed skewed during scanning.
-
Pull out the extension on the ADF paper chute (cover) and open the stacker.

-
Load the document in the ADF paper chute (cover).
Load the document face-down and head-first with the back facing you (when loading multiple documents, the last page is on the top).
Adjust the number of documents so that they do not go beyond the reference marks and are kept within the side guides when they are loaded.
-
Align the side guides with both ends of the document.
Hold each side guide in the middle to adjust them. Otherwise, the document may be fed skewed during scanning.
-
Load the document in the ADF paper chute (cover).
Load the document face-down and head-first with the back facing you (when loading multiple documents, the last page is on the top). Adjust the number of documents so that they do not go beyond the reference marks and are kept within the side guides when they are loaded.
-
Align the side guides with both ends of the document.
Hold each side guide in the middle to adjust them. Otherwise, the document may be fed skewed during scanning.
-
Load the documents in the ADF paper chute (cover) or insert the document into the manual feeder.
When scanning documents all at once (U-turn Scan)
Load the documents in the ADF paper chute (cover), and align the side guides with both ends of the documents.
Load the document face-up and head-first with the front facing you (when loading multiple documents, the first page is on the top).
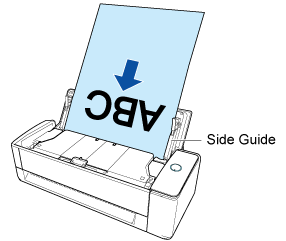
Hold each side guide in the middle to adjust them. Otherwise, the documents may be fed skewed.
 ATTENTION
-
Make sure that the document support tab is open.
Otherwise, a paper jam may occur.
If the document support tab is closed, pull it up with your fingers.
-
If the document support tab comes off, contact the distributor/dealer where you purchased this product.
-
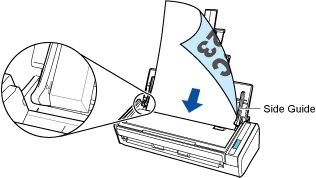
When scanning documents one by one (Return Scan)
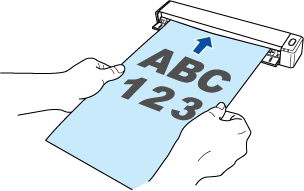
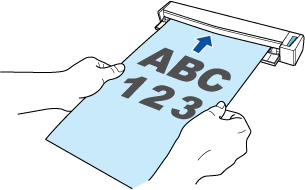
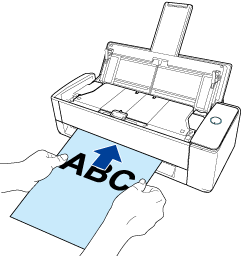
Insert a document into the manual feeder.
Face the front side of a document upwards and insert the top end of the document straight into the middle of the manual feeder.
Make sure that the document is fed into the ScanSnap and is held firmly.
 ATTENTION
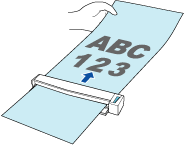
The document comes out from the back of the ScanSnap during the scan.
Leave space (about the length of the document) at the back of the ScanSnap.
TIPYou can scan a document with the ADF paper chute (cover) closed.
-
Place the Background Pad on the front side of the ScanSnap.
The images created from the documents that you scanned are saved in the folder with the file names that you specified.