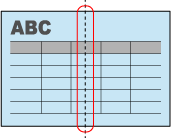
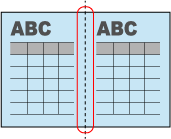
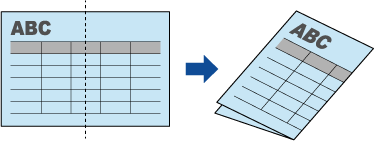
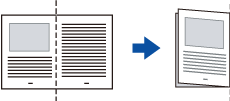
Fold documents of A3, B4, or Double Letter size in half, and scan them with the ScanSnap. The images for the left and right pages of a document folded in half are automatically merged when the document is scanned. Documents larger than A4 (such as A3, B4, and Double Letter size) can be scanned with the ScanSnap by using the Carrier Sheet. Scan the Carrier Sheet with a document folded in half placed inside to automatically merge the images for the both sides of the document. Documents larger than A4 (such as A3, B4, and Double Letter size) can be scanned with the ScanSnap by using an optional Carrier Sheet. Scan the Carrier Sheet with a document folded in half placed inside to automatically merge the images for the both sides of the document.
Note that multiple Carrier Sheets can be loaded and scanned in one go with the ScanSnap.
Scanned images are automatically merged only when there is text, diagram, or a table on the fold line of the folded document.
If scanned images are not merged automatically, you can merge the front side image and the back side image into a double-page spread image after a scan.
For details, refer to Creating a Double-Page Spread Image by Merging Two Pages.
For a document whose scanned images are not merged automatically, you can use the optional Carrier Sheet to scan the document and merge the scanned images automatically.
-
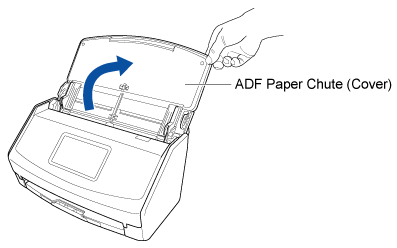
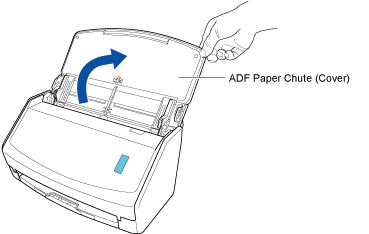
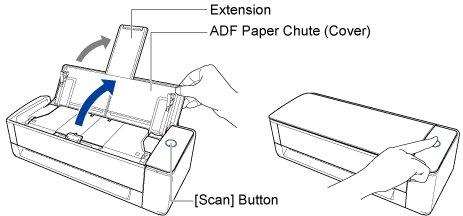
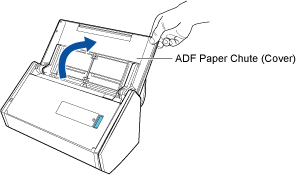
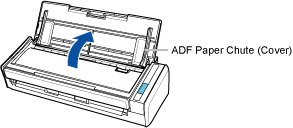
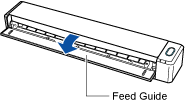
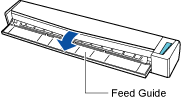
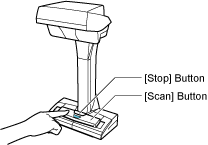
Open the ADF paper chute (cover) of the ScanSnap to turn the power on. Hold the right side of the ADF paper chute (cover) of the ScanSnap then open it or press the [Scan] button to turn it on. Open the feed guide of the ScanSnap to turn the power on. Press the [Scan] button or [Stop] button on the ScanSnap to turn the power on.
Open the ADF paper chute (cover) fully so that the [Scan] button lights up in blue.
When the ADF paper chute (cover) is opened, the extension will rise automatically.
-
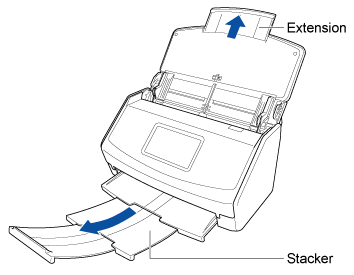
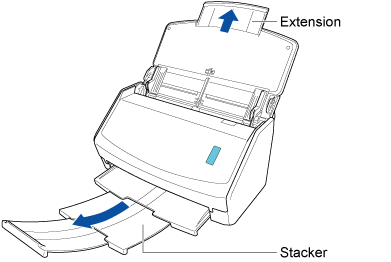
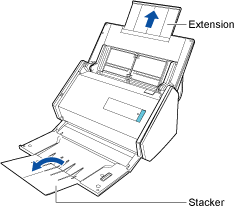
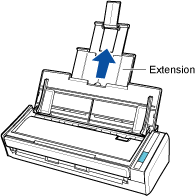
Pull out the extension and the stacker on the ADF paper chute (cover). Pull out the extension on the ADF paper chute (cover) and open the stacker. Pull out the extension.
- Click the [Scan] button at the top of the Main Window of ScanSnap Home to display the Scan Window.
-
In the Home screen on the touch panel, select a profile from the profile list. Select a profile from the profile list.
You can create a new profile or modify the settings for a profile according to the purpose of scanning documents.
For details, refer to Configuring Conditions for Scanning Documents (Profile).
For details, refer to Configuring Conditions for Scanning Documents (Profile).
For details, refer to Configuring Conditions for Scanning Documents (Profile).
For details, refer to Configuring Conditions for Scanning Documents (Profile).
For details, refer to Configuring Conditions for Scanning Documents (Profile).
For details, refer to Configuring Conditions for Scanning Documents (Profile).
For details, refer to Configuring Conditions for Scanning Documents (Profile).
For details, refer to Configuring Conditions for Scanning Documents (Profile).
For details, refer to Configuring Conditions for Scanning Documents (Profile).
For details, refer to Configuring Conditions for Scanning Documents (Profile).
TIP
When multiple users share one ScanSnap unit, make sure that a profile that was created with another computer is not selected.
You can switch to the profile list which displays only profiles created with the computer that is using the ScanSnap.
For details, refer to Changing Users in order to Display the User's Own Profiles.
-
Specify the feeding method.
-
Load a document in the ScanSnap.
-
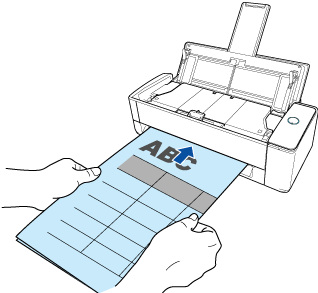
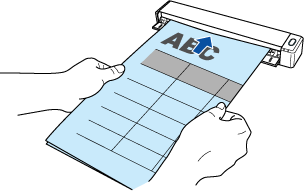
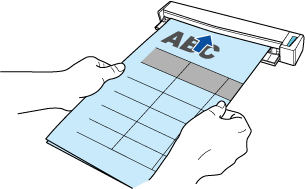
Fold the document in half with the sides to be scanned facing out.
-
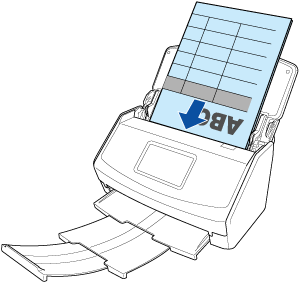
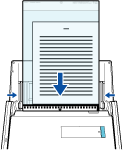
Load the document in the ADF paper chute (cover). Insert the top end of the document straight into the middle of the manual feeder. Insert the document straight into the feeding section of the ScanSnap, with the scanning side facing up.
Make sure that the document is fed into the ScanSnap and is held firmly.
-
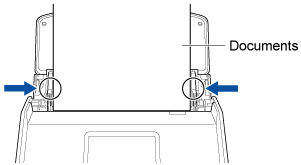
Align the side guides with both ends of the document.
Hold each side guide in the middle to adjust them. Otherwise, the document may be fed skewed.
-
Press the [Scan] button in the home screen on the touch panel to scan the document. Press the [Scan] button to start scanning the document. Press the [Scan/Stop] button to start scanning the document.
ATTENTION
-
To continue scanning, load the next document in the ScanSnap after the "Load the next document." message is displayed on the touch panel. If you load the next document while "Scanning" is displayed on the touch panel, scanning starts immediately, which may cause the document to skew during scanning.
If the documents are skewed during scanning, the following problems may occur:
Part of the scanned image appears missing
Slant lines appear in the scanned image
The size of the scanned image differs from the document size
The images for the left and right pages of a document folded in half are not merged.
The images for the left and right pages of a document folded in half are not connected well at the merged part.
Paper jams occur
TIP
-
You can change the feeding method by pressing the feed mode setting icon in the screen for checking whether to continue a scan.
To scan multiple sheets of documents such as office paper, change the feed mode setting to [Continuous scan].
To continue scanning, insert the next document to be scanned. When the document is inserted, scanning starts automatically.
TIP
To start a scan manually by pressing the [Scan] button when a document is inserted into the manual feeder, clear the [Automatically scan the second and subsequent sheets during a continuous scan] checkbox in the [Manual feeder] tab in the [Feed option] Window when you configure the settings for a profile.
For details, refer to Modifying the Settings for a Profile.
-
Press the [Finish] button. In the window of ScanSnap Home, where the "Load the next document." message is displayed, click the [Finish Scanning] button. In the window of ScanSnap Home, where the "Load the next document." message is displayed, click the [Finish Scanning] button or press the [Scan] button on the ScanSnap to finish scanning the document.
-
Turn over the document and insert it as described in step 4 (b).
-
Press the [Scan/Stop] button to finish scanning the document.
-
Open the ADF paper chute (cover) of the ScanSnap to turn the power on. Hold the right side of the ADF paper chute (cover) of the ScanSnap then open it or press the [Scan] button to turn it on. Open the feed guide of the ScanSnap to turn the power on. Press the [Scan] button or [Stop] button on the ScanSnap to turn the power on.
Open the ADF paper chute (cover) fully so that the [Scan] button lights up in blue.
When the ADF paper chute (cover) is opened, the extension will rise automatically.
-
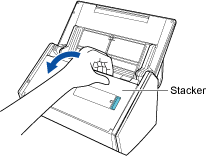
Pull the stacker towards you.
-
Pull out the extension and the stacker on the ADF paper chute (cover). Pull out the extension on the ADF paper chute (cover) and open the stacker. Pull out the extension.
-
Configure the settings for a profile.
-
Click the [Scan] button at the top of the Main Window of ScanSnap Home to display the Scan Window.
-
Click
 to display the [Edit profiles] Window.
-
Select a profile for which you want to modify the settings from the profile list.
TIP
When creating a new profile, click  .
.
From the template list in the [Add new profile] Window that appears when you click  , select a template profile and modify the settings.
-
Select [Automatically detects the document type as "Documents", "Business Cards", "Receipts", or "Photos" and scans the document with the appropriate scan settings] or [All sheets will be scanned as documents] for [Document type detection].
-
Select [Duplex] for [Scanning side].
-
Click the [Option] button for [Feed] to display the [Feed option] Window.
-
Select [Automatic detection] for [Document size].
-
Click the [Carrier sheet] button to display the [Carrier Sheet settings] window.
-
Select [one double-page spread image] in [Save as] and click the [OK] button.
TIP
If [Automatic selection] is specified for [Paper size], an optimal size will be selected automatically from the available standard sizes in [Paper size]. Note that the size of the image may become smaller than the original document depending on the document.
When [Automatically detects the document type as "Documents", "Business Cards", "Receipts", or "Photos" and scans the document with the appropriate scan settings] is selected for [Document type detection] in the settings for a profile, detecting a document type may fail if the size of an image to be saved is smaller than the size of the document.
If the type of document that you scanned differs from the document type of the content data record displayed in the main window of ScanSnap Home, change the document type of the content data record.
-
Click the [OK] button to close the [Feed option] window.
-
Click the [Save] button to close the [Edit profiles] window.
-
From the profile list in the scan window, select a profile that you have configured.
-
Load a document in the ScanSnap.
-
Fold the document in half with the side to be scanned facing out.
Fold it tightly and smooth out any creases.
-
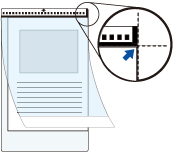
Open the Carrier Sheet to bind the document.
Note that the front side of the Carrier Sheet has a black and white pattern at the top and a thick vertical line in the upper right-hand corner.
Align the top and the fold line of the document with the Carrier Sheet so that there is no space in the upper right-hand corner of the Carrier Sheet.
-
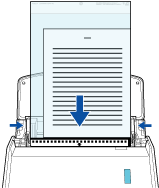
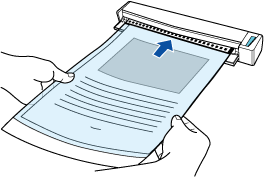
Load the Carrier Sheet with the end which has the black and white pattern as the leading edge in the ADF paper chute (cover) of the ScanSnap. Insert the part with the black and white pattern straight into the feeding section of the ScanSnap, with the front side of the Carrier Sheet facing up.
Align the side guides with both ends of the Carrier Sheet.
Make sure that the Carrier Sheet is fed into the ScanSnap and is held firmly.
-
Press the [Scan] button to scan the document. Press the [Scan] button to scan the document. Press the [Scan/Stop] button to start scanning the document.
-
Turn over the Carrier Sheet and insert it as described in step 3 (c).
-
Press the [Scan/Stop] button to finish scanning the document.
The image created from the document that you scanned is saved in the folder which is specified for [Save to] in the profile.
