This website is designed to be used with ScanSnap Home 2.xx.
If you are using ScanSnap Home 3.0 or later, refer to here.
 Organizing Postcards and Greeting Cards
Scan postcards or greeting cards and save them as PDF files. Managing cards by the year in which you received them or tagging cards with a tag name, such as "New Year's Card" or "Christmas Card" helps you search for a card that you need easily.


This section explains how to scan the greeting cards that you have received so far, and categorize them by the year in which you received them.
When scanning small size documents such as postcards with the ScanSnap, you can insert two documents at a time or you can insert the next document while the current document is being scanned. These scanning methods are referred to as dual scans. For details about dual scans, refer to Scanning Documents by Inserting Two Documents at a Time or by Inserting the Next Document While the Current Document Is Being Scanned.
-
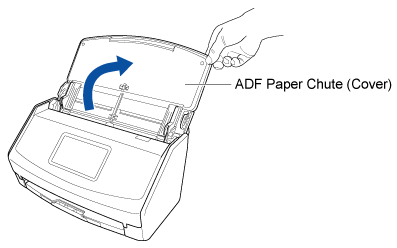
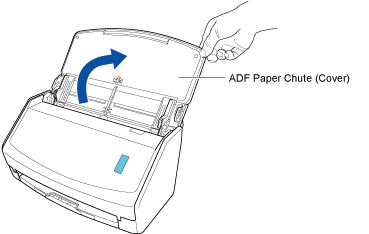
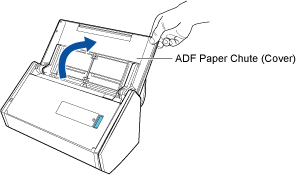
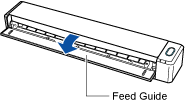
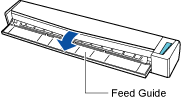
Open the ADF paper chute (cover) of the ScanSnap to turn the power on. Hold the right side of the ADF paper chute (cover) of the ScanSnap then open it or press the [Scan] button to turn it on. Open the feed guide of the ScanSnap to turn the power on.
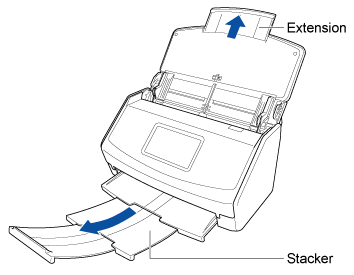
Open the ADF paper chute (cover) fully so that the [Scan] button lights up in blue.
When the ADF paper chute (cover) is opened, the extension will rise automatically.


- Open the ADF paper chute (cover) of the ScanSnap to turn the power on. Hold the right side of the ADF paper chute (cover) of the ScanSnap then open it or press the [Scan] button to turn it on. Open the feed guide of the ScanSnap to turn the power on.
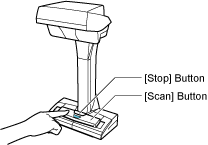
- Press the [Scan] button or [Stop] button on the ScanSnap to turn the power on.
- Prepare a profile in ScanSnap Home.
-
Click the [Scan] button at the top of the Main Window of ScanSnap Home to display the Scan Window.
If the main window is not already displayed, refer to To Display the Main Window.
If the main window is not already displayed, click the [ScanSnap Home] icon
 in the application list that appears when you click Launchpad in the Dock.
 -
Click
 to display the [Add new profile] Window.
-
Click the [Scan] button at the top of the Main Window of ScanSnap Home to display the Scan Window.
- Scan a document with the ScanSnap.
-
Place documents in the scan area of the ScanSnap.
-
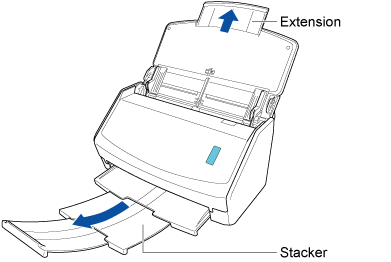
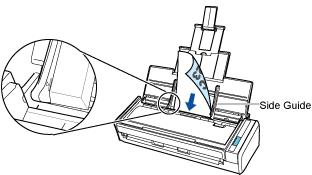
Pull out the extension and the stacker on the ADF paper chute (cover).
-
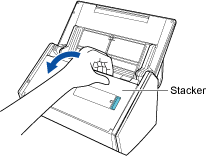
Pull the stacker towards you.
-
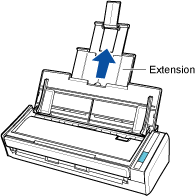
Pull out the extension.
-
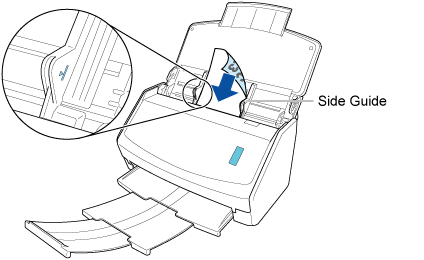
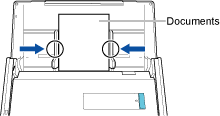
Load a document in the ADF paper chute (cover).
Load a document face-down and head-first with the back facing you (when loading multiple documents, the last page is on the top).
Adjust the number of documents so that they do not go beyond
 within the side guides when they are loaded.
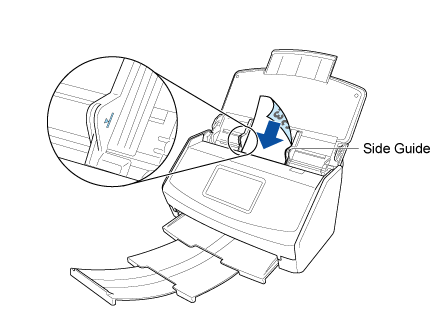
-
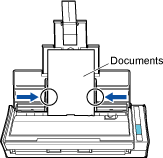
Align the side guides with both ends of the document.
Hold each side guide in the middle to adjust them. Otherwise, the document may be fed skewed during scanning
-
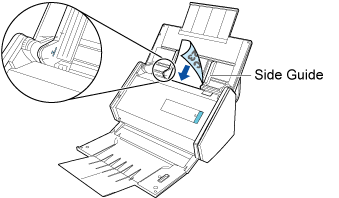
Pull out the extension on the ADF paper chute (cover) and open the stacker.

-
Load documents in the ADF paper chute (cover).
Load the document face-down and head-first with the back facing you (when loading multiple documents, the last page is on the top).
Adjust the number of documents so that they do not go beyond the reference marks and are kept within the side guides when they are loaded.
-
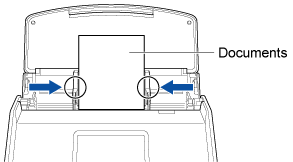
Align the side guides with both ends of the document.
Hold each side guide in the middle to adjust them. Otherwise, the document may be fed skewed during scanning.
-
Load a document in the ADF paper chute (cover).
Load the document face-down and head-first with the back facing you (when loading multiple documents, the last page is on the top). Adjust the number of documents so that they do not go beyond the reference marks and are kept within the side guides when they are loaded.
-
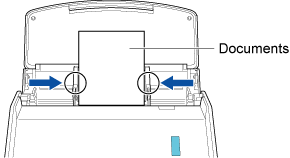
Align the side guides with both ends of the document.
Hold each side guide in the middle to adjust them. Otherwise, the document may be fed skewed during scanning.
-
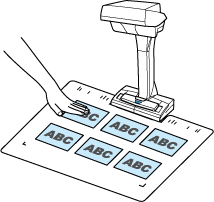
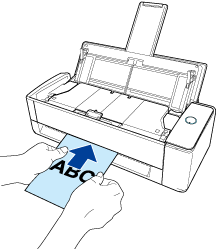
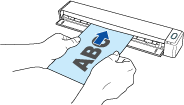
Insert the document straight into the manual feeder, with the scanning side facing up. Insert the document straight into the feeding section of the ScanSnap, with the scanning side facing up.
Make sure that the document is fed into the ScanSnap and is held firmly.
 ATTENTION
The document comes out from the back of the ScanSnap during the scan.
Leave space (about the length of the document) at the back of the ScanSnap.
TIPYou can scan a document with the ADF paper chute (cover) closed.
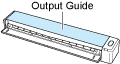
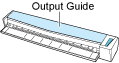
 ATTENTION
If you scan a postcard with the output guide open, a paper jam may occur and damage the postcard. Scan a postcard with the output guide of the ScanSnap closed.
-
Place documents in the scan area of the ScanSnap.
-
In the main window of ScanSnap Home, tag a content data record created from the postcard that you scanned to categorize it.
- Click
 for [Tag] in the Content Data Record View.
- Click
A content data record created from the postcard that you scanned is tagged with a name such as "Greeting Cards 20XX".
When "Greeting Cards 20XX" is selected for [Tag] in the folder list view in the main window of ScanSnap Home, the tagged content data record created from the postcard that you scanned is displayed in the content data record list view.